There’s Only One Way To Play A Star Wars Game

Most computer and console games have a variety of different control schemes depending on the controller peripheral the player has to hand. For Star Wars games the fight scenes may be playable with a gamepad, but perhaps that leaves a little to desired in the realism department.  In that case, [Leonardo Moreno] has the solution, in the form of a motion sensing light sabre for gaming via gesture control.

The first part of any light sabre project is the sabre itself, and for this he uses soft transparent PVC tubing. This might seem an insubstantial choice, but makes sense when the possibility of hitting an expensive television or gamers monitor with it is considered. Up the pipe goes a piece of LED strip, and onto it a hilt containing an Arduino and an MPU6050 gyroscope sensor. The physical controls come courtesy of a small analogue joystick and a trigger fashioned from a wooden clothes pin. The result may be a little rough and ready, but it’s undeniably a light sabre. Full instructions and software can be found at the link.

Light sabres have been a perennial build, but few have captured the original better than this laser based one.

Wind Turbines And Ice: How They’re Tailored For Specific Climates

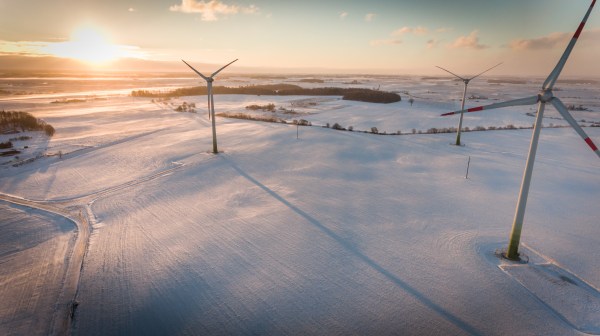
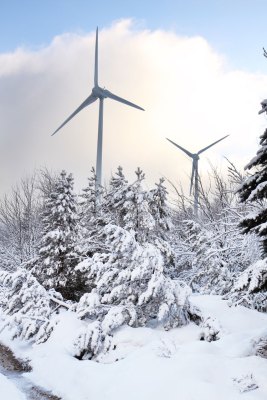
Wind turbines are incredible pieces of technology, able to harvest wind energy and deliver it to the power grid without carbon emissions. Their constant development since the first one came online in 1939 mean that the number of megawatts produced per turbine continues to rise as price per megawatt-hour of wind energy continues to fall. Additionally, they can operate in almost any climate to reliably generate energy almost anywhere in the world from Canada to the North Atlantic to parts beyond. While the cold snap that plowed through the American South recently might seem to contradict this fact, in reality the loss of wind power during this weather event is partially a result of tradeoffs made during the design of these specific wind farms (and, of course, the specifics of how Texas operates its power grid, but that’s outside the scope of this article) rather than a failure of the technology itself.

First, building wind turbines on the scale of megawatts isn’t a one-size-fits-all solution. Purchasing a large turbine from a company like GE, Siemens, or Vestas is a lot like buying a car. A make and model are selected first, and then options are selected for these base models. For example, low but consistent wind speeds demand a larger blade that will rotate at a lower speed whereas areas with higher average wind speeds may be able to get by with smaller and less expensive blades for the same amount of energy production. Another common option for turbines is cold weather packages, which include things like heaters for the control systems, hydraulics, and power electronics, additional insulation in certain areas, and de-icing solutions especially for the turbine blades.

In a location like Texas that rarely sees cold temperatures for very long, it’s understandable that the cold weather packages might be omitted to save money during construction (although some smaller heaters are often included in critical areas to reduce condensation or humidity) but also to save on maintenance as well: every part in a wind turbine has to be maintained. Continuing the car analogy, it’s comparable to someone purchasing a vehicle in a cold climate that didn’t come equipped with air conditioning to save money up front, but also to avoid repair costs when the air conditioning eventually breaks. However, there are other side effects beyond cost to be considered when installing equipment that’s designed to improve a turbine’s operation in cold weather.

Let’s dig into the specifics of how wind turbine equipment is selected for a given wind farm.

Continue reading “Wind Turbines And Ice: How They’re Tailored For Specific Climates”

Electroplating 3D Printed Parts For Great Strength

Resin 3D printers have a significant advantage over filament printers in that they are able to print smaller parts with more fine detail. The main downside is that the resin parts aren’t typically as strong or durable as their filament counterparts. For this reason they’re often used more for small models than for working parts, but [Breaking Taps] wanted to try and improve on the strength of these builds buy adding metal to them through electroplating.

Both copper and nickel coatings are used for these test setups, each with different effects to the resin prints. The nickel adds a dramatic amount of stiffness and the copper seems to increase the amount of strain that the resin part can tolerate — although [Breaking Taps] discusses some issues with this result.

While the results of electroplating resin are encouraging, he notes that it is a cumbersome process. It’s a multi-step ordeal to paint the resin with a special paint which helps the metal to adhere, and then electroplate it. It’s also difficult to ensure an even coating of metal on more complex prints than on the simpler samples he uses in this video.

After everything is said and done, however, if a working part needs to be smaller than a filament printer can produce or needs finer detail, this is a pretty handy way of adding more strength or stiffness to these parts. There’s still some investigating to be done, though, as electroplated filament prints are difficult to test with his setup, but it does show promise. Perhaps one day we’ll be able to print with this amount of precision using metal directly rather than coating plastic with it.

Thanks to [smellsofbikes] for the tip!

Continue reading “Electroplating 3D Printed Parts For Great Strength”

SVG To Gerber, Without The Pain

We’ve all marveled at the high quality PCB artwork used within the #BadgeLife and other communities to produce eye-catching designs, but those of you who have dipped your toes in the PCB artwork water will know that it’s hardly an easy process. [Jaseg] may have an answer though with gerbolyze, his software for processing SVG files into Gerber layers or KiCAD footprints.

His impetus for building it came from disappointing experience with other scripts that simply tried to rasterise any SVG they were given, or didn’t fully support the complete SVG spec. It’s designed for minimal preprocessing, allowing for as streamlined a process as possible. It includes a bitmap vectoriser to handle everything that can be thrown at it, and the GitHub repository has full instructions including examples of the output for different settings.

This is the latest in a long progression of enhancements to the PCB art process, but it’s not by any means the first time we’ve ventured down this path. In particular [Brian Benchoff] did a lot of work on the production of multi-colour PCBs.