Friday: Getting Social With Discord And Bring-a-Hack

With just a few days to go before the kickoff of the 2021 Hackaday Remoticon, we’re still working furiously behind the scenes to pack as much content as possible into the two day virtual event. In fact, there’s so much going on that we thought you’d appreciate getting a bit of a head start as far as planning your own personal course through the weekend goes. The event might be free, but that’s no reason not to squeeze as much out of it as you can.

Chat It Up on Discord

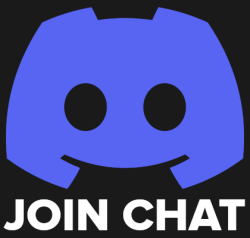
To begin with, you’re really going to want to join the official Hackaday Remoticon Discord server. We know some subset of the Hackaday readership would rather we used Matrix, or IRC, or maybe carefully modulated smoke signals; but at the end of the day, Discord has bubbled to the top as the defacto choice for this kind of thing. Give it a shot, you might actually like it.

The Discord server isn’t just a place for like-minded hackers to hang out and discuss the musical stylings of DJ Jackalope during the Saturday afterparty. It’s also how attendees can ask questions at the end of each presenter’s talk, as we’ll be turning off YouTube chat to keep things centralized. Even if you don’t plan on communicating with others (though you really should), the Discord server has an interactive schedule of events which will let you sign up to be notified when the talks you’ve selected are about to start, and we’ll be dropping important announcements and links in there as the event goes on.

Friday Bring-a-Hack on Gather Town

Like this, but with soldering irons.

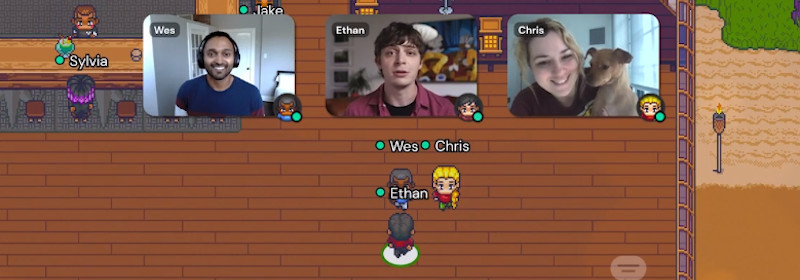
Friday night ends with a Bring-a-Hack where attendees can show off whatever they’ve been working on using Gather. It’s a video chat platform inside a virtual 2D world that looks a bit like Legend of Zelda.

Using this virtual environment, you can easily drop into an ongoing video stream simply by walking up to the presenter. Once you’ve seen enough, just walk over to the next little cluster of users. The point is to recreate the experience of stopping by a crowded after party where everyone brought some hardware project along with them to get spark conversations. Space will be limited, with ticket holders and people in Discord getting the first dibs, so keep an eye on your inbox for information about how to join.

Of course this is not the only Friday evening activity. A few weeks ago we announced that Lewin Day will be hosting Hacker Trivia, giving our beloved commenters the chance to show off your unimpeachable knowledge of technology and Hackaday history. The Friday talk stream will dump immediately into trivia, but here’s the dedicated link if you want to set a reminder for yourself.

Try It, You’ll Like It!

It’s difficult, perhaps even impossible, to truly recreate the experience of going to an in-person hacker con. But with interactive events and the latest and greatest communication software, we’re hoping the 2021 Remoticon can get pretty close. All the pieces are in place, the only thing we need now is to have a whole bunch of excited hackers to join in and have a good time. Think you can help us out?

Back of Rigol DS1104Z oscilloscope with the Ethernet and USB ports visible.

SCPI: On Teaching Your Devices The Lingua Franca Of Laboratories

One could be excused for thinking sometimes that the concept of connecting devices with other devices for automation purposes is a fairly recent invention. Yet for all the (relatively) recent hype of the Internet of Things and the ‘smart home’, laboratories have been wiring up their gear to run complicated measurement and test sequences for many decades now, along with factories doing much the same for automating production processes.

Much like the chaotic universe of IoT devices, lab equipment from different manufacturers feature a wide number of incompatible protocol and interface standards. Ultimately these would coalesce into IEEE-488.1 (GPIB) as the physical layer and by 1990 the first Standard Commands for Programmable Instruments (SCPI) standard was released that built on top of IEEE-488.

SCPI defines (as the name suggests) standard commands to interact with instruments. It has over the past decades gone on to provide remote interaction capabilities to everything from oscilloscopes and power supplies to exotic scientific equipment. Many off the shelf devices a hobbyist can buy today feature an SCPI interface via its Ethernet, USB or RS-232C port(s) that combined with software can be used to automate one’s home lab.

Even better is that it’s relatively straightforward to add SCPI functionality to one’s own devices as well, so long as it has at least an MCU and some way to communicate with the outside world.

Continue reading “SCPI: On Teaching Your Devices The Lingua Franca Of Laboratories”

Brass screen is soldered together into a large mold for cardboard pulp.

How To Make A Classy, Brassy Cardboard Pulp Mold

When we last checked in with prolific prototypist [Eric Strebel], he was perfecting the design of an eco-friendly wireless charger and turning his initial paper prototype into a chipboard version 2.0 that takes manufacturing concerns into consideration. At the end of this second video in a series, [Eric] was printing out the early versions of the form by which he would eventually make a brass screen mold for working with cardboard pulp. You know, the stuff that some egg cartons are made from.

Soldering brass screen into a mold.In the video below, it’s time to build the pulp mold by creating three smaller molds and then joining them into one horizontal mold. The result is a single piece that then gets folded up into a charging stand, much like the egg carton. [Eric] is using brass screen here, but says that copper would be a good choice, too.

After cutting the brass with scissors and pounding them flat, he uses the 3D-printed molds from the previous video to press them into the correct shapes. Each of the three pieces needs a frame, which [Eric] makes from more brass screen, then stitches it to the mold piece with loose screen threads before securing the unions with solder.

Since the weight of all the water would likely bend the brass out of shape, [Eric] finished off the mold by soldering on a frame of flat brass strip. Check out this awesome process below, and stay tuned for the next video when [Eric] pulps some cardboard and pumps out some eco-friendly chargers.

Does this look too complicated? You could always skip the whole mesh mold thing and shape your cardboard confetti directly into 3D printed parts.

Continue reading “How To Make A Classy, Brassy Cardboard Pulp Mold”

Russian Anti-Satellite Weapon Test Draws Widespread Condemnation

On the morning of November 15, a Russian missile destroyed a satellite in orbit above Earth.  The successful test of the anti-satellite weapon has infuriated many in the space industry, put astronauts and cosmonauts alike at risk, and caught the attention of virtually every public and private space organisation on the planet.

It’s yet another chapter in the controversial history of military anti-satellite operations, and one with important implications for future space missions. Let’s examine what happened, and explore the greater context of the operation.

Continue reading “Russian Anti-Satellite Weapon Test Draws Widespread Condemnation”

Arduino Library Makes Digital Rain Like It’s 1999

There’s going to be a new Matrix movie in theaters next month, and you know what that means: we’re about to see a whole new generation get obsessed with the franchise’s iconic “Digital Rain” effect. Thanks to modern advertisement technology, expect to see lines of glittering text pouring down the displays of everything from billboards to gas pumps pretty soon.

Doesn’t get much easier than that.

For those of us who’ve just been looking for an excuse to break out the old Matrix screensavers, you might as well get a jump on things using this handy Arduino library for the ESP8266 and ESP32. Developed by [Eric Nam], it lets you start up a digital rainstorm on displays supported by the TFT_eSPI library as easily as running digitalRainAnim.loop().

You can even install the library through the Arduino IDE, just open the Library Manager and search for “Digital Rain” to get started. You’ve still got to hook the display up to your microcontroller, but come on, [Eric] can’t do it all for you.

Looking at the examples, it seems like various aspects of the animation like color and speed can be configured by initializing the library with different values. Unfortunately we’re not seeing much in the way of documentation for this project, but by comparing the different examples, you should be able to get the high points.

While our first choice would certainly be a wall of green alphanumeric LED displays, we can’t help but be impressed with how easy this project makes it to spin up your own little slice of the Matrix on the workbench.

Continue reading “Arduino Library Makes Digital Rain Like It’s 1999”

NTP, Rust, And Arduino Make A Phenomenal Frequency Counter

Making a microcontroller perform as a frequency counter is a relatively straightforward task involving the measurement of the time period during which a number of pulses are counted. The maximum frequency is however limited to a fraction of the microcontroller’s clock speed and the accuracy of the resulting instrument depends on that of the clock crystal so it will hardly result in the best of frequency counters. It’s something [FrankBuss] has approached with an Arduino-based counter that offloads the timing question to a host PC, and thus claims atomic accuracy due to its clock being tied to a master source via NTP. The Rust code PC-side provides continuous readings whose accuracy increases the longer it is left counting the source. The example shown reaches 20 parts per billion after several hours reading a 1 MHz source.

It’s clear that this is hardly the most convenient of frequency counters, however we can see that it could find a use for anyone intent on monitoring the long-term stability of a source, and could even be used with some kind of feedback to discipline an RF source against the NTP clock with the use of an appropriate prescaler. Its true calling might come though not in measurement but in calibration of another instrument which can be adjusted to match its reading once it has settled down. There’s surely no cheaper way to satisfy your inner frequency standard nut.

Cramming A DS Inside A Gameboy

Many holiday recipes and console hacks share a common theme: cramming a thing inside another thing. Whether it’s turducken or a Nintendo DS inside a Gameboy, the result is always unexpected. The chassis for this mod is a humble Gameboy color with a Gameboy SP screen tackled on the top to serve as the secondary display. Unfortunately, this mod lost touch screen functionality, limiting some of the games you can play.

[TheRetroFuture] received the custom handheld from [GameboyCustom], which was somewhat damaged in shipping. The original screw mounts had to be removed and the case glued back together to fit the DS motherboard. So for [TheRetroFuture] to get inside to start troubleshooting involved a razor blade and patience. Testing various points and swapping components got [TheRetroFuture] closer to the root problems. The fix ended up being a few wires that came loose during shipping. Finally, after reseating a display connection and some careful soldering, it booted and started playing games.

Overall, it’s pretty impressive to see Mario Kart DS running on both screens on the tiny handheld. But you might be asking, why? Why shove one handheld inside another handheld? Sometimes it’s to gain new functionality like this Raspberry Pi inside a PSP body. Sometimes, it’s just because we can. Video after the break.

Continue reading “Cramming A DS Inside A Gameboy”