MorPhlex: The TPU Filament That Goes Soft After You Print It

In FDM 3D printing cycles TPU is a bit of a special filament. Not so much because of its properties, but because it’s rather stretchy even as a filament, which makes especially printing certain hardness grades of TPU into somewhat of an nightmare. An interesting new contender here comes from a company called BIQU, who reckon that their ‘MorPhlex’ TPU solves many of those problems. Recently the [ModBot] channel on YouTube got sent a spool of the filament for testing.

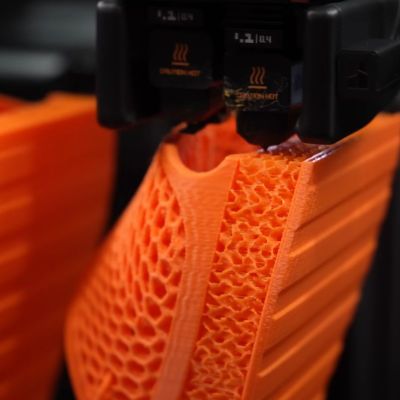
The BIQU MorPhlex TPU filament being turned into squishy slippers. (Credit: ModBot, YouTube)

The ‘magic’ here is that this TPU claims to be a 90A TPU grade while on the spool, but after printing it becomes 75A, meaning a lot softer and squishier. Perhaps unsurprisingly, a big selling point on their product page is that you can print squishy shoes with it. Beyond this is claims to be compatible with ‘most FDM printers’, and the listed printing parameters are typical for TPU in terms of extruder and bed temperature.

After drying the filament as recommended for TPU in general, test prints were printed on a Bambu Lab H2D. Here BIQU recommends not using the AMS, but rather the dedicated TPU feeding channel. For the test prints some slippers were printed over the course of two days. In hindsight glue stick should have been applied to make parts removal easier.

The slippers were indeed squishy, but the real test came in the form of a Shore A hardness meter and some test cube prints. This showed an 80 – 85A for the BIQU MorPhlex test cube depending on whether to test the side or top. As the product datasheet indicates a final hardness of 75A +/- 3A, one could argue that it’s kind-of in spec, but it mostly raises questions on how parameters like temperature and extrusion speed affect the final result.

2025 One Hertz Challenge: STM32 Blinks In Under 50 Bytes

Many of us have run a Blink program on a microcontroller before. It’s effectively the “Hello, World!” of the embedded space. However, few of us have ever thought about optimizing our Blink code to be as miniscule as possible. But that’s precisely what [Rudra Lad] did for this entry into the 2025 One Hertz Challenge!

This example of Blink, delay_blinky_13, is built specifically for the STM32F4 Discovery microcontroller development board. [Rudra] notes the code is “highly optimized” and compiles down to a binary size of under 50 bytes. The code doesn’t even use RAM, and it aims to get the blink as close to 1 Hz as possible. Many optimizations were used to crunch it down as small as possible. For example, the standard startup code isn’t used, with the entire program instead written in the Reset_Handler to save space. Bit-band is also used to write to peripheral registers to blink the LED, since this uses less instructions than the typical methods. Meanwhile, with many tweaks to the delay counting routine, [Rudra] was eventually able to get the blink frequency to 1.00019 Hz, as measured on a logic analyzer. That’s pretty darn close!

While it’s rare that you have only 50 bytes of binary space to blink an LED, work like this is a great way to flex your coding muscles. Code is on Github for the curious, and if you’ve worked up your own impressive tiny binaries, don’t hesitate to let us know!

The Nibbler Was Quite A Scamp

The late 1970s were an interesting time for microcomputers. The rousing success of things like the 8080, the Z80, the 6800, and the 6502 made everyone wanted a piece of the action. National Semiconductor produced its SC/MP. That was technically the Simple Cost-effective Micro Processor, but it was commonly known as Scamp. There were several low-cost development boards built around this processor and [Hello World] is looking at Digikey’s “Nibbler” which was a fairly nice computer for only $150. Check it out in the video below.

The SC/MP was made to be cheap. It had a strange bank switching scheme reminiscent of the Microchip PIC 16F family. It also had, like a lot of old discrete computers, a serial ALU, which made it slower than many of its contemporaries. It did have good features, though. It was cheap and required very few extra parts along with a single 5 V supply in the second and subsequent versions. In addition, it had pins that were made for connecting more than one CPU, which was quite a feat for those days.

Continue reading “The Nibbler Was Quite A Scamp”

Metric, Imperial, And Flexibility

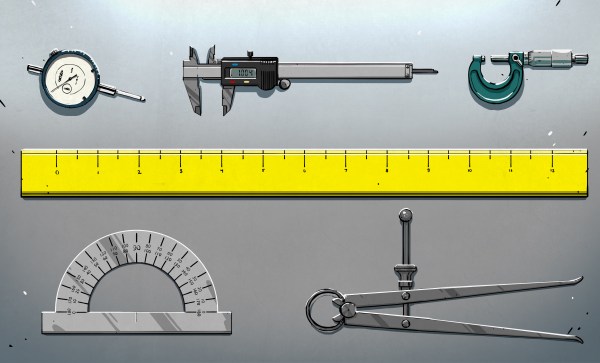
Al Williams wrote up a seemingly innocent piece on a couple of rules-of-thumb to go between metric and US traditional units, and the comment section went wild! Nothing seems to rile up the Hackaday comment section like the choice of what base to use for your unit system. I mean, an idealized version of probably an ancient Egyptian’s foot versus a fraction of the not-quite-right distance from the North Pole to the equator as it passes through Paris? Six of one, half a dozen the other, as far as I’m concerned. Both are arbitrary.

What’s fun, though, is how many of us need to know both systems and how schizophrenic it all can be. My favorite example is PCB layout, where tenths and thousandths of an inch are unavoidable in through-hole and surface-mount parts, yet we call out board sizes and drill bits in millimeters – on the same object, and without batting an eye. American 3D printer enthusiasts will know their M3 hardware, and probably even how much a kilogram weighs, because that’s what you buy spools of filament in. Oddly enough, though I live in Europe, I have 3/4” thread on my garden hose and a 29” monitor on my desk. Americans buy two liter bottles of soda without thinking twice.

The absolute kings of this are in the UK, where the distance between cities is measured in miles, but the dimensions of an apartment in meters. They’ll buy gas in liters and beer in pints. Humans are measured both in feet-and-inches and centimeters, and weighed in pounds, kilograms, or even stone.

And I think that’s just fine. Once you give up on the rightness of either system, they both have their pros and cons. Millimeters are superb for doing carpentry in – that’s just about how tight my tolerances are with hand tools anyway, and if it’s made of wood, you can fudge 0.5 mm either way pretty easily. Sure, you could measure in 32nds of an inch, but have you ever bought a plywood sheet that’s 1536 x 3072 thirty-seconds? (That’s 4’ x 8’, or 1200 mm x 2400 mm.) No, you haven’t.

But maybe stick to one system when lives or critical systems are on the line. Or at least be very careful to call out your units. While it’s annoying to spec the wrong SMT part size because KiCAD calls some of them out in millimeters and inches – 0402 in inches is tiny, but 0402 in metric is microscopic – it’s another thing entirely to load up half as much fuel as you need for a commercial airline flight because of metric vs imperial tons. There’s a limit to how units-flexible you want to be.

Three stages of the dam construction

How To Convert A Drain Into A Hydropower Facility

Over on his YouTube channel [Construction General] shows us how to convert a drain into a hydropower facility. This type of hydroelectric facility is known as a gravitation water vortex power plant. The central structure is a round basin which includes a central drain. The water feeds into the basin through a series of pipes which help to create the vortex which drives the water turbine before flowing out the drain.

To make the facility [Construction General] starts by laying some slabs as the foundation. One of the slabs has a hole to which the central drain pipe is attached. Bricks and mortar are then used to build the basin around the drain. A temporary central pipe is used for scaffolding along with some strings with hooks attached to hold the bricks and mortar in place for the basin. Integrated into the top half of the basin are fifteen inlet pipes which feed in water at an angle.

The next step is to build the dam wall. This is a bricks and mortar affair which includes the drain in the bottom of the wall and two spillways at the top. The spillways are for letting water flow out of the dam if it gets too full. Around the drainage in the dam wall a valve is installed. This valve is called the low-level outlet or the bottom outlet, and in this case it is a sluice, also known as a slide gate, which can be raised or lowered to control the rate of flow through the turbine.

Once the basin is complete and the low-level outlet is in place the scaffolding is removed. The basin is then painted, pink on the inside and white around the top. A turbine is constructed from various metal pieces and installed into the basin. The turbine is attached to a generator which is fixed atop the basin. The apparatus for operating the low-level outlet is installed and the dam is left to fill.

Hydropower is a topic we’ve covered here at Hackaday before, if you’re interested in the topic you might like to check out A Modest But Well-Assembled Home Hydropower Setup, Hydropower From A Washing Mashine, or Bicycle Hub Hydropower.

Continue reading “How To Convert A Drain Into A Hydropower Facility”

Walter Is A Tiny Cellular Modem For Your Projects

It wasn’t that long ago that projects with cellular connectivity were everywhere, but with 2G no longer universally available, glory days of cheap 2G modules seem to be on their way out. So when [Data Slayer] titled his video “You’ve Never Seen Cellular Like This” about a new GSM radio module, we couldn’t help but think that we have — and that we’re glad to see it back.

The module is the Walter, by DPTechnics out of Belgium. It’s fully open-source and contains a ESP32-S3 for WiFi and BLE plus a Sequans Monarch chip for GSM and GNSS connectivity. It’s not the blazing-fast 5G you’re paying your phone carrier for: this is an IoT modem, with LTE-M and NB-IoT. We’re talking speeds in the kbps, not Mbps– but we’re also talking very, very low power usage. Since it’s LTE-M rather than full LTE, you’re probably not going to be bringing back the golden days of Arduino Cellphones,  (since LTE-M doesn’t support VoLTE) but if LoRa isn’t your jam, and you hang out around cell towers, this level of connectivity might interest you.

Walter is actually a drop-in replacement for PyCom’s old GPy module, so if you had a project in mind for that and are frustrated by it being EoL — well, here you are. [Data Slayer] seemed impressed enough with its capabilities as a GPS tracker. We’re impressed with the 9.8 µA consumed in deep sleep mode, and the fact that it has already been certified with the CE, FCC, IC, RCM and UKCA. Those certs mean you could go from prototype to product without getting tangled in red tape, assuming Walter is the only radio onboard.

Our thanks to [Keith Olson] for phoning in the tip. If you have a tip and want to connect, operators are standing by. Continue reading “Walter Is A Tiny Cellular Modem For Your Projects”