2WD robot

Two-Wheeled Arduino Robot Project For Beginners

Here’s a fun build from [RootSaid] that is suitable for people just getting started with microcontrollers and robotics — an Arduino-controlled two-wheeled robot.

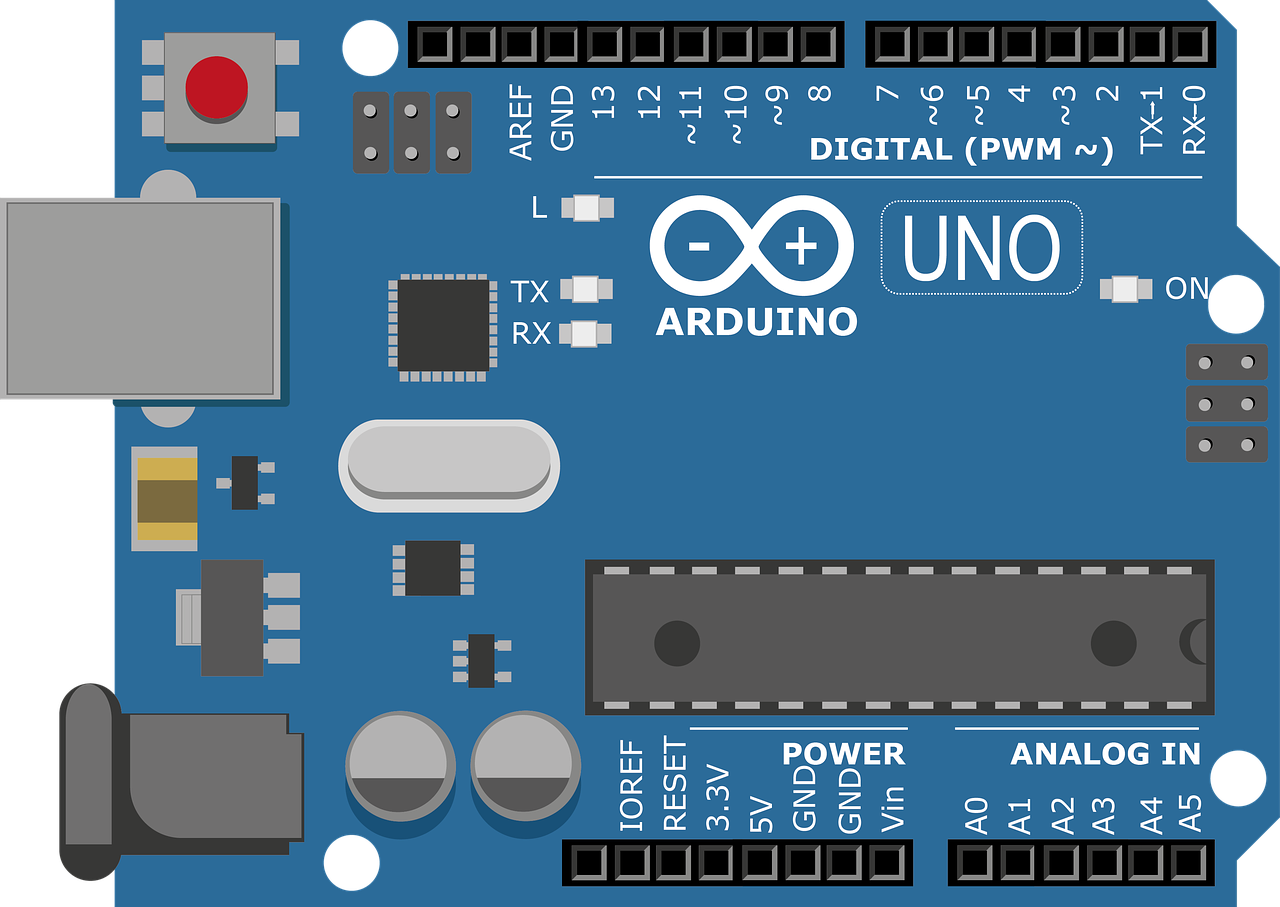
The video assumes you already have one of the common robotics kits that includes the chassis, wheels, and motors, something like this. You’ll also need a microcontroller (in this case, an Arduino Nano), a L293D motor driver IC, a 9 V battery, and some jumper wires.

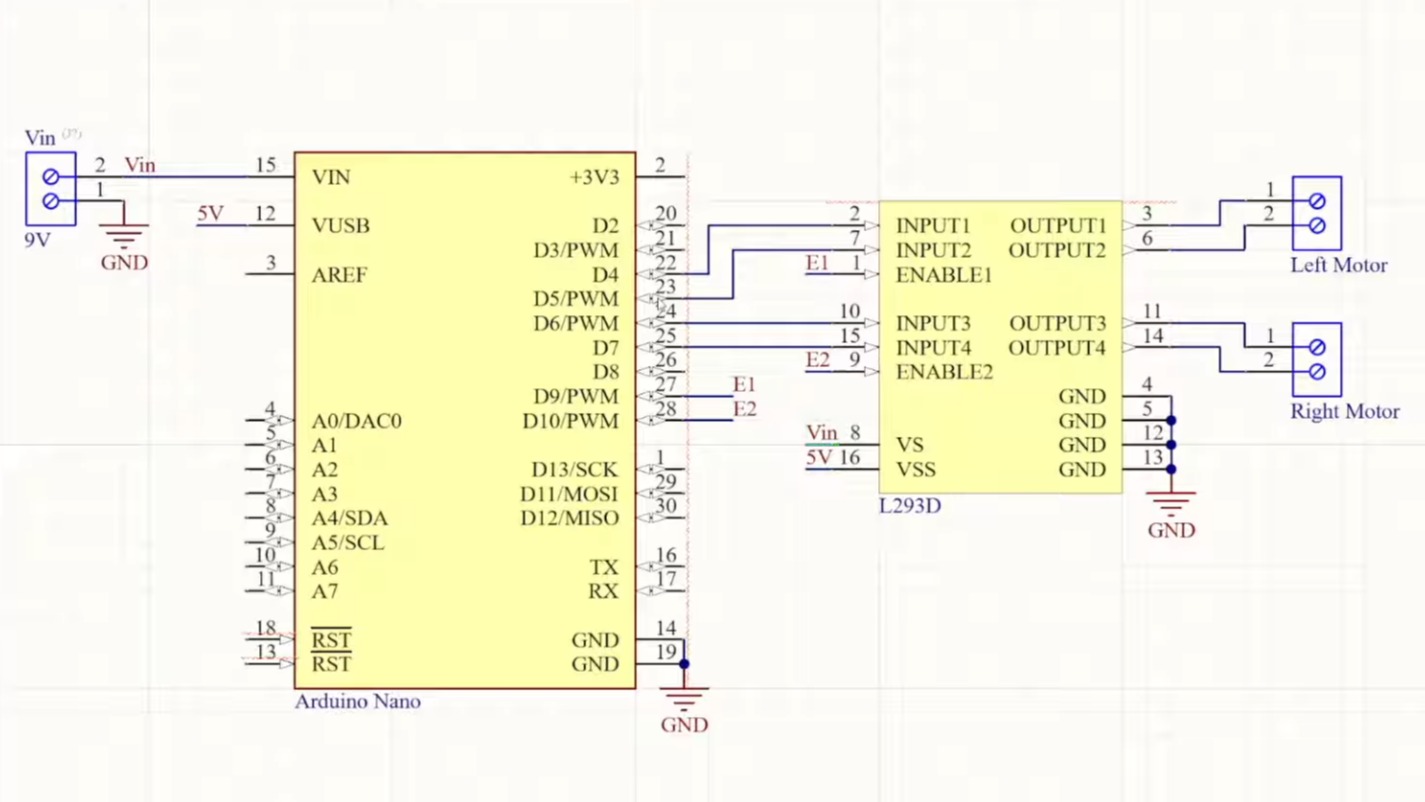
The video goes into detail about how the two wheels connected to one motor each can move the robot in various directions: forward, backward, left, and right. The motors can be made to spin either forward or backward, depending on the polarity of the power supply, using an H-bridge circuit.

The L293D motor driver IC powers and controls the motors connected to the wheels. The L293D takes its commands from the Arduino. The rest of the video is spent going over the software for controlling the wheels.

When you’re ready to go to the next level, you might enjoy this robot dog.

Continue reading “Two-Wheeled Arduino Robot Project For Beginners”

Any Old TV Can Be A Clock With Arduino

If you’ve got an old black and white TV, it’s probably not useful for much. There are precious few analog broadcasters left in the world and black and white isn’t that fun to watch, anyway. However, with a little work, you could repurpose that old tube as a clock, as [mircemk] demonstrates.

The build is based around an Arduino Nano R3. This isn’t a particularly powerful microcontroller board, but it’s good enough to run the classic TVOut library. This library lets you generate composite video on an Atmel AVR microcontroller with an absolute minimum of supporting circuitry. [mircemk] paired the Arduino with a DS3231 real-time clock, and whipped up code to display the time and date on the composite video output. He then also demonstrates how to hack the signal into an old TV that doesn’t have a specific input for composite signals.

You’ll note the headline says “any old TV can be a clock,” and that’s for good reason. Newer TVs tend to eschew the classic composite video input, so the TVOut library won’t be any good if you’re trying to get a display up on your modern-era flatscreen. In any case, we’ve seen the TVOut library put to good use before, too. Video after the break.

Continue reading “Any Old TV Can Be A Clock With Arduino”

Amiga? Arduino? AMeagerBall Gets The Uno Bouncing

When the iconic “Boing Ball” first debuted 40 years ago, it was a wonder to behold. There was nothing like it in the home compuing world upto that time, and it showed that Commodore’s new “Amiga” was a powerhouse sure to last the test of time. Forty years later, the Amiga as we knew it then might not be with us anymore, but [Mark Wilson] is recreating its iconic demo on a microcontroller– but not just any microcontroller. “AMeagerBall” is an Arduino Uno exclusive, and it even tells the time.

Like the original “Boing Ball”, the demo is running at 320×240, though on a touch LCD shield instead of a CRT. Unlike some microcontrollers, the Uno doesn’t have the horsepower to just brute-force emulate a 1980s home computer, so [Mark] has had to recreate the boing ball from scratch. He’s not doing it with any graphics libraries, either. On the Uno that would be too slow, so [Mark] is driving the LCD directly to its appropriate registers, to stay close enough to the metal to make it work. That means if you’re going to try the code on his GitHub repository, you’ll need to be sure to use matching hardware or be prepared to port it.

One of the things about Amiga’s demo that was so impressive is that it hardly made use of the CPU, allowing the Workbench to be pulled up while the ball bounced. That’s not the case here, as the UNO doesn’t have any extra graphics chips. Still, [Mark] was able to squeeze enough horsepower out of everyone’s favourite ATmega to present us with an Amiga-styled clock– either analog, digital, or in the workbench title bar in that iconic blue-and-white. To keep the clock accurate, he’s squeezed an RTC module in, too. Lovely! The different clocks can be accessed via the touchscreen.

Oh, did we forget to mention that the touchscreen is implemented? This certainly stretches the hardware far enough to be considered a demo. If just a bouncing ball doesn’t work the UNO hard enough for you, try booting Linux.

This isn’t the first bouncing ball demo we’ve seen on a microcontroller:  here are four of them bouncing in an ATtiny85.

Continue reading “Amiga? Arduino? AMeagerBall Gets The Uno Bouncing”

Kitchen Bench Splash Guard Powered By Arduino

If you’re blessed with high water pressure at home, you probably love how it helps blast grime from your dishes and provides a pleasant washing experience. However, it can also cause a wonderful mess when that water splashes all over your countertops. [vgmllr] has whipped up a simple solution to this problem by installing an automatic splash guard.

So tidy!

The concept is simple enough—install a pair of flat guards that raise up when the sink is running, in order to stop water getting everywhere. To achieve this, [vgmllr] grabbed an Arduino, and hooked it up to a piezo element, which acts as a water sensor.

The piezo is attached to the bottom of the sink, and effectively acts as a microphone, hooked up to one of the Arduino’s analog-to-digital pins. When water flow is detected, the Arduino commands two servos to raise a pair of 3D printed arms that run up and down the outside of the sink. Each arm is fitted with magnets, which mate with another pair of magnets on the splash shields inside the sink. When the arms go up, the splash shields go up, and when the arms go down, the splash shields go down.

It’s an ingenious design, mostly because the installation is so clean and seamless. By using magnets to move the splash shields, [vgmllr] eliminated any need to drill through the sink, or deal with any pesky seals or potential water leaks. Plus, if the splash shields are getting in the way of something, they can easily be popped off without having to disassemble the entire mechanism.

It’s a tidy little build, both practical and well-engineered. It’s not as advanced as other kitchen automations we’ve seen before, but it’s elegant in its simple utility.

Hackaday Podcast Episode 341: Qualcomm Owns Arduino, Steppers Still Dominate 3D Printing, And Google Controls Your Apps

The nights are drawing in for Europeans, and Elliot Williams is joined this week by Jenny List for an evening podcast looking at the past week in all things Hackaday. After reminding listeners of the upcoming Hackaday Supercon and Jawncon events, we take a moment to mark the sad passing of the prolific YouTuber, Robert Murray-Smith.

Before diving into the real hacks, there are a couple of more general news stories with an effect on our community. First, the takeover of Arduino by Qualcomm, and what its effect is likely to be. We try to speculate as to where the Arduino platform might go from here, and even whether it remains the player it once was, in 2025. Then there’s the decision by Google to restrict Android sideloading to only approved-developer APKs unless over ADB. It’s an assault on a user’s rights over their own hardware, as well as something of a blow to the open-source Android ecosystem. What will be our community’s response?

On more familiar territory we have custom LCDs, algorithmic art, and a discussion of non-stepper motors in 3D printing. Even the MakerBot Cupcake makes an appearance. Then there’s a tiny RV, new creative use of an ESP32 peripheral, and the DVD logo screensaver, in hardware. We end the show with a look at why logic circuits use the voltages they do. It’s a smorgasbord of hacks for your listening enjoyment.

Download yourself an MP3 even without a Hackaday Listeners’ License.

Continue reading “Hackaday Podcast Episode 341: Qualcomm Owns Arduino, Steppers Still Dominate 3D Printing, And Google Controls Your Apps”

Qualcomm Introduces The Arduino Uno Q Linux-Capable SBC

Generally people equate the Arduino hardware platforms with MCU-centric options that are great for things like low-powered embedded computing, but less for running desktop operating systems. This looks about to change with the Arduino Uno Q, which keeps the familiar Uno formfactor, but features both a single-core Cortex-M33 STM32U575 MCU and a quad-core Cortex-A53 Qualcomm Dragonwing QRB2210 SoC.

According to the store page the board will ship starting October 24, with the price being $44 USD. This gets you a board with the aforementioned SoC and MCU, as well as 2 GB of LPDDR4 and 16 GB of eMMC. There’s also a WiFi and Bluetooth module present, which can be used with whatever OS you decide to install on the Qualcomm SoC.

This new product comes right on the heels of Arduino being acquired by Qualcomm. Whether the Uno Q is a worthy purchase mostly depends on what you intend to use the board for, with the SoC’s I/O going via a single USB-C connector which is also used for its power supply. This means that a USB-C expansion hub is basically required if you want to have video output, additional USB connectors, etc. If you wish to run a headless OS install this would of course be much less of a concern.

Screenshot of AVRpascal

Pascal? On My Arduino? It’s More Likely Than You Think

The Arduino ecosystem is an amazing learning tool, but even those of us who love it admit that even the simplified C Arduino uses isn’t the ideal teaching language. Those of us who remember learning Pascal as our first “real” programming language in schools (first aside from BASIC, at least) might look fondly on the AVRPascal project by [Andrzej Karwowski].

[Andrzej] is using FreePascal’s compiler tools, and AVRdude to pipe compiled code onto the micro-controller. Those tools are built into his AVRPascal code editor to create a Pascal-based alternative to the Arduino IDE for programming AVR-based microcontrollers. The latest version, 3.3, even includes a serial port monitor compatible with the Arduino boards.

This guy, but with Pascal. What’s not to love?

The Arduino comparisons don’t stop there: [Andrzej] also maintains UnoLib, a Pascal library for the Arduino Uno and compatible boards with some of the functionality you’d expect from Arduino libraries: easy access to I/O (digital and analog ports) timers, serial communication, and even extras like i2c, LCD and sensor libraries.

He’s distributing the AVRPascal editor as freeware, but it is not open source. It’s too bad, because Pascal is a great choice for microcontrollers: compiled, it isn’t much slower than C, but it can be as easy to write as Python. Micropython shows there’s a big market for “easy” embedded programming; Pascal could help fill it in a more performant way. Is the one-man license holding this project back, or is it just that people don’t use Pascal much these days?

While AVR programming is mostly done in C, this is hardly the first time we’ve seen alternatives. While some have delved into the frightening mysteries of assembly, others have risen to higher abstraction to run LISP or even good old fashioned BASIC. Pascal seems like a good middle road, if you want to go off the beaten path away from C.

Via reddit.