Hacklet 53 – Quick Tool Hacks

They say necessity is the mother of invention. Have you ever been right in the middle of a project, when you realize that you could hack up a simple tool which would make your current task easier? Maybe it’s a coil winder, or a device to hold .100 headers straight in their holes. Faster than you can say “Arabian Nights”, you’re working on a project within a project. It might not be pretty, but it gets the job done. This week’s Hacklet is all about quick tool hacks – little projects that help out around the shop or hackerspace.

lampieWe start with [theonetruestickman] and Magnificent Magnifier LED Coversion. [theonetruestickman] picked up an articulated magnifier lamp at Goodwill for $4. These lamps are a staple of benches everywhere. The only problem was the switch and fluorescent tube were both failing. [theonetruestickman] didn’t feel bad for the lamp though. He pulled out the tube, ballast, and starter, replacing them with LEDs. He used 12 V 3 watt LED modules to replace the tube. Three modules provided plenty of light. An old wall wart donated its transformer to the effort. Since these LED modules are happy running on AC, no bridge rectifier was necessary. The modernized lamp is now happily serving on [theonetruestickman’s] workbench.

toolNext up is [Kwisatz] with Pick Up tool hack. [Kwisatz] is a person of few words. This whole project consists of just two words. Specifically, “syringe” and “spring”. Thankfully [Kwisatz] has provided several pictures to show us exactly what they’ve created. If you’ve ever used one of those cheap pickup tools from China, you know [Kwisatz’s] pain. The tiny piece of surgical tube inside the tool creates a feeble vacuum. These tools only hold parts for a few seconds before the vacuum decays enough to drop the part. [Kwisatz] kept the tip of the tool, but replaced the body with a syringe. A spring is used to create just the right amount of vacuum to hold parts on while they are being placed.

fume[Dylan Bleier] made his shop air a bit safer to breathe with a simple fume extractor for $20. Solder and flux create some nasty smoke when heated. Generally that smoke wafts directly into the face of the hacker peeking at the 0402 resistor they are trying to solder. A bit of smoke once in a while might not be so bad, but over the years, the effects add up. [Dylan] used two 120V AC bathroom fans, some metal ducting, plywood, and a bit of time to make this fume extractor. [Dylan] is the first to say it’s not UL, CE, or ROHS compliant, but it does get the job done. He even added a screen to keep bugs from flying in from the outdoor exhaust port.

helix[ftregan] needed to wind a helical coil for an antenna, so he built Helix Winder. Helices are essentially springs, so that should be easy, right? Turns out that making a nice uniform helix is not the easiest thing in the world. The helix winder is a jig which makes winding these special coils much easier. Holes are drilled at a specific angle in a wooden block. The wire is fed through that block and rolled onto an aluminum tube. Rotating the block on the tube forces the wire into the helix shape. The only downside is that each winder is only good for once dimension of helix.

I’ve noticed that some of these quick hacks don’t get as much love as they deserve over on hackaday.io. So if you notice a cool hack like this, drop a comment and give the project a skull. If you want to see more of these hacks, check out our new quick tool hacks list! See a project I might have missed? Don’t be shy, just drop me a message on Hackaday.io. That’s it for this week’s Hacklet, As always, see you next week. Same hack time, same hack channel, bringing you the best of Hackaday.io!

Caption CERN Contest – I’ve Got My Eye On You

As week 20 of the Caption CERN Contest comes to a close, we can say that this scientist may have been a bit sleepy from all his hard work, but all our caption writers certainly were not! Thank’s to everyone who stayed up late and entered.

Whiteboards and their associated dry erase markers have become a staple in every office, school, and home. It’s getting hard to remember that everyone used blackboards not so long ago. High energy physics,and flammable dust probably are not a good mix. Let’s hope our sleeping scientist cleaned the erasers outdoors after he woke up.

The Funnies:

  • “A weekend at CERNies”- [Rob]
  • “After bitten by the Schrödinger’s cat, Doc Brown acquired the most useful power of a cat – being able to sleep anywhere, any time.” – [K.C. Lee]
  • “CERN’s infamous “wind tunnel” experiments” – [Rollyn01]

This week’s winner is [MechaTweak] with “During the great blackboard shortage of ’66, scientists went to great lengths to protect their unfinished work from premature erasure”. [MechaTweak] describes himself as a “Mild mannered design engineer by day, father of four crazy kids by night.” With all those kids running around, he’s going to enjoy having a Stickvise from The Hackaday Store. You can bet he’ll be using the Stickvise to solder up some boards for Shower water saver, his entry in the 2015 Hackaday Prize.

Week 21

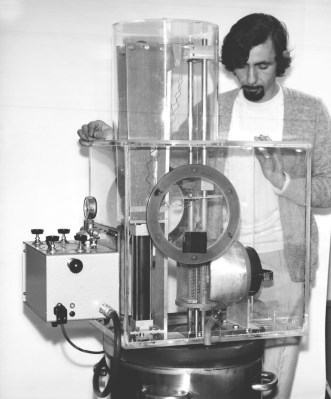
cern-21-smThese two CERN scientists are looking through some kind of optical apparatus. There is a plano-convex lens mounted on an adjustable arm. The scientists appear to be looking through a window while adjusting some controls.

Is this some kind of physics experiment? Could it be research into psychomotor acuity? Maybe the dark-haired scientist is just getting her yearly CERN eye exam? You tell us!

This week’s prize is the ever poular Teensy 3.1 from The Hackaday Store.  Add your humorous caption as a comment to this project log. Make sure you’re commenting on the contest log, not on the contest itself.

As always, if you actually have information about the image or the people in it, let CERN know on theoriginal image discussion page.

Good Luck!

Machine Metal With Electricity: An EDM Attachment For 3D Printers

[SuperUnknown] has revealed a secret project he’s been working on. He’s cooked up an EDM attachment for 3D printers, or any CNC machine for that matter. Electrical Discharge Machining (EDM) is a method of using sparks to machine metal. EDM isn’t a new technology, in fact commercial machines have been around since the 1960’s. If you’ve ever had an arc scar up your multimeter probes, you’ve unwittingly done a bit of EDM.

The theory behind EDM is simple: High voltage between the tool and workpiece causes sparks to jump between them. Each spark erodes the workpiece (and the tool). Big EDM machines perform their magic in a liquid which acts as both a dielectric and a flushing medium. This liquid can be anything from deionzed tap water to specially formulated oil. [SuperUnknown] is using good old-fashioned tap water.

edm-roughAs you can imagine, a single spark won’t erode much metal. EDM machines fire tens of thousands of times per second. The exact frequencies, voltages, and currents are secrets the machine manufacturers keep close to their chests. [SuperUnknown] is zeroing in on 65 volts at 2 amps, running at 35 kHz. He’s made some great progress, gouging into hardened files, removing broken taps from brass, and even eroding the impression of a coin in steel.

While we’d love to say this is a free open source project, [superUnknown] needs to pay the bills. He’s going with crowdsourced funding. No, not another Kickstarter. This project is taking a different route. The videos of the machine will be uploaded to YouTube and visible to [superUnknown’s] Patreon supporters. They will also be available for rent using YouTube’s new rental system. [SuperUnknown] has pledged to figure out a way to make the content available for starving college students and others with limited incomes.

Based upon his previous adventures with lil’ screwy, his homemade 100 ton press, and various other projects on the Arduino verses Evil YouTube channel, we think [superUnkown] has a pretty good chance of making home EDM work. Click past the break to see two videos of the 3D printer EDM toolhead in action. We should mention that [SuperUnknown] is rather colorful with his dialogue, so make sure you’re using headphones if you’re at work.

Continue reading “Machine Metal With Electricity: An EDM Attachment For 3D Printers”

Castrol Virtual Drift: Hacking Code At 80MPH With A Driver In A VR Helmet

Driving a brand new 670 horsepower Roucsh stage 3 Mustang while wearing virtual reality goggles. Sounds nuts right? That’s exactly what Castrol Oil’s advertising agency came up with though. They didn’t want to just make a commercial though – they wanted to do the real thing. Enter [Adam and Glenn], the engineers who were tasked with getting data from the car into a high end gaming PC. The computer was running a custom simulation under the Unreal Engine. El Toro field provided a vast expanse of empty tarmac to drive the car without worry of hitting any real world obstacles.

The Oculus Rift was never designed to be operated inside a moving vehicle, so it presented a unique challenge for [Adam and Glenn]. Every time the car turned or spun, the Oculus’ on-board Inertial Measurement Unit (IMU) would think driver [Matt Powers] was turning his head. At one point [Matt] was trying to drive while the game engine had him sitting in the passenger seat turned sideways. The solution was to install a 9 degree of freedom IMU in the car, then subtract the movements of that IMU from the one in the Rift.

GPS data came from a Real Time Kinematic (RTK) GPS unit. Unfortunately, the GPS had a 5Hz update rate – not nearly fast enough for a car moving close to 100 MPH. The GPS was relegated to aligning the virtual and real worlds at the start of the simulation. The rest of the data came from the IMUs and the car’s own CAN bus. [Adam and Glenn] used an Arduino with a Microchip mcp2515 can bus interface  to read values such as steering angle, throttle position, brake pressure, and wheel spin. The data was then passed on to the Unreal engine. The Arduino code is up on Github, though the team had to sanitize some of Ford’s proprietary CAN message data to avoid a lawsuit. It’s worth noting that [Adam and Glenn] didn’t have any support from Ford on this, they just sniffed the CAN network to determine each message ID.

The final video has the Hollywood treatment. “In game” footage has been replaced with pre-rendered sequences, which look so good we’d think the whole thing was fake, that is if we didn’t know better.

Click past the break for the final commercial and some behind the scenes footage.

Continue reading “Castrol Virtual Drift: Hacking Code At 80MPH With A Driver In A VR Helmet”

Hacklet 52 – Breakout Board Projects

Starting a design with a new part can be hard. What power supply voltage(s) does it need? Are there any support component requirements? What is the footprint? What about the I/O voltage levels? Breakout boards are designed to answer all those questions for you. Breakouts help when you’re designing with a new part – be it a microcontroller, a sensor, a motor driver, or anything else. They also are a huge help when you’re trying to knock out a quick hack, and just need to get something working quick. Fast to integrate, often breadboard friendly, breakouts just make things easier! This week’s Hacklet is about some of the best breakout board projects on Hackaday.io!

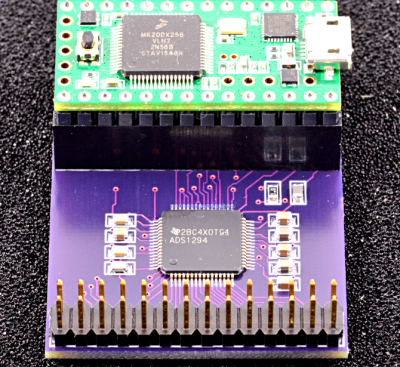
32f4We start with [Christoph] and STM32F030F4P6 breakout board. Inspired by the Teensy 3.0, [Christoph] set out to build a simple, easy to use, and small breakout board for an ARM processor. The STM32F030F4P6 is a great starting point. At only 20 pins, it’s one of the smallest ARM based chips around. He added the basic things needed to bring this chip up: decoupling caps, a reset button, headers for ST’s software debugger, and of course an LED for a blinky hello world program. The resulting board is physically tiny, but this lilliputian ARM board packs Coretex M0 powered punch!

drvNext up is [al1] and DRV8836 Breakout. Sooner or later, everyone wants to drive a motor in one of their projects. It’s a rite of passage, just like blinking an LED. Motors pull a lot of current though, so external transistors or driver chips are almost always necessary. TI’s DRV8836 chip packs two full H-bridges into one package. That’s enough to drive two DC motors or one stepper. Handling 1.5 amps of current per driver in a tiny package means that thermal coupling is important. The DRV8836 has a large thermal pad which has to be soldered to keep the magic smoke in. [al1] dropped the chip, along with the correct thermal footprint and decoupling capacitors onto a simple breakout. The result is easy to use motor drivers for the masses.

espHackaday.io power user [davedarko] took cues from his favorite designs to create Ignore this ESP8266 board. In [Dave’s] own words, “I stole from every one. The huzza from Adafruit, [Matt’s] breakout board, [Al1s] board, NodeMCUs DevKit.” Hey [Dave] there’s no stealing in open source hardware! There is  only design reuse with attribution, which is exactly what you’re doing. [Dave’s] breakout can use both popular ESP8266 footprints: the ESP-01 and ESP-12. He’s added power, reset/programming buttons, and the all important serial header to talk to the module. Going serial allows dave to keep costs down by not including an expensive serial to USB chip in the BOM. Most of us have FTDI cables (or clones) bouncing hanging around anyway. We definitely like the logo on this one!

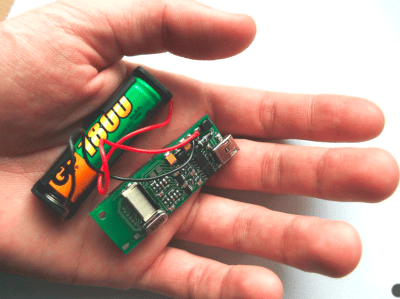
bbbFinally we have [The Big One] with uBBB 32u4. uBBB 32u4 is a bigger brother of µbbb, a Hackaday.io project [Warren] and [The Big One] worked on. µbbb uses an Atmel ATmega32u2 processor. [The Big One] has expanded the faimly to include an ATmega32u4. If you’re wondering, uBBB stands for “Micro Bare Bones Board” At 1.65″ x 0.8″, this is a micro board. It still manages to  include everything you need to get the processor up and running fast. Crystal, buttons, decoupling caps, and LEDs – everything is here. A mini USB connector makes communicating with the ATmega a snap!

If you want to see more breakout boards, check out our new breakout board list! If I’ve forgotten to add you to the list, just drop me a message on Hackaday.io. That’s it for this week’s Hacklet, As always, see you next week. Same hack time, same hack channel, bringing you the best of Hackaday.io!
Caption CERN Contest – Work Until You Drop

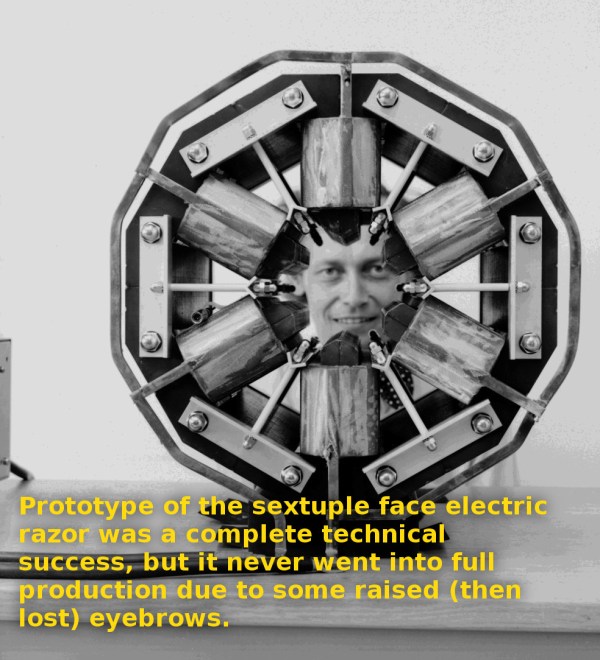
Week 19 of the Caption CERN Contest is now in the record books, though we’re sure we’ll be getting “safety update” emails from HR about the incident for the next several weeks. Thanks to everyone who threw caution to the wind and submitted a caption! This definitely is some sort of medical or emergency room at CERN. We’re still not quite clear as to why they need a full-sized skeleton though. We have to wonder how many lab pranks that poor former-human has been part of.

The Funnies:

  • “The second test subject survived a bit better than the first, and if you’re wondering, the first test subject is standing in the corner”- [jakewisher125]
  • “It soon became apparent that it had been a mistake to entrust site security to sharks with lasers.” -[Robb Smith]
  • “What do you mean blink once if it hurts? Are you serious?” – [Rollyn01]

This week’s winner is [Will Frankian] with “Dr. Banks never tried eyeballing the electron beam alignment again”. Congrats [Will]! Enjoy your LightBlue Bean from The Hackaday Store!

Week 20

cern-20-smAnyone who’s worked on a major project, be it professional, personal, or for a contest like The Hackaday Prize, knows about marathon sessions. Those times when you put in your all and just push the project ahead until you drop. This scientist has definitely given his all and then some! He’s catching a few winks right under the blackboard where he presumably has been working. This image has no caption, though it’s attached to an album entitled Linac control room. None of the pictures seem to show much of a control room though. It seems that back in 1966, CERN’s photographer was a bit more interested in the sleeping scientists than the science itself!

What do you think is happening in this image? Can you make anything interesting out from the diagrams on the blackboard? Give it a shot! This week’s prize is a Stickvice from The Hackaday Store.

Add your humorous caption as a comment to this project log. Make sure you’re commenting on the contest log, not on the contest itself. As always, if you actually have information about the image or the people in it, let CERN know on the original image discussion page.

Good Luck!

Phonographs Through The Eye Of An Electron Microscope

Hackaday Prize judge [Ben Krasnow] has been busy lately. He’s put his scanning electron microscope (SEM) to work creating an animation of a phonograph needle playing a record. (YouTube link) This is the same 80’s SEM [Ben] hacked back in November. Unfortunately, [Ben’s]  JSM-T200 isn’t quite large enough to hold an entire 12″ LP, so he had to cut a small section of a record out. The vinyl mods weren’t done there though. SEMs need a conductive surface for imagingphono_anim_1. Vinyl is an insulator. [Ben] dealt with this by using his vacuum chamber to evaporate a thin layer of silver on the vinyl.

Just imaging the record wouldn’t be enough; [Ben] wanted an animation of a needle traveling through the record grove. He tore apart an old phonograph needle and installed it in on a copper wire in the SEM. Thanks to the dual stage setup of the JSM-T200, [Ben] was able to move the record-chip and needle independently. He could then move the record underneath the needle as if it were actually playing. [Ben] used his oscilloscope to record 60 frames, each spaced 50 microns apart. He used octave to process the data, and wound up with the awesome GIF animation you see on the left. 

pits[Ben] wasn’t done though. He checked out a few other recording formats, including CD and DVD optical media, and capacitance electronic disc, an obscure format from RCA which failed miserably in the market. The toughest challenge [Ben] faced was imaging the CD media. The familiar pits of a CD are stored on a thin aluminum layer sandwiched between the lacquer label and the plastic disc. He tried dissolving the plastic with chemicals, but enough plastic was left behind to distort the image. The solution turned out to be double-sided tape. Sticking some tape down on the CD and peeling it off cleanly removed the aluminum, and provided a sturdy substrate with which to mount the sample in the SEM.

We’re curious if stereo audio data can be extracted from the SEM images.  [Oona] managed to do this with a mono recording from a toy robot.  Who’s going to be the first one to break out the image analysis software and capture some audio from [Ben’s] images?

Continue reading “Phonographs Through The Eye Of An Electron Microscope”