Hackaday Prize Entry: Bone Conduction Headphones

Beats headphones are very popular, they’re everywhere, and they sound like trash. That’s a shame, because there’s a century of recorded music out there that sounds really good. [WΛLLTΞCH] forgot about [Dre] and started looking into a better way to listen to music. He came up with bone conduction transducers and started one of the most interesting projects for this year’s Hackaday Prize.

Instead of driving a speaker cone that vibrates the air, passes through the middle ear, and vibrates the eardrum, bone conduction amplifiers bypass the outer and middle ear completely. Not only does this produce a clearer reproduction of sound, but it’s also great for anyone with an abnormality in the ear canal, ear drum, or the tiny bones of the inner ear.

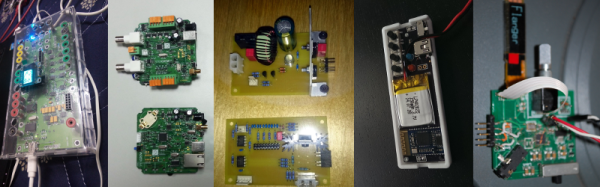
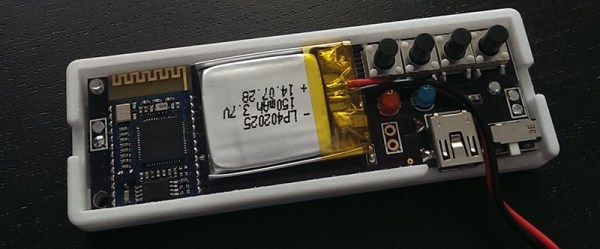
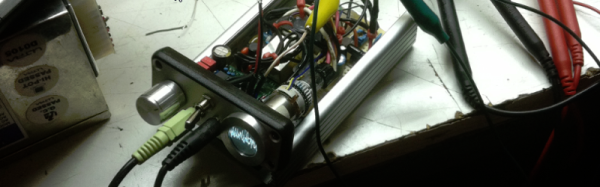
[WΛLLTΞCH]’s first prototype is using a bone conduction amplifier and a cheap Bluetooth module, stuffed into a small 3D printed case. With two 1W transducer modules, it was enough for a proof of concept. The final design is vastly more integrated, with a dedicated Bluetooth audio module. To this, [WΛLLTΞCH] is adding microphones and the ability to take calls over Bluetooth. It’s a great project, and something that could make a great product, something we’re also looking for in this year’s Hackaday Prize.

The 2015 Hackaday Prize is sponsored by:

Bread Online

Bread Online Is A Bread Maker For The Internet Of Things

An engineering student at the University of Western Macedonia has just added another appliance to the ever-growing list of Internet enabled things. [Panagiotis] decided to modify an off-the-shelf bread maker to enable remote control via the Internet.

[Panagiotis] had to remove pretty much all of the original control circuitry for this device. The original controller was replaced with an Arduino Uno R3 and an Ethernet shield. The temperature sensor also needed to be replaced, since [Panagiotis] could not find any official documentation describing the specifications of the original. Luckily, the heating element and mixer motor were able to be re-used.

A few holes were drilled into the case to make room for the Ethernet connector as well as a USB connector. Two relays were used to allow the Arduino to switch the heating element and mixer motor on and off. The front panel of the bread maker came with a simple LCD screen and a few control buttons. Rather than let those go to waste, they were also wired into the Arduino.

The Arduino bread maker can be controlled via a web site that runs on a separate server. The website is coded with PHP and runs on Apache. It has a simple interface that allows the user to specify several settings including how much bread is being cooked as well as the desired darkness of the bread. The user can then schedule the bread maker to start. Bread Online also comes with an “offline” mode so that it can be used locally without the need for a computer or web browser. Be sure to check out the video demonstration below. Continue reading “Bread Online Is A Bread Maker For The Internet Of Things”

Headphone Amp Features A Tiny CRT

[ErikaFluff] needed an amp for her Grado open cans. Rather than build yet another boring black box, she built what may be the most awesome headphone amp ever by adding a tiny CRT which displays the current audio waveform. She packaged all this up in a customized Hammond box which makes it look like it just rolled off the line from some audiophile studio.

The amplifier in this case is based upon the CMoy, a common headphone amp design. [ErikaFluff] added a MOSFET on the output to drive his relatively low impedance (32 ohm) Grado headphones with reasonable volume. The CRT is from an old video camera viewfinder. Before LCDs were advanced and cheap enough to include in video cameras, CRTs were the only show in town. These tiny black and white screens use high voltage to scan an electron beam across a phosphor screen just like their bigger brethren.

In action! - ImgurSince she was going with an oscilloscope style vector scan rather than the raster scan the screen electronics were originally designed for, [ErikaFluff] had to create her own horizontal and vertical deflection circuits. Horizontal scan is created by a 555 timer generating a sawtooth wave at 75 Hz. Vertical deflection is via an LM386 driving a hand wound impedance matching transformer. The high voltage flyback transformer and its associated driver circuit were kept from the original CRT, though repackaged to make them as small as possible.

You might think that having a few thousand volts next to a sensitive audio amplifier would cause some noise issues. We also worried a bit about shorts causing unexpected shock treatments through the wearer’s ears. [ErikaFluff] says there is no need to for concern — the signal is fed to the CRT circuit through optocouplers. The audio circuit is also electrically split from the CRT and runs on a virtual ground. Judicious amounts of shielding tape keeps the two circuits isolated.

This may not be the most practical project, but we think it’s pretty darn cool. The response over on Reddit’s electronics subreddit seems to be positive as well. We hope [ErikaFluff] is sitting down when this post gets published!

Hackaday’s Interview With Arduino CEO [Massimo Banzi]

I caught up with [Massimo Banzi] at the Shenzhen Maker Faire to talk about manufacturing in China, the current and future of Arduino, and how recent events may shape the Open Hardware landscape.

The big news from Arduino at SZMF is a new partnership with Seeed Studio to manufacture theGenuino. This is an official Arduino board manufactured in China for the Chinese market. Knowing that the board is official and connected to the founders is key point to get makers to adopt this hardware. [Massimo] makes a good point about the ideal of “Proudly Made in China” which I could see as a selling point for the burgeoning maker market there. This may be a growing principle in China, but in an ocean of clone boards it sounds like a tough path forward. On the other hand, their booth was mobbed with people putting in new orders.

[Massimo] belives the current Arduino strife has actually served to move the project forward. He cites the schism between arduino.cc and arduino.org for catalyzing manufacturing partnerships with both Adafruit Industries and Seeed Studios. This has resulted in official Arduino hardware that is not made only in Italy, but made in the region the hardware will be used; NYC for US orders, Shenzhen for China orders.

Our discussion wraps up with a plea from [Massimo] for the Hackaday community to be a little less fickle about projects using Arduino. That one makes me chuckle a bit!

Micro:bit — BBC Gets A Million Kids Into Embedded Dev

In the Early 1980s, the BBC launched a project to teach computer literacy to a generation of British schoolchildren. This project resulted in the BBC Micro, a very capable home computer that showed a generation exactly what a computer could do. These children then went home, turned on their ZX Spectrums, and became a generation of software engineers. Still, the BBC Micro is remembered fondly.

The computer revolution is long over, but today we suffer a sea change of embedded processors and microcontrollers. With Arduinos and Raspberry Pis, the BBC has decided it’s time to put the power of an ARM microcontroller into the hands of a million 11- and 12-year olds. The result is the Micro:bit. It’s a small microcontroller board with an ARM processor, an IMU, buttons, Bluetooth and a 5×5 LED array – exactly what you need if you’re teaching a million kids how to blink an LED.

Although the BBC has finalized the design for the Micro:bit, there are no specs at all. However, a few educated guesses can be made. The USB controller is provided by Freescale, who also provide the digital compass and magnetometer. Programming is done through a web-based, Arduino-like IDE with what appears to be a decent Micro:bit specific library. The board is also mbed compatible. Bluetooth, and apparently the ARM Cortex M0 core, is provided by a Nordic nRF51822. There are only three alligator clip-compatible I/Os, and its doubtful any student will be building anything that would be too complex for an entry level ARM. It’s also 3V logic; finally, the tyranny of 5V has fallen.

The Micro:bit is best seen as a tool that enables the relatively recent addition of a computer science curriculum in UK schools. There is now a requirement for seven-year-olds to understand algorithms and create simple programs. Previously computer education in the UK has consisted of PowerPoint. Now, secondary school students will be learning Boolean logic.

While the Micro:bit is utterly useless as a tool for doing real work, education is not real work. For blinking a few LEDs, having a device react to movement, playing with Bluetooth, and other lesser evils of electronics, the Micro:bit is great. Not everyone will become the digital technologists this initiative is trying to create, but for those who have an inclination towards semicolons and electrons, this is a great introduction to technology.

50 Winners Using Microchip Parts

For the last few weeks we’ve been celebrating builds that use parts from our manufacturer sponsors of the 2015 Hackaday Prize. Today we are happy to announce 50 winners who used Microchip parts in their builds. Making the cut is one thing, but rising to the top is another. These builds show off some amazing work from those who entered them. In addition to the prizes which we’ll be sending out, we’d like these projects to receive the recognition they deserve. Please take the time to click through to the projects, explore what has been accomplished, and leave congratulations a comment on the project page.

Still Time to Win!

We’re far from the end of the line. We’ll be giving roughly $17,000 more in prizes before the entry round closes in the middle of August. Enter your build now for a chance in these weekly contests! This week we’re looking for things that move in our Wings, Wheels, and Propellers Contest.

One voter will win $1000 from the Hackaday Store this week as well! Anyone is welcome to vote in Astronaut or Not. Vote Now! The drawing is tomorrow afternoon.

Continue reading “50 Winners Using Microchip Parts”

Upgrading An Old Lantern

[Shockwaver] stumbled across some old kerosene lanterns, and decided he also stumbled across his next project. He decided to leave the kerosene out, and in its place used some RGB LEDs to bring the lanterns back to life. This is quite an upgrade. Considering the burning kerosene will only put out a few colors of light, the astute reader will have realized the RGB array has the ability put out over 16 million colors.

After some initial testing, he settled on a 24 LED circle array powered by an ATtiny85. The FastLED library helped him keep the code within the tight memory requirements. [Shockwaver] was not used to working with the such a small amount of memory, but after some fiddling he was able to make it work in the end, using 8,126 bytes.

The source can be found on his github page. Be sure to check out the video below to see the RGB lantern in action.

Continue reading “Upgrading An Old Lantern”