Hacking The Linksys WRT120N Part 2

linksysjtag

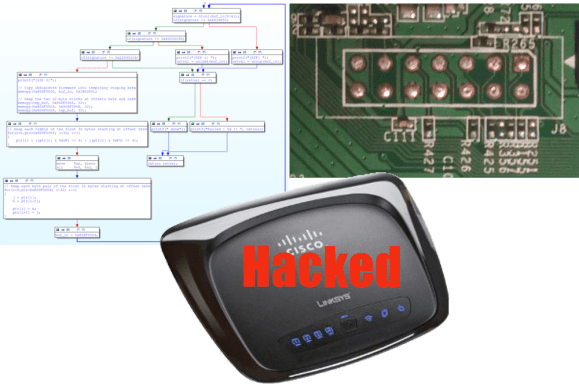
[Craig Heffner] has been busy with his Linksys WRT120N router. When we last checked in on [Craig] he had reverse engineered the obfuscation techniques used in the router’s firmware. Since then, he’s re-enabled JTAG, cracked the “encryption” used for saving configuration backups, and now he’s devised a simple attack to change the admin password.  With the firmware unlocked, [Craig] went after the hardware JTAG. His first hurdle was a missing jumper connecting the TDI pin to the processor. With a solder blob making the connection, he then found the router would connect to his JTAG debugger, and immediately reset. TDI had been re-used as a GPIO in software, and assigned to the reset button on the back of the router. [Craig’s] JTAG pod was pulling the pin low and causing the reset. To make matters worse, the bootloader also redefined and checked for the reset button. If the button were pressed it would boot into a recovery mode. [Craig] patched the bootloader with a little help from IDA pro. He then desoldered the router’s flash and programmed it outside the system. The firmware required a similar patch. Rather than desolder the flash chip again, [Craig] created a firmware update the router would accept and flashed it via the router’s web interface.

Since he already was deep into the Linksys Firmware, [Craig] looked for any obvious attack vectors. He found a big one in the /cgi/tmUnBlock.cgi. Inside the firmware, the URL sent to the CGI would be sent through sprintf().  In plain english, it means that no input length checking was happening – so a URL longer than the firmware engineers expected (in this case 256 bytes) would overflow into areas of memory it wasn’t supposed to – in this case, the stack. For an astute attacker, that’s a wide open door.  [Craig] was able to use find some Return Oriented Programming (ROP) gadgets and created an input value that would cause the router to reset its own administrator password. After running the exploit, a quick trip to the router’s webpage proved his attack was successful.

If that wasn’t enough, [Craig] also spent some time looking at the patches to the router’s firmware. The release notes of one of the patches mentioned encrypting configuration files. The WRT120N, like many routers, allows the owner to download and save the configuration as a file. It turned out that the “encryption” scheme was nothing more than an exclusive OR with 0xFF. A pretty weak encryption scheme by any standards. To [Craig] we send our congratulations. To the WRT120N software engineers, we’d suggest taking one of [Craig’s] embedded device exploitation classes.

Weather Clock Puts OLPC To Work

weather-clcok

A clock to tell the weather? [Andrew] has created a device to do that and more. Inspired by [Sean’s] weather clock, [Andrew’s]clock displays the current weather conditions, temperature, moon phase, and of course the time. The whole project started years ago with a broken keyboard. [Andrew] wanted to try to use the keyboard controller PCB as a bidirectional computer interface. Data to the computer would go in via the key matrix. Output data would be read via the status LEDs. Cheap simple microcontroller boards like the Arduino sidelined the project for a few years, but he never completely left it behind.

With an unused OLPC XO-1 in hand, [Andrew] pulled out his old keyboard controller and started hacking. His first task was getting meaningful data out of the keyboard LEDs. He coded up his own keyboard led control library in python. On the hardware side an op amp took on the roll of a comparator to ensure proper logic levels were present. [Andrew] then hooked two LEDs up as clock and data lines to standard 74 series shift registers (most likely 74HC/HCT595). He found that his data was completely garbled due to bounce. A second shift register buffering the clock cleaned things up. [Andrew] was left with a stable 40 bits per second serial link to his shift registers. With all this done, the next step was the clock itself. [Andrew] bought a RUSCH Wall clock from IKEA, and converted the clockwork to a gear reduction for a DC motor he pulled from an old answering machine. He could now move the hands at will, but had no way to determine their position. IR break beam sensors from old printers came to the rescue.

After connecting the motor drive, [Andrew] still had a number of outputs available. A few LEDs were in his parts box, so into the project they went. 12 LEDs around the outside of the clock to display the current time. 3 LEDs hide behind the weather icons as status indicators. [Andrew’s] python software really ties this together. His OLPC grabs data from the internet and displays it on the clock. A web interface allows the user to perform manual updates on the clock and to set alarms. The alarms even incorporate speech output via eSpeak. We love the reuse and recycling of parts in this hack. The end result is a clock any hacker would be proud to display on their wall.

Continue reading “Weather Clock Puts OLPC To Work”

Omnidirectional Robot Takes On A Candy Factory

OmniRobot

[AltaPowderDog] is building a competition robot as part of his freshman engineering course at Ohio State University. The contest is sponsored by Nestle, so it’s no surprise the robots have to perform various tasks in a miniature candy factory. Broken up into teams of four, the students are building autonomous robots to move pallets, scoop candy, operate switches and pull pins from tubes. Each team is provided a standard microcontroller board and funds to purchase robot parts from an online store. The factory also sports an overhead infrared navigation system, which should help the robots stay on track.

[AltaPowderDog] took his inspiration from [Michal’s] OmniBot, which used adjustable geometry wheels. A lever and gear system allows the robot to pivot all four wheels synchronously. This effectively allows the robot to turn within its own axis. With some proper path planning and end effector placement, [AltaPowderDog’s] team should be able to shave down their time through the candy factory. The team has run into a few issues though. This robot design only utilizes two powered wheels, which has caused the team to become stuck up on a ramp in the factory. To combat this, the team is installed a simple suspension which allows the non-powered wheels to move up and out of the way on the ramp. The results look promising. The video after the break includes a short clip of [AltaPowderDog’s] ‘bot making a quick turn and activating a switch. Very nice work!

Continue reading “Omnidirectional Robot Takes On A Candy Factory”

Arduino Gets Fowl With Flappy Bit

flappy-bit

We have to swallow our pride and hand it to [Dan200]. He may have finally found an application that everyone can agree is a perfect fit for Arduino. Flappy Bit is [Dan’s] Arduino Uno based Flappy Bird clone. [Dan] is a software guy at heart, but he’s taken a peck at electronics of late. Flappy Bit was just a fun side project for him to learn how to program the Arduino. The hardware consists of an 8×8 LED matrix, current limiting resistors, and a single button.

[Dan’s] implementation isn’t 100% faithful to the iOS/Android original. Rather than simply parrot Flappy Bird, he changed it up a bit. The user presses and holds the button to climb, and releases it to descend. This seems to make the game a bit more forgiving. We also won’t be missing all the lovely sound effects from Flappy Bird.  While there is less flapping in Flappy Bit, it does make us more nostalgic for those  tabletop LCD/LED games we played in the 80’s and can’t stop crowing about today.

[Dan] has released the full source code to the project (Pastebin link), and there is more information available on his reddit thread. Give flappy bit a try. You won’t egret it!

Continue reading “Arduino Gets Fowl With Flappy Bit”

Low Budget Omnidirectional Treadmill

Omni-treadmill

Moving around in space is one of the major hurdles in virtual reality. A holodeck wouldn’t be much fun if you kept walking into walls.  [Gamnaught] is working on a simple solution to this complex problem with his budget omnidirectional treadmill. Omnidirectional treadmills have been around in various forms for a number of years. The idea behind them simple: allow a person walk in any direction without actually changing their position. This is a bit different from the unidirectional treadmill models found at the local gym. Some very complex solutions have been used to create omnidirectional treadmills, including multiple motors and computer control systems as can be found in the US Army omnidirectional treadmill.  [Gamnaught] kept it simple. He built a circular 2×4 platform 13-15 degree bowl. The bowl is covered with carpet, and the user wears furniture sliders on their shoes. The low friction of the sliders allows the user to walk, run, and even walk backwards on the platform. Bungie cords provide resistance so the user doesn’t walk off the platform.

The early results look promising. [Gamnaught] says the balance felt a bit weird at times and took some getting used to. Anyone who has spent time with the Oculus Rift or other VR systems will tell you – many aspects of virtual reality take some getting used to. The treadmill is still open loop, however [Gamnaught] hopes to add motion tracking with a Sixense STEM system. We think a OpenCV based system would work as well. We’ve also seen carpet sliders sold as a children’s toy to be strapped over regular sneakers. Going the toy route would avoid needing a dedicated pair of footwear for the treadmill. More build information can be found on [Gamnaught’s] Reddit thread on the topic.

Continue reading “Low Budget Omnidirectional Treadmill”

Lichtspiel Crosses Board Games With Video games

Lichtspiel

Video games are amazing these days. Cinemagraphic game play, incredible accelerated graphics, you name it. The average tabletop board game though, has not received the benefit of all this technology. [Marcel] hopes to provide some options for changing that with Lichtspiel, an Interactive Digital Boardgame. Lichtspiel uses a Philips Pico-Beamer projector to project the game board onto a white surface. A camera (either a Raspberry Pi camera module or a Logitech USB webcam) then picks up the players interactions with the game board. Actual interaction is done with small black chips. When a player moves their chip, the vision system sends the x,y coordinates main processor. The game then changes based upon the chip position. [Marcel’s] video shows two demonstrations, a matrix style board game simulation for two and a co-operative asteroids style game. In the asteroids style game one player moves the ship while the other aims the weapons.

We can’t help but see the similarities between this system and the board game demos for castAR , though we feel they fill different niches. Lichtspiel does away with 3D, and by doing so doesn’t require projection glasses to play. Lichtspiel definitely has possibilities. We’d love to see [Marcel] open up his software design so that it can be further developed.

Continue reading “Lichtspiel Crosses Board Games With Video games”

Fixing The Unfixable: Pebble Smartwatch Screen Replacement

[Colt] found himself with a broken Pebble, so he fixed it. The Pebble watch really ignited the smartwatch world with its record-breaking Kickstarter campaign. Working on the Pebble has proved to be frustrating experience for hardware hackers though. Ifixit’s teardown revealed the Pebble extremely difficult to repair. This isn’t due to some evil plan by the smartwatch gods to keep us from repairing our toys. It’s a problem that comes from stuffing a lot electronics into a small waterproof package. [Colt’s] problem was a bad screen. Pebble has a few known screen issues with their early models. Blinking screens, snow, and outright failed screens seemed to happen at an alarming rate as the early Kickstarter editions landed. Thankfully all those issues were corrected and replacements sent to the unlucky owners.

The actual screen used in the Pebble is a Sharp Memory LCD. Memory is an apt name as the screens actually behave as a SPI attached write only memory. Sharp sells flexible printed circuit (FPC) versions of the LCDs to aid in debugging. For space constrained designs though, an elastomeric or “zebra strip” connector is the common way to go. Alternating bands of conductive and insulating material make electrical connections between the Pebble’s circuit board and the conductive portions of the LCD glass.

[Colt] found himself with a dead screen out of warranty, so he decided to attempt a screen replacement. He found a replacement screen from Mouser, and proceeded to remove the top case of his watch. The top plastic case seems to be the hardest part of getting into a Pebble. It appears to be bonded with a glue that is stronger than the plastic itself. [Colt] broke the glass of his screen during the removal, which wasn’t a big deal as it was already dead. Prying only destroyed the top plastic, so he broke out a rotary tool which made quick work of the plastic.  The new screen worked perfectly, but had to be held in just the right position over its zebra connector. Some waterproof epoxy held it in place permanently. The next step was a new top cover. An old flip phone donated its plastic shell to the effort, and hot glue kept everything in place. [Colt] finished his work with a couple of layers of model paint. The result certainly isn’t as pretty or waterproof as the original. It is functional though, and about $120 USD cheaper than buying a new Pebble.

Continue reading “Fixing The Unfixable: Pebble Smartwatch Screen Replacement”