Levitating Objects In Paramagnetic Liquids

Two weekends ago was the Bay Area Maker Faire, and lacking a venue to talk to people who actually make things, we had a meetup at a pub. This brought out a ton of interesting people, and tons of interesting demos of what these people were building. By either proclivity or necessity, most of these demos were very blinkey. The demo [Grant McGregor] from Monterey Community College brought was not blinkey, but it was exceptionally cool. He’s levitating objects in paramagnetic liquids with permanent magnets.

Levitating objects in a paramagnetic solution around a magnetic field has been an intense area of research for the Whitesides Research Group for a few years now, with papers that demonstrate methods of measuring the density of objects in a paramagnetic solution and fixing diamagnetic objects inside a magnetic field. [Grant] is replicating this research with things that can be brought to a bar in a small metal box – vials of manganese chlorate with bits of plastic and very strong neodymium magnets. The bits of plastic in these vials usually float or sink, depending on exactly what plastic they’re made of. When the paramagnetic solution is exposed to a magnetic field, the density of the solution changes, making the bits of plastic sink or float.

It’s a bizarre effect, but [Grant] mentioned a nurd rage video that shows the effect very clearly. [Grant]’s further experiments will be to replicate the Whitesides Research Group’s experiment to fix a diamagnetic object inside a magnetic field. As for any practical uses for this effect, you might be able to differentiate between different types of plastic (think 3D printing filament) with just a vial of solution and a strong magnet.

[Grant] was heading out of the pub right when I ran into him, but he did stick around long enough to run into the alley behind the pub and record an interview/demo. You can check that out below.

Continue reading “Levitating Objects In Paramagnetic Liquids”

LayerOne Demoscene Demoboard Party

The LayerOne conference is over, and that means this last weekend saw one of the biggest demoscene parties in the USA. Who won? A European team. We should have seen this coming.

There were two categories for the LayerOne demo compo, the first using only the LayerOne Demoscene Board. It’s a board with a PIC24F microcontroller, VGA out, and a 1/8″ mono audio out. That’s it; everything that comes out of this board is hand coded on the PIC. A few months ago, [JKing] wrote a demo to demonstrate what this demoboard can do. According to him, it’s the only reason Hackaday sold a single Demoboard in the Hackaday store:

Continue reading “LayerOne Demoscene Demoboard Party”

The Hackaday Prize: An Ultra Low Cost 3D Printer Controller

This isn’t a Hackaday Prize entry that will change the world, but that doesn’t mean there’s not a place for it. [vdirienzo] is building an ultra low-cost 3D printer controller for 3D printers and other CNC machine. It’s not going to change the world, but it is a rather interesting little device.

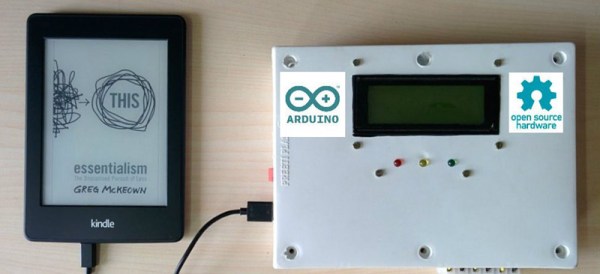
This printer controller is very minimal, with a single-sided circuit board with just enough parts and components to make this board useful. The stepper motor drivers are from Pololu, and most of the other components are stuff you could pull out of a reasonably stocked junk drawer. The microcontroller is rather interesting; it’s an Arduino Nano. Instead of the ATMega644 and ‘Mega1280 microcontrollers found on other 8-bit printer controller boards, [vdirienzo] slimmed down the Teacup firmware to fit on the ATMega328 in the Arduino Nano.

The SinapTec is not by any means the first effort to create an ultra low-cost controller board for a 3D printer that can be assembled at home. The RepRap Gen 7 electronics can be manufactured on a RepRap or small CNC mill. There’s not much to these boards – just a small, single-sided board. If you want a small, simple, and cheap controller board for a 3D printer, this is all you need.

While a cheap 3D printer controller board doesn’t really fit with the ‘change the world’ theme of The Hackaday Prize, that doesn’t mean there’s still not a place in the contest for [vdirienzo]’s entry; we have a Best Product category, with a $100k prize and a six month residency in the Hackaday Design Lab. If that’s not enough reason to build something cool – even if it won’t change the world – we don’t know what is.


The 2015 Hackaday Prize is sponsored by:

Hackaday Prize Entry: The Chocometer

Diabetes affects almost 400 million people worldwide, and complications due to diabetes – blindness, cardiovascular disease, and kidney problems – can be reduced by regular monitoring of blood glucose. The usual way of measuring blood glucose is with a pin prick of blood and a small test strip that costs about $0.30. That’s a lot of test strips and blood used by 400 million diabetics every day. Wouldn’t it be better if there was a less invasive way of measuring blood glucose?

[marcelclaro]’s project for The Hackaday Prize aims to do just that. Instead of measuring blood directly, his project will measure blood glucose by shining light through a finger or an earlobe. Using light to detect blood glucose is something that has been studied in the lab, but so far, there aren’t any products on the market that use this technique.

There are two major problems [marcel] needs to overcome to turn this project into reality. The first is simply raw data for calibration. For [marcel], this is easy; he has Type 1 diabetes, and takes four glucose measurements a day. Patient heal thyself, or something.

The second problem is getting a photosensor that’s sensitive enough. By using an InGaAs PIN diode, a current-controlled oscillator, and a digital counter, [marcel] should have a sensor that’s good enough, with electronics that are cheap enough, to create some tech that is truly game changing for a few hundred million people around the world.


The 2015 Hackaday Prize is sponsored by:

Hackaday Links Column Banner

Hackaday Links: May 24, 2015

A few months ago, we heard about a random guy finding injection molds for old Commodore computers. He did what the best of us would do and started a Kickstarter to remanufacture these cool old cases. It’s the best story on retrocomputing this year, and someone else figured out they could remanufacture Commodore 64 keycaps. If you got one of these remanufactured cases, give the keycaps a look.

Remember this Android app that will tell you the value of resistors by reading their color code. Another option for the iOS crowd was presented at Maker Faire last weekend. It’s called ResistorVision, and it’s perfect for the colorblind people out there. An Android version of ResistorVision will be released sometime in the near future.

A few folks at Langly Research Center have a very cool job. They built a hybrid electric tilt wing plane with eight motors on the wing and two on the tail. It’s ultimately powered by two 8 hp diesel engines that charge Liion batteries. When it comes to hydrocarbon-powered hovering behemoths, our heart is with Goliath.

A bottom-of-the-line avionics panel for a small private plane costs about $10,000. How do you reduce the cost? Getting rid of FAA certification? Yeah. And by putting a Raspberry Pi in it. It was expoed last month at the Sun ‘N Fun in Florida, and it’s exactly what the pilots out there would expect: a flight system running on a Raspberry Pi. It was installed in a Zenith 750, a 2-seat LSA, registered as an experimental. You can put just about anything in the cabin of one of these, and the FAA is okay with it. If it’ll ever be certified is anyone’s guess.

LayerOne Hardware Hacking Village

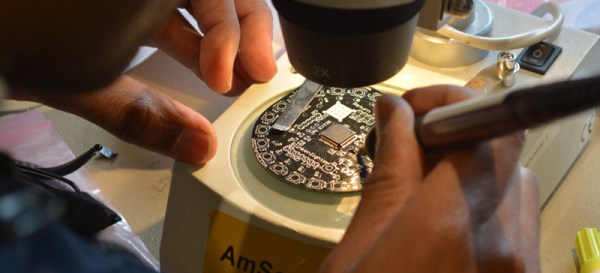
Go to DEFCON and you’ll stand in line for five hours to get a fancy electronic badge you’ll be showing to your grandchildren some day. Yes, at DEFCON, you buy your hacker cred. LayerOne is not so kind to the technically inept. At LayerOne, you are given a PCB, bag of parts, and are told to earn your hacker cred by soldering tiny QFP and SOT-23 chips by hand. The Hardware Hacking Village at LayerOne was packed with people eagerly assembling their badge, or badges depending on how cool they are.

The badges are designed by [charlie x] of null space labs, one of the many local hackerspaces around the area. The design and construction of these badges were documented on the LayerOne Badge project on hackaday.io, and they’re probably best con badges we’ve ever seen.

There are two badges being distributed around LayerOne. The first is an extremely blinkey badge with a Cypress PSoC4 controlling 22 individually addressable RGB LEDs. Most conference attendees received a bare PCB and a bag of parts – the PCB will get you in the door, but if you want your nerd cred, you’ll have to assemble your own badge.

There are still a few interesting features for this badge, including an ESP8266 module that will listen to UDP packets and drive the LEDs. Yes, a random person on the same WiFi AP can control the LEDs of the entire conference event. The badges can also be chained together with just three wires, but so far no one has done this.

vocore
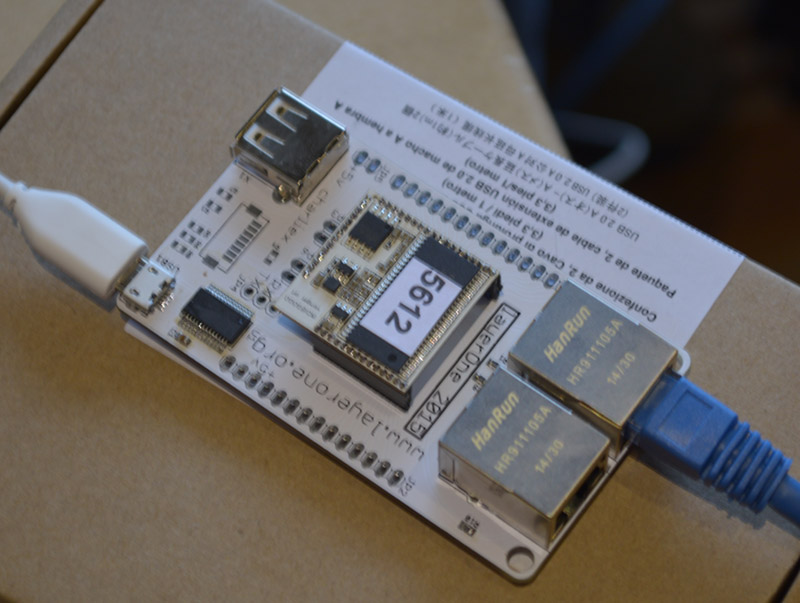
The Speaker and Staff badge, based on a VoCore

The second badge – for speakers and staff – is exceptionally more powerful. It’s a Linux box on a badge with two Ethernet connectors running OpenWRT. For a con badge, it’s incredibly powerful, but this isn’t the most computationally complex badge that has ever been at a LayerOne conference. For last year’s badge, [charlie] put together a badge with an FPGA, SAM7 microcontroller, SD card, and OLED display. They were mining Bitcons on these badges.

The Hardware Hacking Village was loaded up with a dozen or so Metcal soldering irons, binocular microscopes, and enough solder, wick, and flux to allow everyone to solder their badge together. Everyone who attempted it actually completed their badge, and stories of badge hacking competitions at other cons were filled with tales of people sprinkling components on random solder pads. Imagine: a conference where people are technically adept. Amazing.

Hackaday Prize Entry: Arduino MPPT Controller

Imagine you’re building a small solar installation. The naive solution would be grabbing a solar panel from Horror Freight, getting a car battery and AC inverter, and hoping everything works. This is the dumb solution. To get the most out of a solar you need to match the voltage of the solar cell to the voltage of the battery. How do you do that? With [Debasish]’s entry for The Hackaday Prize, an Arduino MPPT Solar Charge Controller.

This Maximum Power Point Tracker uses a buck converter to step down the voltage from the solar cell to the voltage of the battery. It’s extremely efficient and every proper solar installation will need a charge controller that does something similar.

For his MPPT, [Debasish] is using an Arduino Nano for all the math, a DC to DC buck converter, and a few MOSFETs. Extremely simple, but [Debasish] is connecting the entire controller to the Internet with an ESP8266 module. It’s a great example of building something for much less than it would cost to buy the same thing, and a great example for something that has a chance at making the world a little better.


The 2015 Hackaday Prize is sponsored by: