WebSockets, Raspis, And GPIO

socket

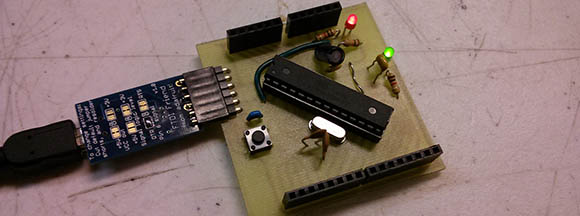
A while back, [Blaise] tried his hand at getting the WebSocket protocol working with PIC microcontrollers, WiFi adapters, and a few pots, knobs, and switches. It was an excellent project for its time, but now [Blaise] has a Raspberry Pi, and the associated GPIO pins and Ethernet connection. He decided it was time to upgrade his build to the Pi, this time with a project he calls PiIO.

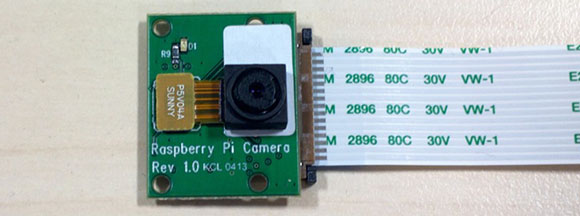
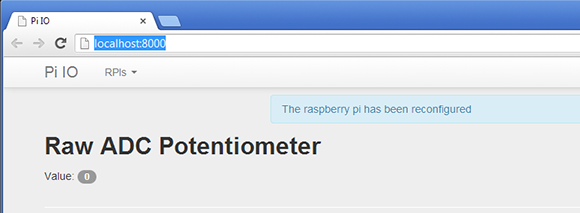
The basic idea of [Blaise]’s project requires a Pi, a server, and a computer running a browser for the end user. On the Pi side of the build, [Blaise] connected a Microchip MCP3008 eight input, 10-bit ADC via the SPI bus. The Pi takes the ADC sensor values from pots, buttons, or any other analog source and sends them to a server with the WebSocket protocol.

The server hosts a web site written with Django, Autobahn, and Python to communicate with the Pi and host the web page for the data received from the Pi. There’s support for multiple Pis in [Blaise]’s build, making complicated projects we can’t even conceive very possible.

[Blaise] put up an awesome demo video of PiIO up; you can check that out after the break.

Continue reading “WebSockets, Raspis, And GPIO”

PCB Production Workshop Means Everyone Gets An Arduino

nano

Over at the LVL1 hackerspace in Lousiville, [Brad] is putting together a workshop on etching PCBs at home. [Brad] wanted all the participants to take home something cool, so he settled on an Arduino clone as the workshop’s project.

The clone [Brad] used is the Nanino, a single-sided board we’ve seen before. Unfortunately, there aren’t any CAD files for the Nanino and doing a toner transfer with the existing PDFs was a pain. This led [Brad] to redraw the Nanino in Diptrace and put the files up for everyone to grab.

In his workshop, [Brad] is going to be using a laser printer, hydrogen peroxide, and HCl. one of the most common setups for home etching. If you’re in the Louisville area, you can make your own Nanino with a home etching workshop on March 16th. Be careful, though: those LVL1 guys are pretty weird; they have a moat and are building a homicidal AI.

Making Karaoke Worse

kaoss belt

Karaoke just isn’t fair. Not only do you have people who can’t sing choosing to belt out extremely difficult to sing songs, but the variety of songs generally isn’t that great. In an effort to make the karaoke situation at the pubs he frequents better – or worse, depending on how you look at it – [cosmic blooper] is now bringing a vocal effects processor to karaoke. Yes, now he’s got pitch shifting that takes him into [Bieber] territory, and auto tune to emulate the [T-Pain] and the Black Eyed Peas.

To bring the world of synths and effects to a karaoke party, [cosmic blooper] took a battery-powered Kaoss Pad and attached it to his belt with the help of some sheet metal. An RCA to XLR adapter connects the Kaoss Pad to the karaoke microphone, while a mic of questionable quality takes [blooper]’s voice to be transmuted into a horrifying display of effects and pitch shifters.

There’s no video of [cosmic blooper]’s karaoke machine in action, but he tells us he’ll be getting one up soon.

Raspberry Pi Camera Board Incoming

camera

Your Raspberry Pi has on-board connectors for cameras and displays, but until now no hardware demigod has taken up the challenge of connecting an image sensor or LCD to one of these ports. It seems everyone is waiting for official Raspi hardware designed for these ports. That wait is just about over as the Raspberry Pi foundations is hoping to release a camera board in the coming weeks.

The camera module is based on a 5 megapixel sensor, allowing it to capture 2560×1920 images as well as full 1080 video with the help of some drivers being whipped up at the Raspberry Pi foundation.

Considering the Raspi USB webcam projects we’ve seen aren’t really all that capable – OpenCV runs at about 4 fps without any image processing and about 1 fps with edge detection – the Raspberry Pi camera board should be less taxing for the Pi, enabling some really cool computer vision projects.

The camera board should be available in a little more than a month, so for those of us waiting to get our hands on this thing now, we’ll have to settle for the demo video of the Pi streaming 1080p video to a network at 30fps after the break.

Continue reading “Raspberry Pi Camera Board Incoming”

Shooting Ping Pong Balls At Mach 1.2

Ping%20pong%20gun

Next time you’re in a Nerf gun battle, you better hope you’ve got this absurdly powerful ping pong ball gun. It shoots common celluloid spheres at over 400 meters per second, or Mach 1.2.

This ping pong gun is the work of [Mark French], [Craig Zehrung], and [Jim Stratton] at Purdue University. As you would expect, the gun is powered by compressed air housed in a length of 3 inch schedule 80 PVC pipe. One end of the pressure vessel is sealed with a PVC end cap, while the other is closed off with a doubled up piece of duct tape to contain the pressure.

The interesting bit of the build is a de Laval nozzle between the pressure vessel and the barrel. Just like a rocket engine nozzle, this bit of machined PVC compresses the air coming through the burst duct tape seal and allows it to expand again, propelling the muzzle-loaded ping pong ball at supersonic speeds.

The guys have written a report on their gun, you can grab that over on arxiv.

Finding 1s And 0s With A Microscope And Computer Vision

ROM

One day, [Adam] was asked if he would like to take part in a little project. A mad scientist come engineer at [Adam]’s job had just removed the plastic casing from a IC, and wanted a little help decoding the information on a masked ROM. These ROMs are basically just data etched directly into silicon, so the only way to actually read the data is with some nitric acid and a microscope. [Adam] was more than up for the challenge, but not wanting to count out thousands of 1s and 0s etched into a chip, he figured out a way to let a computer do it with some clever programming and computer vision.

[Adam] has used OpenCV before, but the macro image of the masked ROM had a lot of extraneous information; there were gaps in the columns of bits, and letting a computer do all the work would result in crap data. His solution was to semi-automate the process of counting 1s and 0s by selecting a grid by hand and letting image processing software do the rest of the work.

This work resulted in rompar, a tool to decode the data on de-packaged ROMs. It works very well – [Adam] was able to successfully decode the ROM and netted the machine codes for the object of his reverse engineering.

Elemental Display Is Also A LED Wall

elements

[Dan] is an element collector, someone who gets his socks knocked off by bismuth crystals and the orange vapor of bromine. Of course every element collector needs a proper display case, and since the periodic table table idea is cliché, [Dan] decided to build an elemental display that’s also a really awesome LED wall.

The build started off as most do with a few sheets of plywood and 120 acrylic shelves for each item in [Dan]’s collection. The real magic happened when [Dan]’s buddy [Bill] was called in to make the display a little more interesting.

Behind each acrylic shelf is a three-LED section of a LED strip, each part of the periodic table having a different color. The 120 individual shelving units are broken down into 16-shelf groups, each driven by a custom LED driver board. These driver boards are connected to a master Arduino with phone cables and make wonderful use of a very neat TCL5940 Arduino library.

The elemental display has a few options; all-on, twinkling, an Apple ‘breathing’ mode, and a graphic eq, as shown in the video after the break.

Continue reading “Elemental Display Is Also A LED Wall”