Ouya, A $100 Game Console For Indie Developers

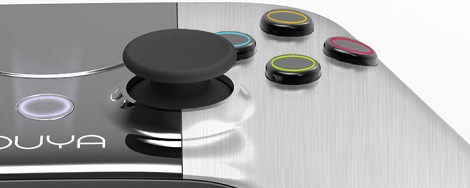
With the explosion of mobile gaming (due in no small part to the egg-bombing Angry Birds), the Ouya was bound to happen. It’s a $100 game console powered by Android that puts indie games right into your living room.

The specs for the Ouya means this cube of games isn’t a slouch: the console comes loaded with an NVIDIA Terga3 quad-core processor, 1 GB of RAM, 8 Gigs of flash storage, HDMI, WiFi, Bluetooth, and Android 4.0. A requirement for publishing games on the Ouya is making at least some of the game free to play, a la TF2 or LoL. In addition to being a video game console, Ouya will also pull down Twitch.TV streams allowing you to watch Starcraft championships and other e-sports on your big-screen TV.

Not only does the Ouya play games, its designers made the device easily hackable. There aren’t enough details to know exactly what this means, but we’re sure we’ll see a full-blown Linux distro running on the Ouya within a week of release.

As of this writing, the Ouya Kickstarter has already met their funding goal of $950,000 by taking in two million a freaking ton of money with 29 days left. This might become the most successful Kickstarter to date, and we can’t wait to see all the neat stuff and hacks for the Ouya in the near future.

Cheap As Chips Arduino Ethernet Shield

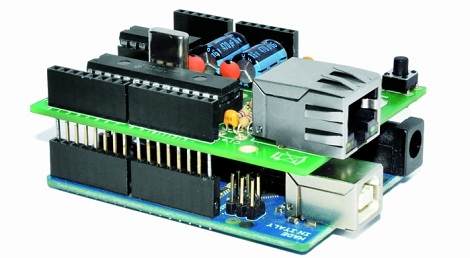
It’s no secret that Ethernet shields for the Arduino are a little expensive. With the official Ethernet shield selling for about $50 and other options not much cheaper, there’s a lot of room for improvement for Arduinofied Ethernet. [Boris] over at Open Electronics has a solution to this problem: his Ethercard powered by a $3 Ethernet controller.

The Ethercard uses the Microchip ENC28J60, a through-hole Ethernet controller. There isn’t much else on the board apart from an RJ45 jack, caps, resistors, and a cheap buffer chip. This board was designed to be easily produced, and we’re thinking it might be possible to etch this board at home.

There are a few drawbacks to this ENC28J60 Ethernet shield – the official Arduino Ethernet shield has a 10/100 Mbps connection where the Microchip-powered shield is limited to 10 Mbps. Given the reduced cost, ease of assembly, and the fact that it’s pretty hard to saturate a 100Mbps connection with an Arduino this flaw can be easily ignored.

Pretty neat, especially considering how much you can do with an Ethernet connection on your Arduino. Files and code available in the git.

Raspi Contest To Get The Kids Programming

The Raspberry Pi was originally conceived as an educational platform. Much like the BBC Micros and Apple ][s of yore, the Raspi is designed to get kids into programming by giving them a very tiny but still useful computer. Truth be told, we haven’t seen any educational hacks involving the Raspberry Pi, most likely because makers and tinkerers like us have been buying up all the available boards. The Raspi team is trying to correct this problem by holding a summer programming contest aimed at kids under 18 years of age.

The rules are simple: there are two age brackets, under 13, and ages 14-18. The kid who writes the best piece of software for the Raspberry Pi gets $1000, with five $200 runners-up in each category.The contest will run for eight weeks, timed perfectly to coincide with summer vacation.

There will be a few more weekly contests the Raspi team will be holding in the future, but with eight weeks to complete a project we can’t wait to see all the neat stuff kids are going to make.


RA 3D Printer Controller Board Does Everything, Has Disco Lights

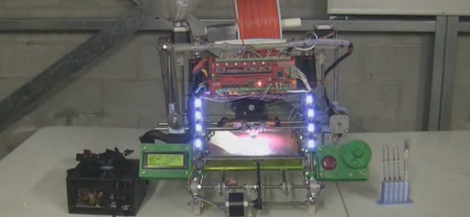
3D printers are getting far, far more complicated than a 4-axis, plastic-squirting CNC machine. These days, you really haven’t earned your geek cred unless you’ve hacked an LCD and SD card interface into your 3D printer, or at least experimented with multiple extruders. There’s a problem with the controller boards everyone is using, though: most boards simply don’t have enough output pins, greatly reducing the number of cool things a 3D printer can do.

Enter RA. It’s a new 3D printer controller board with IO for any imaginable setup. Going down the feature list of RA, we’re wondering why we haven’t seen some of these features before. A 24-pin ATX power header is soldered directly to the board, giving RA users a stupidly easy way to power their printer. Of course there are outputs for LEDs, camera triggers (printer time-lapse movies are really cool), light rings, buzzers, an LCD/rotary encoder/SD card control panel, and support for two heated beds for gigantic printers. If printing in one color isn’t good enough for you, RA has support for three extruders

Compared to other 3D printer boards such as RAMPS or the Sanguinololu, the number of outputs on this board is simply amazing. If you’re planning to build a huge, feature-laden 3D printer, you probably couldn’t do much better than what RA is offering.

Video-based Radar For Your Car

[Gustaf] has been playing around with machine vision for a while and sent in his latest project in on our tip line. It’s a video based car radar system that can detect cars in a camera’s field of vision while cruising down the highway.

Like [Gustaf]’s previous experiments with machine vision where he got a computer to recognize and count yellow cylinders and green rectangles, the radar build uses ADABoost and the AForge AI/Machine Vision C# framework. [Gustef] used an evolutionary algorithm to detect the presence of a car in a video frame, first by selecting 150 images of cars from a pre-recorded video, and the another 1,850 images were selected by a computer and confirmed as a car by a human eye.

With 2000 images of cars in its database, [Gustaf]’s machine vision algorithm is able to detect a car in real-time as he drove down a beautiful Swedish highway. In addition to overlaying a rectangle underneath each car in a video frame and an awesome  Terminator-style HUD in the upper right corner, [Gustaf] also a distance display above the hood of his car.

It’s an awesome build that makes us wonder if [Gustef] is building an autonomous car. Even if he’s not, it really makes us want to install a video HUD in our whip, just to see this in action.

On Not Designing Circuits With Evolutionary Algorithms

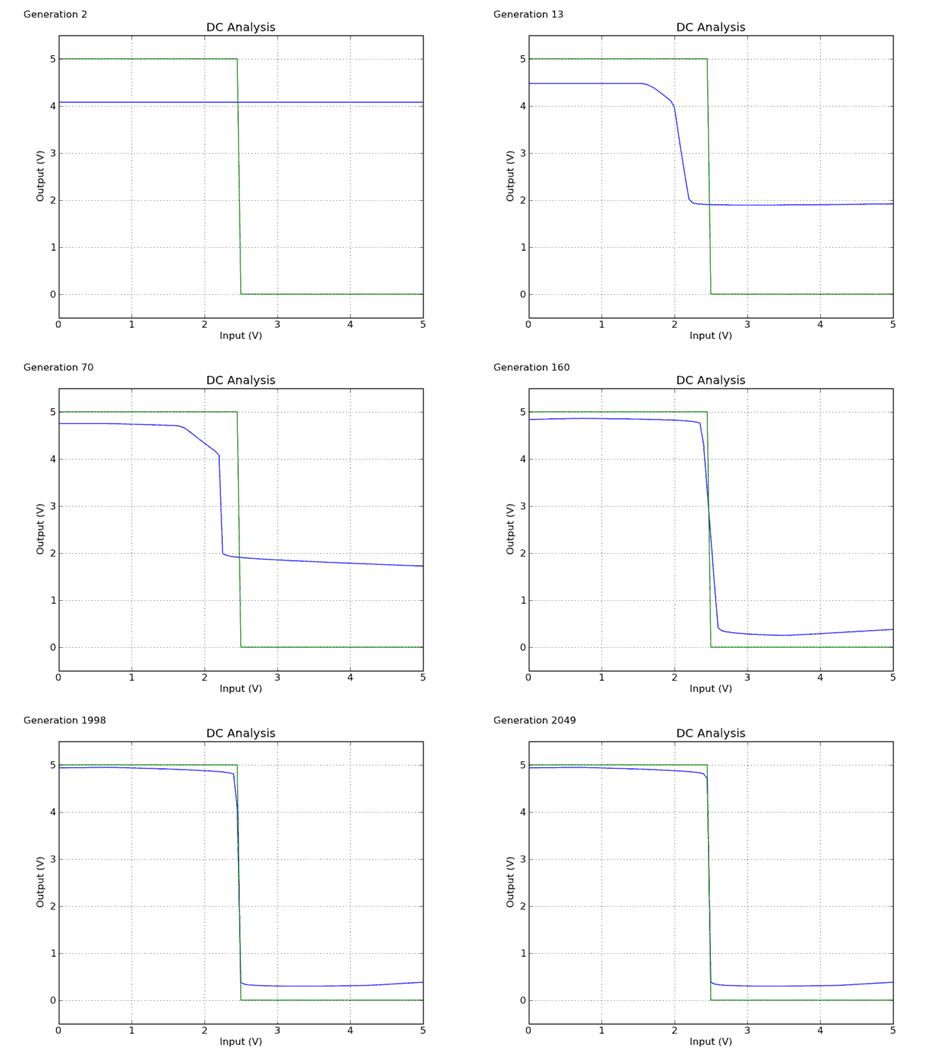
[Henrik] has been working on a program to design electronic circuits using evolutionary algorithms. It’s still very much a work in progress, but he’s gotten to the point of generating a decent BJT inverter after 78 generations (9 minutes of compute time), as shown in the .gif above.

To evolve these circuits, [Henrik] told a SPICE simulation to generate an inverter with a 5V power supply, 2N3904 and 2N3906 transistors, and whatever resistors were needed. The first dozen or so generations didn’t actually do anything, but after 2000 generations the algorithm produced a circuit nearly identical to the description of a CMOS inverter you’d find in a circuit textbook.

Using evolution to guide electronic design is nothing new; an evolutionary algorithm and a a few bits of Verilog can turn an FPGA into a chip that can tell the difference between a 1kHz and 10kHz tone with extremely minimal hardware requirements. There’s also some very, very strange stuff that happened in this experiment; the evolutionary algorithm utilized things that are impossible for a human to program and relies on magnetic flux and quantum weirdness inside the FPGA.

[Henrik] says his algorithm didn’t test for how much current goes through the transistors, so implementing this circuit outside of a simulation will destroy the transistors and emit a puff of blue smoke. If you’d like design your own circuits using evolution, [Henrik] put all the code in a git for your perusal. It’s damn cool as it stands now, and once [Henrik] includes checking current and voltage in each component his project may actually be useful.

Refurbing A C64 With A Raspberry Pi

When [Carl] first heard of the Raspberry Pi, he immeidatly though how freakin tiny this board is compared to a Mini ITX motherboard. After ordering a Raspi, [Carl] decided to put his barely-larger-than-a-credit-card computer inside a Commodore 64.

[Carl]’s updated C64 functions exactly like the original – the 30-year-old keyboard works thanks to the help of a Keyrah keyboard and control port adapter. This adapter was soldered to a stripped USB cable, allowing [Carl] to keep the finished project looking very clean and tidy. Of course, the composite, HDMI, and Ethernet ports are broken out, allowing for this computer to connect to any network or TV.

For a final touch, [Carl] painted the case. He originally wanted to spray on a black, red, and purple motif to match the Raspi, but he eventually settled on a beige and red style. [Carl] really put together an awesome build, and for much, much less money than the rereleased C64 Windows-powered monstrosity goes for. You can check out the build log video after the break.

Continue reading “Refurbing A C64 With A Raspberry Pi”