A LEGO Turing Machine For [Alan]’s Centennial

2012 is the 100-year anniversary of [Alan Turing]’s birth, and to celebrate the centennial, [Jeroen] and [Davy] over at Centrum Wiskunde & Informatica in The Netherlands built a Turing machine out of LEGO.

A Turing machine is an extremely simple device, but is still able to compute everything your desktop can. The machine is generally described as an infinite paper tape with a read/write head. On this paper tape, the numbers ‘1’ and ‘0’ are written. By precisely defining what the Turing machine should do when it comes across a ‘1’ or ‘0’, its able to do the same calculations as a laptop, albeit at a much slower rate.

The LEGO Turing machine has a series of pins signifying each bit. These pins are moved underneath a read/write head containing a light sensor and robotic arm. When a pin is down, the camera sees a dark spot signifying one state. When the pin is up, light reflects off a white LEGO piece signifying another state.

[Jeroen] and [Davy] built an IDE for their Turing machine, so if you’ve got a few LEGO NTX bricks lying around you can grab the Git and build your own. Check out the mini documentary after the break.

Continue reading “A LEGO Turing Machine For [Alan]’s Centennial”
Fast And Easy Solder Paste Stencils

If you’re making your own boards with SMD parts, you might want to get a solder paste stencil. Usually made of laser-cut mylar or extremely thin steel, these stencils allow you to squeegee solder paste onto your board’s pads and make assembly a whole lot easier. [Rochey] needed a stencil for a board he was working on, and lacking a laser cutter he turned to what he had available – a few bits of plastic and a CNC machine.

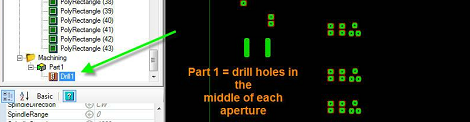
[Rochey] began making his stencils out of laminating pouches and an xacto knife. This worked well, but it was time-consuming, and a bit fiddly when cutting 1 mm square holes. To speed up the process, [Rochey] put one of these laminating pouches on his CNC machine, exported the ‘Top Cream’ layer in Eagle to the CNC software of his choice, and had his machine attack the plastic with a 1 mm drill bit.

To [Rochey]’s surprise, everything went as planned; in five minutes, he had a stencil with perfectly accurate holes that masked off everything but the SMD pads.

Thanks [Fabien] for sending this one in.

Putting Scores Of Arduinos On The Internet With One Router

Like many hackers of late, [Rick] has been experimenting with connecting Arduinos to the Internet with a disused WiFi router and an installation of OpenWRT. Unlike his fellow makers, [Rick] thought it would be wasteful to dedicate a single router to one Arduino project, so he used a small, low power wireless module to connect up to 30 Arduinos to the Internet.

Just as in a few recent builds (1, 2), [Rick] found an old Fonera router sitting in a box at his local hackerspace. After installing OpenWRT, [Rick] connected a very small wireless module to the router’s GPIO pins and patched the firmware to put an SPI bus on the router.

Now, whenever [Rick] wants to connect an Arduino project to the Internet, all he needs is a $4 radio module. This radio module connects to the router, and the router handles the networking requirements of up to 30 DIY projects.

If you’re looking to build an Internet-enable sensor network, we honestly can’t think of a better or cheaper way of going about it. Nice job, [Rick].

Emulating Mac System 7 On An Android Device

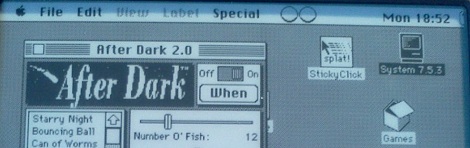
Over on the 68kmla forums, a website dedicated to old Macs built before 1994, [zydeco] released his Android port of Mini vMac, a Macintosh Plus emulator that puts the power of a Motorola MC68000 processor and System 7 on any computer.

Unlike the original Macintosh, or the subsequent revision that bumped the RAM up to 512 kilobytes, the Mac Plus was actually useful. With the addition of a SCSI port and support for 4 Megabytes of RAM, it’s not only possible to browse the Internet, but also act as a server. There’s a reason [Sprite_tm] chose to rebuild one of these classic, all-in-one machines to act as a home server; they really do epitomize the elegant computers from a more civilized age.

68kmla user [FlyingToaster] even went so far as to put a Mac Plus in his nook touch. With this, he’s got a full-blown installation of System 7 running on an e-ink screen, complete with LemmingsGauntlet, and Tetris.

It should be possible to plug this emulated box into the Internet. Unfortunately, experience tells us it won’t be a very pleasant browsing experience outside Hackaday’s retro edition.

Ask Hackaday: Has Anyone Built A Radio Telescope?

[Michael] sent in a question regarding the latest advances in software defined radios available for $20 on eBay:

I’ve been looking in to SDR lately, mainly for the possibility of using it for incredibly cheap radio astronomy. So far all I’ve found are whispers. I’m 18 and have very little experience, but I figured you might be able to help me find a little more info.

This really brings me back, [Michael]. I saw Contact in the theater (surprisingly, a rare case when the book and movie are equals), and in my childish exuberance went out and listened to lightning on Jupiter. The financial difficulties of expanding my setup meant the experiments stopped there, but at least I knew amateur radio telescopy was possible.

The latest and greatest advance in software defined radio – namely, a $20 TV tuner dongle – brings something new to the table. Instead of the thousands of dollars in gear that was required in 1997 when I last looked into this, it’s possible to set up a  passable radio telescope for under $100.

I’ll leave it to the Hackaday commentors to fill [Michael] in on the details, but here’s my suggestion:

Optimize your setup for 1420 MHz. There are three reasons for this: firstly, very few things in the universe absorb radio waves at a frequency of 1420MHz; there’s a reason it’s so often used in radio astronomy. Secondly, most government agencies around the world ban (or at least don’t look too kindly upon) transmitting on 1420 MHz. This frequency has been somewhat protected for use by astronomers. Thirdly, most of the Realtek TV tuner dongles have a frequency range of 64 – 1700 MHz, so it’s possible to receive 1420 MHz with this minimal setup.

As far as antennas go, your best bet is probably going to be one of those old C-band parabolic antennas from the 80s. That will make your telescope highly directional and give it a huge amount of gain. There is the problem of having a 20-foot-wide eyesore in your back yard, however. Alternatively, you could use a smaller DirecTV satellite dish, but I’m not making any promises with that. It’ll work, but it’s too small for an optimal setup.

I’ll concede the floor to anyone who has additional information. If you’ve built a radio telescope, send it in and I’ll put it up.

Using The GPIO Pins On A Raspberry Pi

In addition to being a serviceable single board computer, the Raspberry Pi also has a header full of GPIO pins at your beck and call. [Tedbot] sent in a great tutorial on using these pins with Python, Bash, and C.

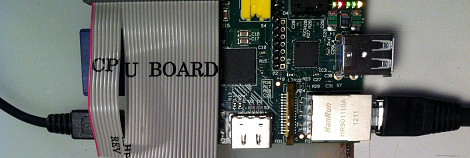
The GPIO pins on the Raspi are arranged in a 2×13 header. Until Sparkfun manages to manufacture a decent Raspi protoboard, the easiest way to break these pins out is with an old IDE ribbon cable. After plugging the other end into a breadboard, [Tedbot] had an easily accessible set of Raspi pins.

To control these pins, [Tedbot] found two libraries: the first is WiringPi that implements a C-style, Arduino-like programming environment on the Raspi. The second is the RPi.GPIO Python package. Since the Raspi runs Linux, and everything in Unix is a file, [Tedbot] used a shell script to blink a LED.

One word of warning if you’re building a board to extend the capabilities of the Raspi: these pins aren’t 5 V tolerant, so you’ll need to throw in a buffer or level converter when building a Raspi circuit.

Edit: Adafruit is releasing a Pi Plate prototyping board in a few weeks. Neat, huh?

Finally, A 3D Printer For Burritos

[Marko] created a robot that prints burritos. Truly, we’ve reached new heights as a species.

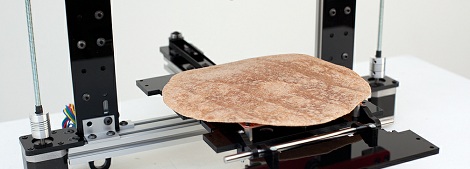
The Burritob0t is based on the ORD Hadron 3d printer with a pair of air compressor/syringe-based extruders based on the Makerbot Frostruder. All the ingredients – rice, meat, salsa, and molten cheese – will be printed onto the surface of a tortilla heated by a Makerbot heated build platform.

[Marko] has some pretty neat plans for his Burritob0t such as an iPhone app for ordering your burritos and some sort of social commentary thing using burritos. We’re assuming [Marko] hasn’t yet got this Burritob0t up and running for the lack of any action shots or demo videos. That said, there’s a wonderful Flickr gallery and an about page that covers the artistic statement behind the Burritob0t.

If you want to get your own Burritobot, [Marko] hopes to have a Kickstarter up sometime in July.