Deep Dive Into The HP ScantJet 4C

[Shelby] at Tech Tangents recently wrapped a project / obsession to obtain an old HP ScanJet 4C, get it running on a PC and put it through its paces. After after nearly five years, three scanners, and untold SCSI cards and drivers later, he finally succeeded. The first big problem was getting a working scanner. These don’t stand up well to shipping, and one arrived with broken mirrors. And when he finally got one that worked, sorting out SCSI controller and driver issues was surprisingly complicated, though ultimately successful.

The HP ScanJet 4C was introduced in 1995, and was notable for its scanning quality, its resolution ( 2400 DPI interpolated / 600 DPI optical ), and selling for under $1000. Except for replacement parts concerns, particularly the customized triphosphor fluorescent bulb assembly, it would still be a very competent scanner today. For this reason, [Shelby] will not be using it as his daily use scanner. Continue reading “Deep Dive Into The HP ScantJet 4C”


Lo-Fi Tchaikovsky

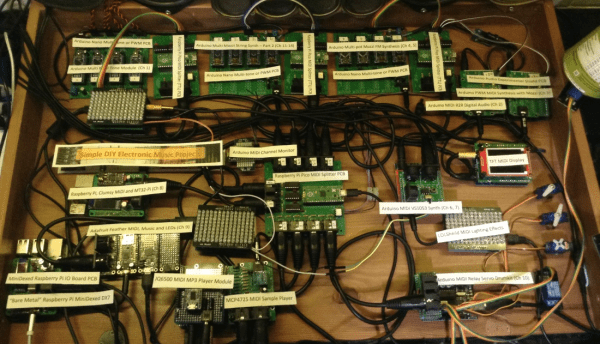
[Kevin] over at Simple DIY ElectroMusic Projects recently upgraded his Lo-Fi Orchestra. To celebrate his 400th blog post, he programmed it to play Tchaikovsky’s 1812 Overture. Two Arduino Nanos, four Arduino Unos, four Raspberry Pi Picos, and one Raspberry Pi have joined the Lo-Fi Orchestra this year, conducted by a new Pico MIDI Splitter. Changes were made in every section of the orchestra except percussion. We are delighted that the Pringles tom and plastic tub bass drums remain, not to mention the usual assortment of cheap mixers, amps, and speakers.

Tchaikovsky’s score famously calls for some “instruments” not found in the typical orchestra — a battery of cannon and a carillon, for example. Therefore [Kevin] had to supplement the Lo-Fi Orchestra for this performance with extras — a JQ6500 MP3 module on clash cymbals, a bare metal MiniDexed Raspberry Pi playing the carillon, and a MCP4725 with a Lots-of-LEDs shield firing off cannon and fireworks, respectively.

Although slightly disappointed that the MCP4725 beat out Mr. Fireworks in the auditions, we do like the result. [Kevin] reports that the latest version is much more reliable and predictable, having eliminated various MIDI faults and electrical noise. It presents a stable platform for future musical presentations, a kind of on-demand Lo-Fi Orchestra jukebox, as he describes it. A detailed review of all the changes can be found in his explanatory blog post. Check out an earlier performance of Holst’s The Planets suite from our coverage back in 2021.

Continue reading “Lo-Fi Tchaikovsky”

Laser Scanner Upgraded To Use PCB Motor

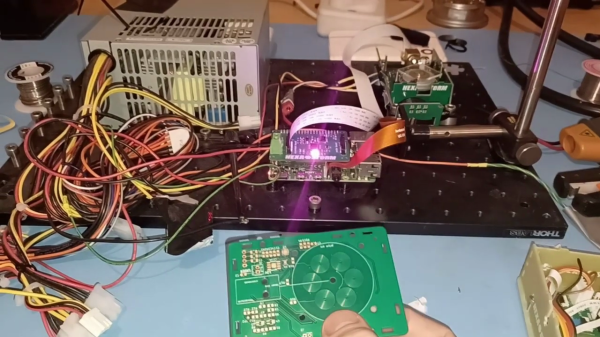
[Rik]’s Hexastorm laser scanner project originally used a discrete polygon mirror controller+motor module from Sharp to spin a prism. But the scanner head was a bit difficult to assemble and had a lot of messy wires. This has all been replaced by a single board featuring a PCB-printed motor, based on the work of [Carl Bugeja]. The results are promising so far — see video below the break.

Since the prism is not attached to anything, currently it will fall off if mounted in the intended vertical orientation. One of [Rik]’s next steps is to improve the mount’s design to constrain the spinning prism. The previous Sharp motor was specified to 21000 RPM, but was only driven to 2400 RPM in [Rik]’s first version. This new PCB motor spins at 2000 RPM in these tests, comparable to his previous experiments ( we’re not sure about the maximum RPM ).

See our original writeup from 2019 to review the goals of this project, and be sure to checkout details and documentation on the Hexastorm project page. To learn more about PCB motors, read our article about [Carl]’s first design and visit his Hackaday.io page. Thanks to [Jonathan Beri] for the tip.

Continue reading “Laser Scanner Upgraded To Use PCB Motor”

Reverse Engineering The Apple Lightning Connector

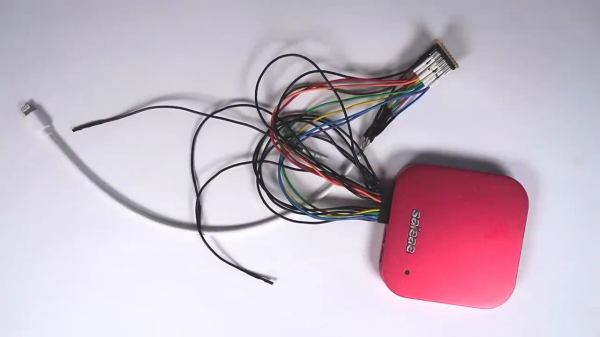
A frequent contributor to the hacker community, [stacksmashing] has prepared an excellent instructional video on reverse engineering Apple’s Lighting connector proprietary protocol. The video begins by showing how to gain physical access to the signals and hooking them up to a logic analyzer. He then notes that the handshaking uses only a single signal and proposes that Apple isn’t going to re-invent the wheel (perhaps a risky assumption). Using a ChatGPT search, obligatory these days, we learn that Dallas Semiconductor / Microchip 1-wire is probably the protocol employed.

Which embedded single-wire busses exist that encode bits with different lengths of low and high signals?

At the basic level, 1-wire and protocols like Texas Instruments SDQ operate in a similar manner. It turns out that [stacksmashing] already wrote a SDQ analyzer module for the Saleae logic analyzer. Aided by this tool, he digs deeper and learns more about the kinds of messages and their contents. For example, upon being plugged in, the host system queries the accessory’s serial number, manufacturer, model number, and product description. Finally, he introduces the CRC reverse engineering tool reveng to determine which CRC polynomial and algorithm the protocol uses to frame each packet.

Even if you have no interest in Lightning cables, this video is a great tutorial on the types of things you need to do in order to make sense of an unknown communications protocol. Gather what information you can, make some educated guesses, observe the signals, revise your guesses, and repeat. In part two, [stacksmashing] will show how to build a homemade iPhone JTAG cable.

We wrote in more detail about cracking the Lightning interface back in 2015. The Lightning interface may have been a good solution in its day, foreshadowing some of the features we now have in USB-C. But its proprietary and closed nature meant it wasn’t used outside of the Apple ecosystem. With the proliferation and capabilities of USB-C, not to mention various legislative edicts, Lightning’s days seem numbered. Is the industry finally settling on one interface? Let us know your thoughts in the comments below.

Continue reading “Reverse Engineering The Apple Lightning Connector”

Exploring The History Of EPROM In The Soviet Union

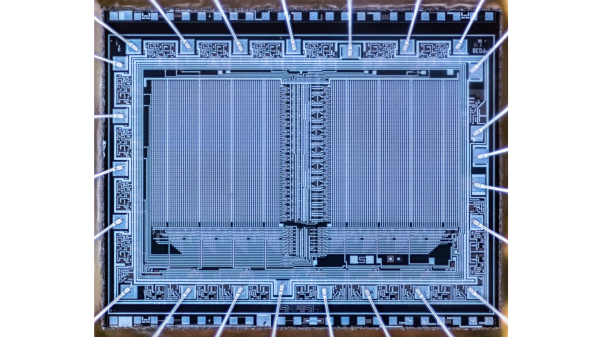
An article on the history of EPROMs in the Soviet Union by [Vladimir Yakovlev] over at The CPU Shack Museum caught our attention. It is part one of a series on the topic, and walks you through the earliest Soviet EPROMs families.

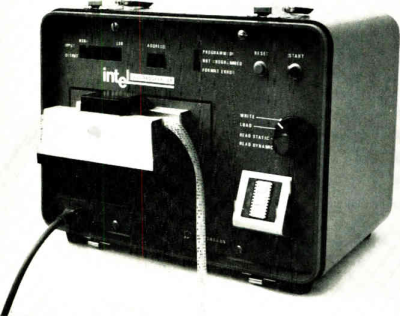
Early EPROM programmer using punched paper tape (Intel, Electronics Magazine 1971)

The first of which, from the 1970s, is the K505RR1 developed and manufactured in Kyiv, equivalent to the first-generation Intel 1702A. It could hold 2048 bits, organized as 256×8, and offered a whopping 20 reprogramming cycles and data retention of 5000 hours.

The narrative proceeds to introduce several subsequent generations, design facilities, manufacturing techniques, and representative chip examples. A few tidbits — unlike Western EPROMs, the Soviets managed to put quartz windows in plastic packages (see the KP573 family).

In addition to the common gray or white, they also used different terracotta colored ceramic packages. An odd ceramic flat-pack EPROM is shown, and also some EPROMs whose dies have been painted over and re-badged as OTP chips.

Intel began producing EPROMs in 1971 as reported by the inventor, Intel’s Dov Frohman-Bentchkowsky, in Electronics Magazine’s 10 May edition (pg 91). We learned, amongst other things, that the 1701 did not have a quartz window, but could still be erased by exposure to X-rays. A friendly word of warning — browsing electronics advertisements from 50 years ago can easily consume your entire morning.

Once the package is sealed, information can still be erased by exposing it to X radiation in excess of 5×10⁴ rads, a dose which is easily attainable with commercial X-ray generators.

To dig deeper, check out the CPU Shack’s write-up on the history of EPROMs in general, and a piece we wrote in 2014 about the history of home computers behind the Iron Curtain.

Tidy Breadboard Uses Banana Bread

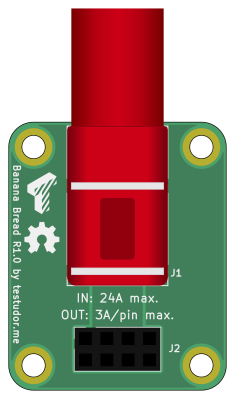
Self-described passionate maker in the electronics and 3D printing world, [Jakob], aka [testudor], was getting frustrated trying to connect banana plugs to solderless breadboards. Project Banana Bread was born — small banana jack adaptors and a companion tray with pockets to hold up to six modules.

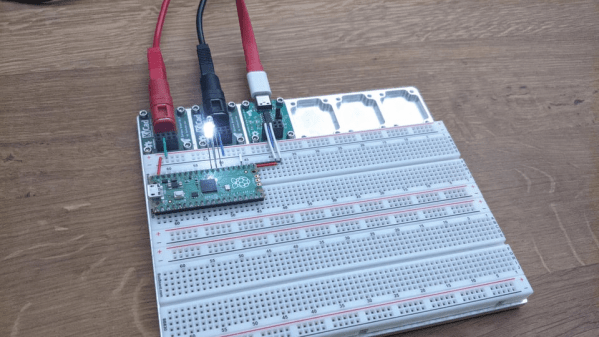
The base in the photo is made from 5083 aluminum, machined on a homemade CNC router. But design files for a yet-to-be-tested 3D printer version are available as well. As can happen, he strayed from the original goal of solving the banana jack issue, and also cranked out a USB-serial port and a blank template module for any custom interfaces folks may want to implement.

If it is only power connections you are interested in, we covered the Open Power project back in 2019. And also don’t forget the mother of all breadboards, this 1960s behemoth we wrote about last year. What kinds of breadboard interface modules do you find most useful? Let us know in the comments below.


Count Leading Zeros For Efficient Logarithms

[Ihsan Kehribar] points out a clever trick you can use to quickly and efficiently compute the logarithm of a 32-bit integer. The technique relies on the CLZ instruction which counts the number of leading zeros in a machine word and is available in many modern processors. Typical algorithms used to compute logarithms are not quick and have a variable execution time depending on the input value. The technique [Ihsan] is using is both fast and has a constant run time.

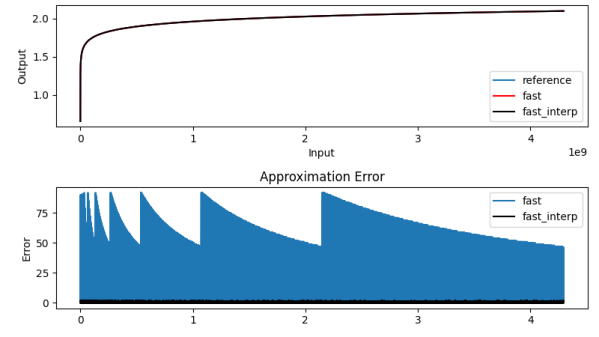
The above equation summarized the math behind the algorithm. We get the first term easily using the CLZ instruction. Using the remainder and a pre-computed lookup table, it is possible to get the second term to various degrees of accuracy, depending on how big you make the table and whether or not you take the performance hit of interpolation or not — those of a certain age will no likely groan at the memory of doing interpolation by hand from logarithm tables in high school math class. [Ihsan] has posted an MIT-licensed implementation of this technique in his GitHub repository, which includes both the C-language algorithm and Python tools to generate the lookup table and evaluate the errors.

Why would you do this? Our first thought was real-time streaming DSP operations, where you want fast and deterministic calculations, and [Ihsan]’s specifically calls out embedded audio processing as one class of such applications. And he should know, after all, since he developed a MIDI capable polyphonic FM synthesizer on a Cortex M0 that we covered way back in 2015.