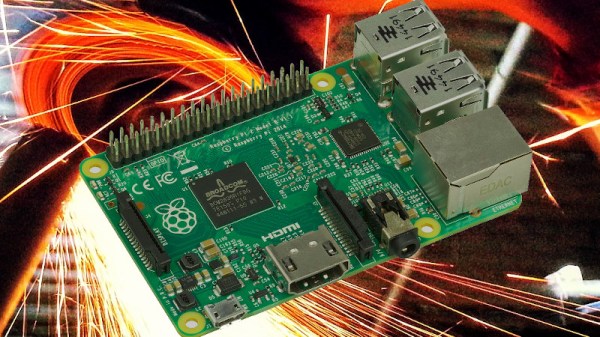
[Rene Strange] has graced these fair pages a short while ago with a sweet Raspberry Pi software based poly synth, with a tantalising reference to it being a bare metal application. So now, we’ll look into circle, the bare metal programming environment that it is based upon. The platform consists of a large set of C++ classes to access the hardware as well as perform tasks such as task creation and scheduling in the cooperative multitasking, multicore environment. Supporting all Raspberry Pi boards from version 2 onwards (not including the Pico!) in both 32-bit and 64-bit flavours, the environment is pretty complete. Classes are provided for USB, networking, FatFS, as well as more mundane tasks such as dealing with interrupts. On top of these classes there are a pile of application-specific libraries, covering functions such as display interfacing, GUIs using a variety of frameworks, and some more esoteric applications such as interfacing to a Pico, and even sending the system log to a remote web browser!
Classes and libraries however, don’t always help by themselves, which is where the 42 (yes, we know) code examples come in very handy. They’ve provided example applications for some fun stuff like drawing Mandelbrot fractals to the display, as well as some more mundane tasks that we have to deal with such as getting that pesky DMA controller to play nice with the SPI hardware. All-in-all, this looks like a great set of tools for taking full advantage of some fairly beefy hardware for your next embedded project that needs plenty of resources, but not all that unnecessary operating system stuff.
Perhaps not quite as complete as circle, but we’ve seen a fair few Raspberry Pi Bare metal projects over the years, like the Nerdsynth, based on the PiZero, and this neat little bare metal assembly language clone of starfox.
Thanks [Ruhan] for the tip!
Header: Aryan Patidar, CC BY 4.0/Evan-Amos, Public domain.
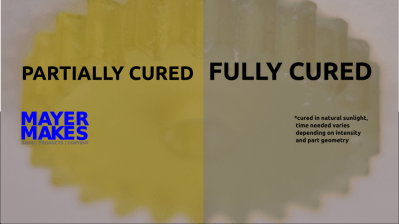 have a neat trick of presenting a definite yellowish hue when not fully cured, which is very helpful. This is particularly useful when removing support structures as you can use the color change during the curing process to judge the right moment to snap off the thicker sections, minimizing the risk of damaging the print. The resulting printed part is also tough enough to withstand subsequent traditional post-processing, such as milling, giving greater final finishing tolerances. Try doing that with an FDM print.


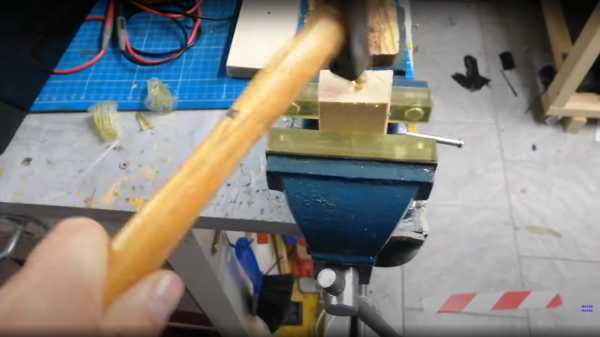
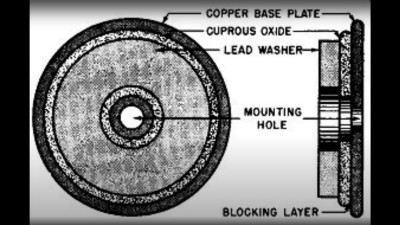 based not upon silicon or germanium, but copper. Copper (I) Oxide is a naturally occurring P-type semiconductor, which can be easily constructed by heating a copper sheet in a flame, and scraping off the outer layer of Copper (II) Oxide leaving the active layer below. Simply making contact to a piece of steel is sufficient to complete the device.
 as the Selenium rectifier, based on the properties of a Cadmium Selenide – Selenium interface, which forms an NP junction, albeit one that can’t handle as much power as good old copper. One final device, which was a bit of an improvement upon the original CuO rectifiers, was based upon a stack of Copper Sulphide/Magnesium metal plates, but they came along too late. Once we discovered the wonders of germanium and silicon, it was consigned to the history books before it really saw wide adoption.