RFID Emulator + E-paper Badge Can Be Programmed With Sound

In a way, an e-paper display makes an excellent foundation for a reprogrammable RFID card. The display only needs power during a refresh, and 125 kHz RFID tags are passive in the sense that the power for the RFID transaction comes from the reader itself. [Georgi Gerganov] has put those together in the GGtag, an open-source project for a 3.52″ e-paper badge with a trick or two up its sleeve.

One clever function is that it is programmable with sound, a feature built off another project of [Georgi]’s called ggwave, a data-to-sound (and vice-versa) framework that has been ported to just about every hardware platform one cares to imagine — including mobile phones — and can reliably send data through the air.

Transmitting data over sound is limited in throughput but has a number of advantages, not least of which is the huge range of compatible devices. There’s a web-based tool for programming the GGtag with sound available at ggtag.io that will give you a preview and let you hear how it works. The data encoding method gives transmissions a charming beep-boop quality that’s a bit reminiscent of an analog modem handshake. GGtag can also be programmed over USB serial, a faster (but somewhat less exciting) option.

The project’s GitHub repository contains GGtag’s code and technical details, and the CrowdSupply project is in the works for anyone who would prefer to buy one once they become available.

The Moment A Bullet Turns Into A Flashlight, Caught On Film

[The Slo Mo Guys] caught something fascinating while filming some firearms at 82,000 frames per second: a visible emission of light immediately preceding a bullet impact. The moment it occurs is pictured above, but if you’d like to jump directly to the point in the video where this occurs, it all starts at [8:18].

The ability to capture ultra-slow motion allows us to see things that would otherwise happen far too quickly to perceive, and there are quite a few visual spectacles in the whole video. We’ll talk a bit about what is involved, and what could be happening.

Spotting something unusual on video replay is what exteme slo-mo filming is all about.

First of all, the clear blocks being shot are ballistic gel. These dense blocks are tough, elastic, and a common sight in firearms testing because they reliably and consistently measure things like bullet deformation, fragmentation, and impact. It’s possible to make homemade ballistic gel with sufficient quantities of gelatin and water, but the clear ones like you see here are oil-based, visually clear, and more stable (they do not shrink due to evaporation).

We’ve seen the diesel effect occur in ballistic gelatin, which is most likely the result of the bullet impact vaporizing small amounts of the (oil-based) gel when the channel forms, and that vaporized material ignites due to a sudden increase in pressure as it contracts.

In the video linked above (and embedded below), there is probably a bit more in the mix. The rifles being tested are large-bore rifles, firing big cartridges with a large amount of gunpowder igniting behind each bullet. The burning powder causes a rapid expansion of hot, pressurized gasses that push the bullet down the barrel at tremendous speed. As the bullet exits, so does a jet of hot gasses. Sometimes, the last bits of burning powder are visible as a brief muzzle flash that accompanies the bullet leaving the barrel.

A large projectile traveling at supersonic velocities results in a large channel and expansion when it hits ballistic gel, but when fired at close range there are hot gasses from the muzzle and any remaining burning gunpowder in the mix, as well. All of which help generate the kind of visual spectacles we see here.

We suspect that the single frame of a flashlight-like emission of light as the flat-nosed bullet strikes the face of the gel is also the result of the diesel effect, but it’s an absolutely remarkable visual and a fascinating thing to capture on film. You can watch the whole thing just below the page break.

Continue reading “The Moment A Bullet Turns Into A Flashlight, Caught On Film”

That Ultra-White Paint That Helps Cool Surfaces? Make Your Own!

It started with [KB9ENS] looking into paints or coatings for passive or radiative cooling, and in the process he decided to DIY his own. Not only is it perfectly accessible to a home experimenter, his initial results look like they have some promise, as well.

[KB9ENS] read about a type of ultra-white paint formulation that not only reflects heat, but is able to radiate it into space, cooling the painted surface to below ambient temperature. This is intriguing because while commercial paints can insulate and reflect heat, they cannot make a surface cooler than its surroundings.

Anecdotally speaking, this painted battery section of a solar recharger gets too hot to touch in full sunlight. But when painted over, it was merely warm.

What really got [KB9ENS] thinking was that at its core, the passively-cooling paint in the research is essentially a whole lot of different particle sizes of barium sulfate (BaSO₄) mixed into an acrylic binder. These two ingredients are remarkably accessible. A half-pound of BaSO₄ from a pottery supply shop was only a few dollars, and a plain acrylic base is easily obtained from almost any paint or art supplier.

[KB9ENS] decided to mix up a crude batch of BaSO₄ paint, apply it to some things, and see how well it compared to other paints and coatings. He wetted the BaSO₄ with some isopropyl alcohol to help it mix into the base, and made a few different concentrations. A 60% concentration by volume seemed to give the best overall results.

There’s no indication of whether any lower-than-ambient cooling is happening, but according to a non-contact thermometer even this homemade mixture does a better job of keeping sunlight from heating things up compared to similarly-applied commercial paints (although it fared only slightly better than titanium dioxide-based white paint in the initial test.)

[KB9ENS] also painted the battery section of a solar recharger with his homemade paint and noted that while under normal circumstances — that is to say, in full sunlight — that section becomes too hot to touch, with the paint coating it was merely warm.

Actual passive cooling can do more than just keep something less warm than it would be otherwise. We’ve seen it recently used to passively and continuously generate power thanks to its ability to create a constant temperature differential, day and night.

Behold A Gallery Of Sony’s PS VR2 Prototypes

Every finished product stands at the end of a long line of prototypes, and Sony have recently shared an interview and images of their PlayStation VR2 prototypes.

Many of the prototypes focus on a specific functionality, and readers who are not familiar with building things might find it a bit wild to see just how big and ungainly un-optimized hardware can be.

Finished product (bottom) contrasted with functionally-identical prototype (top).

The images are definitely the best part of that link, but the interview has a few interesting bits. For example, one prototype was optimized for evaluating and testing camera placement with a high degree of accuracy, and it hardly looks like a VR headset at all.

The controllers on the other hand seem to have gone though more iterations based on the ergonomics and physical layout of controls. The VR2 controllers integrate the adaptive triggers from the PlayStation 5, which are of a genuinely clever design capable of variable resistance as well as an active force feedback effect that’s not quite like anything that’s come before.

There’s a lot of work that goes into developing something like a VR headset, as we see here and we’ve seen with Facebook’s (now Meta) VR research prototypes. But even when one can leverage pre-made modules as much as possible and doesn’t need to start entirely from scratch, making a VR headset remains a whole heap of work.

Physical Neural Network Can Be Trained Like A Digital One

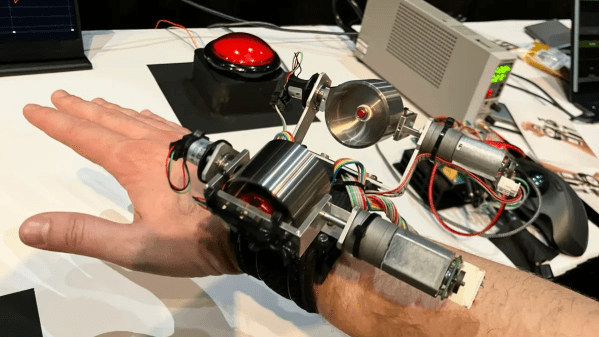
Here’s an unusual concept: a computer-guided mechanical neural network (video, embedded below.) Why would one want a mechanical neural network? It’s essentially a tool to explore what it would take to make physical materials work in nonstandard ways. The main part is a lattice of interlinked mechanical components. When one applies a certain force in a certain direction on one end, it causes the lattice to deform in a non-intuitive way on the other end.

To make this happen, individual mechanical elements  in the lattice need to have their compliance carefully tuned under the guidance of a computer system. The mechanisms shown can be adjusted on demand while force is applied and cameras monitor the results.

This feedback loop allows researchers to use the same techniques for training neural networks that are used in machine learning applications. Ultimately, a lattice can be configured in such a way that when side A is pressed like this, side B moves like that.

We’ve seen compliant structures that move in unexpected ways before, and they are always fascinating. One example is this 3D-printed door latch that translates a twisting motion into a linear one. Research into physical neural networks seems like it might open the door to more complex systems, or provide insights into metamaterial design.

You can watch the video below just under the page break, or if you prefer, skip the intro and jump straight into How It Works at [2:32].

Continue reading “Physical Neural Network Can Be Trained Like A Digital One”

Open Source OLED Nametag Is Full Of Features

Ever wanted a sweet OLED nametag with fancy features like daylight readability, automatic brightness adjustment, GIF animation support, all-day runtime, easy web interface, and more? [TobleMiner]’s OLED Nametag is the project you want to keep an eye on in that case.

It’s still an early prototype, but the feature list looks great and works with a variety of OLED modules that are easily available. The enclosure can be 3D printed, and while there is very little spare room inside the housing, [TobleMiner] has clearly made the most of all available space. Some PCB fab houses offer component placement these days, and the board is designed with exactly that in mind.

We’ve seen a batteryless E-paper display make a serviceable nametag in the past, and while those offer high contrast and wide viewing angles, they lack the sort of features this project is bursting at the seams with. Affordable access to good components and the ability to have high-quality PCBs made on demand has really raised the bar in terms of what a hacker project can work with in recent years, and we love to see it expressed in projects like this one.

3D Printer Recognizes Third-Party Build Plates, Just Make Your Own ID Codes

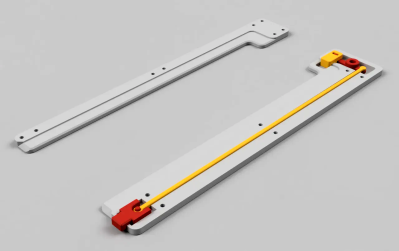
The Bambu X1C 3D printer is a machine known for its speed, and it has a number of useful features like automatic build platform recognition. Factory build platforms are marked with an identifier code, and thanks to [elumspe] it’s now possible to make your own identifiers to stick onto third-party platforms and have the printer recognize them as though they were factory offerings. There’s even a super handy 3D-printable alignment tool that ensures the identifier goes in the correct spot, which is a nice touch.

These codes aren’t DRM so much as they are used by the printer to automatically verify that the installed build plate matches the slicer settings before a job begins. Printing one and sticking it in the right place is an easy way to get third-party plates recognized the same as factory offerings.

The identifier codes aren’t DRM so much as they are a way for the printer to verify that the installed build platform matches the slicer settings before a print begins, and throw up a warning if it doesn’t. The printer is perfectly happy to use third-party build surfaces, but since they lack an identifier, the printer will throw a warning each time. One solution is to simply disable checking the build platform before a print, but for those who would prefer to have the printer see what it expects to see, printing a small 2D barcode to stick on is an easy way to do it.

We see these sometimes called QR codes, but they look more like AprilTags. Both are types of 2D barcode, but while QR codes can encode a variety of information types, AprilTags are simpler and usually represent identifiers. In this case, they’re an appropriate way to let a camera-enabled printer know what kind of build plate is installed.

AprilTags are common in computer vision applications, and even relatively modest hardware can detect and decode them almost in real time. AprilTags are convenient and easy to use, as this gate access system demonstrates.