Diagram of Packets Sent by Timeshifter

Encoding Data In Packet Delays

If you’ve ever been to a capture the flag hacking competition (CTF), you’ve probably seen some steganography challenges. Steganography is the art of concealing data in plain sight. Tools including secret inks that are only visible under certain light have been used for this purpose in the past. A modern steganography challenge will typically require you to find a “flag” hidden within an image or file.

[Anfractuosus] came up with a method of hiding packets within a stream of network traffic. ‘Timeshifter’ encodes data as delays between packets. Depending on the length of the delay, each packet is interpreted as a one or zero.

To do this, a C program uses libnetfilter_queue to get access to packets. The user sets up a network rule using iptables, which forwards traffic to the Timeshifter program. This is then used to send and receive data.

All the code is provided, and it makes for a good example if you’ve ever wanted to play around with low-level networking on Linux. If you’re interested in steganography, or CTFs in general, check out this great resource.

Dancing Mandelbrot Set On A FPGA

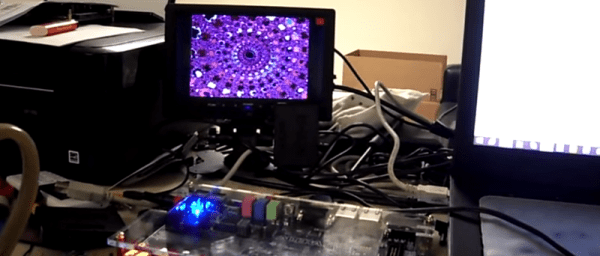
This FPGA based build creates an interesting display which reacts to music. [Wancheng’s] Dancing Mandelbrot Set uses an FPGA and some math to generate a controllable fractal display.

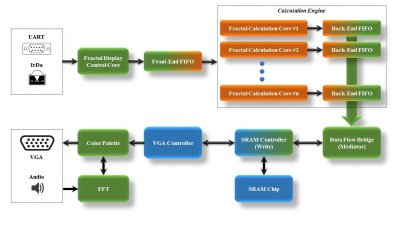
The build produces a Mandelbrot Set with colours that are modified by an audio input. The Terasic DE2-115 development board, which hosts a Cyclone IV FPGA, provides all the IO and processing. On the input side, UART or an IR remote can be used to zoom in and out on the display. An audio input maps to the color control, and a VGA output allows for the result to be displayed in real time.

Dancing Mandelbrot Block DiagramOn the FPGA, a custom calculation engine, running at up to 150 MHz, does the math to generate the fractal. A Fast Fourier transform decomposes the audio input into frequencies, which are used to control the colors of the output image.
This build is best explained by watching, so check out the video after the break.

Continue reading “Dancing Mandelbrot Set On A FPGA”

Header of the Project Byzantium website

Meshing Pis With Project Byzantium

If internet service providers go down, how are we going to get our devices to communicate? Project Byzantium aims to create an “ad-hoc wireless mesh networking for the zombie apocalypse.” It’s a live Linux distribution that makes it easy to join a secure mesh network.

[B1tsh1fter] has put together a set of hardware for running Byzantium on Pis in emergency situations. A Raspberry Pi 2 acts as a mesh node, using a powerful USB WiFi adapter for networking. Options are provided for backup power, including a solar charger and a supercapacitor based solution.

The Pi runs a standard Raspbian install, but uses packages from the ByzPi repository. This provides a single script that gets a Byzantium node up and running on the Pi. In the background, OLSR is used to route packets through the mesh network, so that nodes can communicate without relying on a single link.

The project has a ways to go, but the Raspberry Pi based setup makes it cheap and easy to get a wide area network up and running without relying on a single authority.

Making Music With Clojure And Bananas

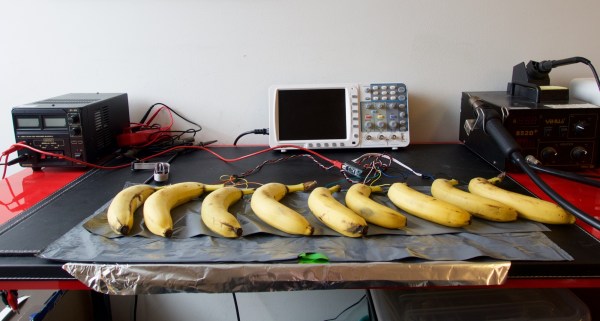
At this point, the banana piano is a pretty classic hack. The banana becomes a cheap, colorful touch sensor, which looks sort of like a piano key. The Arduino sets the pin as a low-level output, then sets the pin as an input with a pull up resistor. The time it takes for the pin to flip from a 0 to a 1 determines if the sensor is touched.

[Stian] took a new approach to the banana piano by hooking it up to Clojure and Overtone. Clojure is a dialect of Lisp which runs in the Java Virtual Machine. Overtone is a Clojure library that provides tons of utilities for music making.

Overtone acts as a client to the Supercollider synthesis server. Supercollider has been around since 1996, and provides a wide array of sound synthesis functions. Overtone simply tells Supercollider what to do, letting you easily program sounds in Clojure.

The banana piano acts as an input to a Clojure program. This program maps the banana to a musical note, then triggers a note on Overtone’s built-in piano sampler. The result is a nice piano sound played with fruit. Of course, since Overtone and Supercollider are very flexible, this could be used for something much more complex.

After the break, a video of the banana piano playing some “Swedish Jazz.”

Continue reading “Making Music With Clojure And Bananas”

A self powered camera, showing output video

Self Powered Camera Powers Itself

Cameras sense light to create images, and solar cells turn light into energy. Why not mash the two together and create a self-powered camera?

The Computer Vision Laboratory at Columbia built this unique camera, which harvests power from its photodiode sensors. These photodiodes also act as an array of pixels that can recover an image. The result is a black and white video camera that needs no external power supply.

The energy harvester circuit charges up a supercap that provides power to the system. The frame rate of the camera is limited by the energy that can be harvested: higher frame rates require more juice. For this reason, the team developed an algorithm that varies the frame rate based on available energy.

The MC13226V microcontroller that was used for this build features an internal 2.4 GHz radio. The group mentions wireless functionality as a possibility feature in the future, which would make for a completely untethered, battery free camera.

Disassembled D-Link Firmware

D-Link Fails At Strings

Small Office and Home Office (SOHO) wireless routers have terrible security. That’s nothing new. But it is somewhat sad that manufacturers just keep repurposing the same broken firmware. Case in point: D-Link’s new DIR-890L, which looks like a turtled hexapod. [Craig] looked behind the odd case and grabbed the latest firmware for this device from D-Link’s website. Then he found a serious vulnerability.

D-Link's DIR-890 Router

The usual process was applied to the firmware image. Extract it, run binwalk to find the various contents of the firmware image, and then extract the root filesystem. This contains all the code that runs the router’s various services.

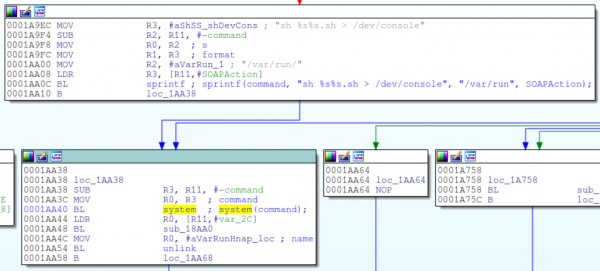
The CGI scripts are an obvious place to poke for issues. [Colin] disassembled the single executable that handles all CGI requests and started looking at the code that handles Home Network Administration Protocol (HNAP) requests. The first find was that system commands were being built using HNAP data. The data wasn’t being sanitized, so all that was needed was a way to bypass authentication.

This is where D-Link made a major error. They wanted to allow one specific URL to not require authentication. Seems simple, compare string A to string B and ensure they match. But they used the strstr function. This will return true if string A contains string B. Oops.

So authentication can be bypassed, telnetd can be started, and voila: a root shell on D-Link’s most pyramid-shaped router. Oh, and you can’t disable HNAP. May we suggest OpenWrt or dd-wrt?

A Automated Optical Inspection machine, inspecting the USB Armory board

Meet The Machines That Build Complex PCBs

You can etch a simple PCB at home with a few chemicals and some patience. However, once you get to multilayer boards, you’re going to want to pay someone to do the dirty work.

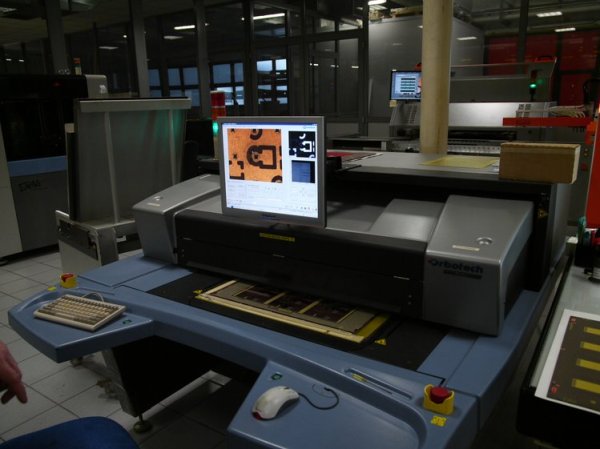
The folks behind the USB Armory project visited the factories that build their 6 layer PCB and assemble their final product. Then they posted a full walkthrough of the machines used in the manufacturing process.

The boards start out as layers of copper laminates. Each one is etched by applying a film, using a laser to print the design from a Gerber file, and etching away the unwanted copper in a solution. Then the copper and fibreglass prepreg sandwich is bonded together with epoxy and a big press.

Bonded boards then get drilled for vias, run through plating and solder mask processes and finally plated using an Electroless Nickel Immersion Gold (ENIG) process to give them that shiny gold finish. These completed boards are shipped off to another company, where a pick and place followed by reflow soldering mounts all the components to the board. An X-Ray is used to verify that the BGA parts are soldered correctly.

The walkthrough gives a detailed explanation of the process. It shows us the machines that create products we rely on daily, but never get to see.