Give Your Projects A Retro Tint With This 8051-based Arduino Uno

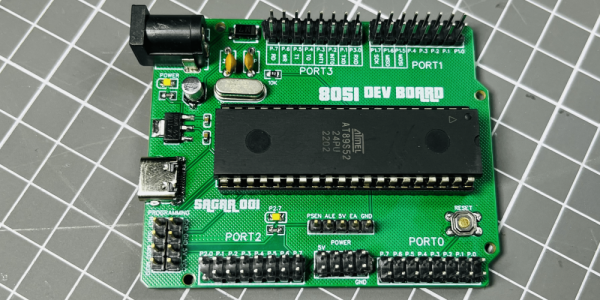
Most of us are familiar with the Arduino Uno, a starting place for electronics projects since 2010. But what if the Arduino Uno was released in 1980? You’d probably get something like [ElectroBoy]’s 8051-based Arduino Uno.
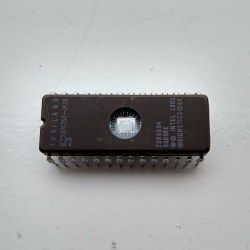
28-pin DIP integrated circuit with a window revealing the die
Close-up shot of the 87C752, an 8051 with EPROM

The Arduino Uno-compatible board has an MCS-51 (often called 8051 instead) instead of the usual ATmega328P/ATmega168. Specifically, [ElectroBoy] uses the AT89S52. Like the ATmega microcontrollers, the AT89S52 has an 8-bit CPU with a Harvard architecture and very similar GPIO capabilities. Unlike the ATmega, however, the original MCS-51 has a CISC CPU (as opposed to ATmega being RISC) and a release date about 36 years earlier.

The board itself also has some differences from the original Arduino Uno. First of all, it has a USB type-C port, which is definitely a bonus. Secondly, it’s simpler: No USB-UART (which also means no USB programming), a different pin layout (Arduino shields likely won’t fit) and more I/Os than the ATmegas have. Sure, it’s not as practical as an actual Arduino Uno, but it’s definitely cool for our retrocomputing nerds.

Eliminate That Pesky Power-Only USB Cable With This Cable Tester

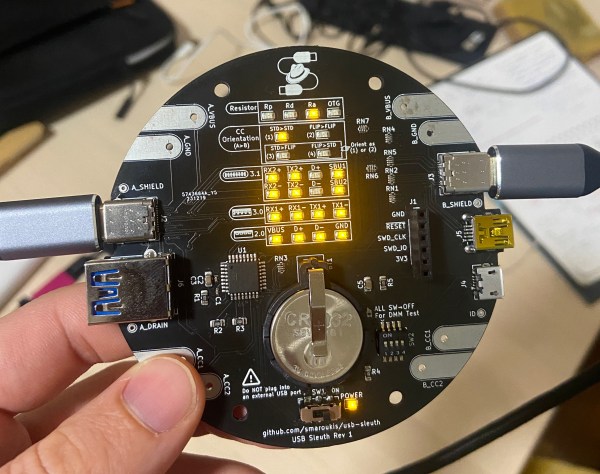
Ever wondered why your Arduino wasn’t programming, only to find out that the cable doesn’t have any data conductors? Worry not, [Spencer Maroukis] has got you covered with the USB Sleuth Cable Tester!

The cable tester is a beautiful black circular PCB, with USB ports of nearly every type on the edges. It works partially through passive detection with LEDs and otherwise through active detection of things like the orientation with an STM32 powered by a coin cell battery. But it gets better: There are disconnect switches and exposed pads to test some of the conductors with a digital multimeter!

It may not be necessary for all of us, but one thing is clear: When you needed a good USB cable, you wished you had this to actually test it. The design is open-source too, which is definitely nice if you want one for yourself.

Meanwhile this isn’t the first USB cable tester we’ve seen here.

Building A Semi-Auto Cookie Dough Gun

Are you a chocolate chip cookie connoisseur? Do you want to eat more cookies than you probably should at the push of a button? Don’t worry, [Startup Chuck] has got you covered with his semi-automatic cookie dough dispenser.

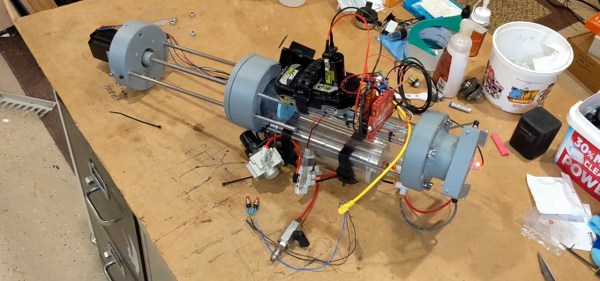
[Startup Chuck] tries several ways of dispensing dough, some of which more explosive than others. Turns out that a homemade pneumatic extruder doesn’t exactly rhyme with “safety”. The other methods are more promising dough though, and an empty caulk tube sourced from Amazon and a motorized caulking gun demonstrate a less dangerous, more effective way to dispense dough.

Inspired by this approach, he started development of a servo-driven extruder. It uses store-bought dough cylinders in a sleek metal and acrylic contraption that is then treated with the requisite big mess of wires any good project has. As the dough is extruded, an optical sensor detects how far the dough has moved and it uses sufficiently violent pneumatics to slice the dough, which has the fun side effect of launching pucks of cookie dough at the user.

If you like the idea of edible extrusions, but aren’t so concerned about the rapid-fire element of this project, the concept isn’t unlike some of the food printers we’ve covered.

Continue reading “Building A Semi-Auto Cookie Dough Gun”

Compute The Mandelbrot Set With A Custom RISC-V CPU

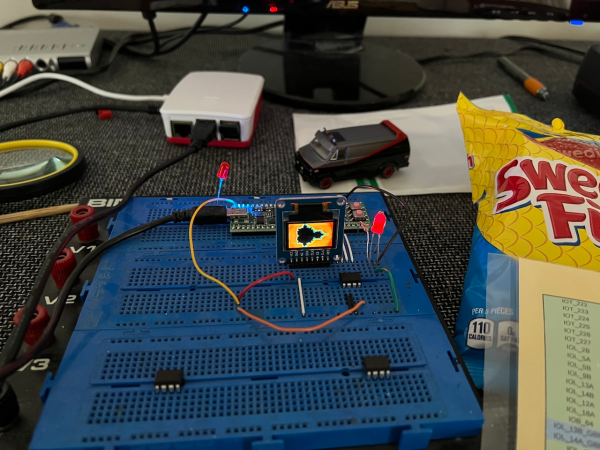
When faced with an FPGA, some people might use it to visualize the Mandelbrot set. Others might use it to make CPUs. But what happens if you combine the two? [Michael Kohn] shows us what happens with his RISC-V CPU with an instruction specially made for computing the Mandelbrot set.

[Michael] takes us through the unusual process of turning his 8008 into a RISC-V CPU. Re-using bits of logic here and replacing other logic there leaves him with a functional RISC-V core. Not finished, [Michael] takes it upon himself to also create a custom instruction just for computing a point for the Mandelbrot set, accelerating the demo from twenty-three seconds to merely one!

Still not finished, [Michael] also creates an implementation of the long gone F100-L CPU, once again with added Mandelbrot set flair, simultaneously with the RISC-V project. Finally, he ports his “Java Grinder” Java bytecode compiler to both RISC-V and the F100-L, because Java runs on 1 Billion devicesTM.

Continue reading “Compute The Mandelbrot Set With A Custom RISC-V CPU”

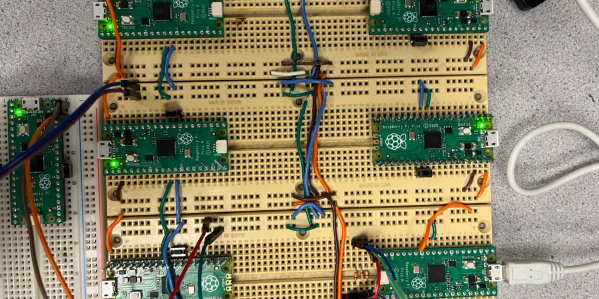
Several Raspberry Pi Picos connected to each other

Raspberry Pi Pico Parallel Mandelbrot Computation

The Mandelbrot set is — when visualized with some colors — an interesting shape with infinite detail. While the patterns are immediately obvious to the human eye, anyone who’s run one can tell you that they’re pretty computationally expensive to produce. Fortunately, as with many things in graphics, rendering the Mandelbrot set can be easily parallelized.

That’s what [rak277] and [ir93] demonstrate in their RP2040-based finals project. Computron, as they call it, is a network of Raspberry Pi Picos that work together to compute a visualization of the Mandelbrot set and show it on a VGA display. The Computron is made of two or more “math units” and one “projection unit”. The math units communicate over a shared I²C bus with the projection unit to first divide the workload and then compute their share of the work.

This project shows both the strengths and limitations of parallel computation. It makes use of multiple math units on a highly parallelizable workload, but as more math units are added there are diminishing performance gains due to the increased communications load on the network, which [rak277] and [ir93] suspect to be the current bottleneck in the Computron.

If you’re fresh out of Pi Picos, and don’t mind waiting awhile, you could always crank out a Mandelbrot set on your trusty Atari 800 in BASIC.

Game Graphics: Rasterization

Last time, I talked about racing the beam, a type of graphics used when memory was scarce. Now it’s time to step into the future with more memory and talk about what modern 2D games still do to this day: rasterization.

Just in time Memory

Continuing the trend set by racing the beam, rasterized graphics are also on a grid, just a much tinier one. Though not unique to rasterized, the “frame buffer” is the logical conclusion of bitmap mode fidelity: enough memory is allocated so that every pixel can have its own color. What’s different about a frame buffer is that everything is drawn before it is shown and, crucially, this doesn’t have to happen in the same order as the pixels are displayed. Rasterization draws entire shapes — triangles, lines and rectangles — into the frame buffer and the screen is typically updated all at once. Continue reading “Game Graphics: Rasterization”

Spice Up Your Earrings With Microelectronics

We’ve covered [mitxela] in the past and if you know him, you’ll likely know him for putting the micro in microelectronics. This year, he’s at it again with his LED Industrial Piercing.

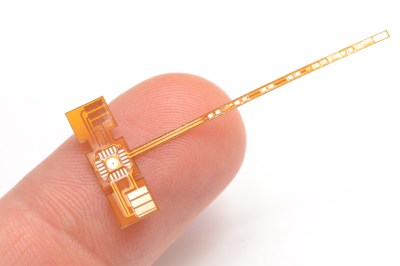
A T-shaped flexible PCB that is smaller than an index finger
This tiny PCB is really pushing the limits of fabrication

Inspired by the absolutely tiny 0402 LEDs and industrial piercings, [mitxela] started thinking of a way to construct the 5cm long device. He found some normal LED earrings to steal the battery compartment from. Then, with a tick needle and some more steel, he created a new industrial earring with some holes.

Of course, no [mitxela] project is complete without comically tiny microsoldering and this project makes the VQFN ATTiny he used look large. He puts his PCB suppliers to the test with a merely 1mm wide flex PCB for the LEDs to be mounted on. Finally, he combines the flex PCB, the earring and some epoxy to create yet another piece of LED jewelry.

Video after the break.
Continue reading “Spice Up Your Earrings With Microelectronics”