Build A DIY Space Mouse For A More Efficient CAD Workflow

When you find yourself doing a lot of work in 3D modelling, you occasionally wish for something more capable than the humble two-dimensional mouse. A space mouse is a great tool in this regard, and [Salim Benbouziyane] was inspired to build his own.

[Salim] started his work with research, by watching a teardown of a Connexion Space Navigator 3D mouse. This informed him of the basic functionality and the workings inside. The commercial product appears to use an optical sensor setup, but [Salim] decided to go with a magnetic sensor setup instead due to the parts he had on hand. Namely, a 3-axis magnetometer which seemed perfect for the task.

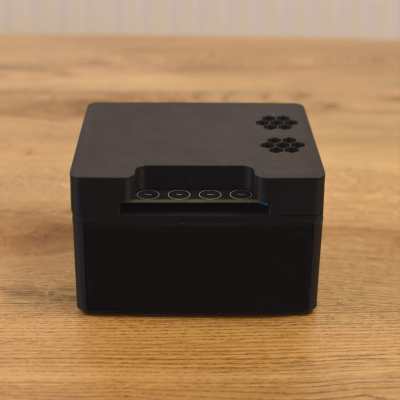
The build uses a motion platform mounted on six springs which translates and rotates in three dimensions as required. The magnetometer is mounted on the platform above a stationary set of neodymium magnets. Thus, when the platform, and thus sensor, moves, the magnetometer’s output can be used to determine the motion of the platform and translate that into useful viewport commands for CAD software. A RP2040 is charged with reading the magnetometer and acting as a USB HID device. It’s all wrapped up in a neat 3D-printed housing.

For now, it’s a little simpler in its operation than a full 6 DOF Spacemouse, but it nonetheless has helped [Salim]’s workflow improve. A good peripheral like this can be a real boon on the desktop; we’ve seen a few DIY projects in this realm for just that reason. Video after the break.

Continue reading “Build A DIY Space Mouse For A More Efficient CAD Workflow”

Sci Fi UI Made Easy With Arwes

Many of us grew up watching Star Trek, marvelling at the beautiful colorful interfaces on the computers that ran the Starship Enterprise. Today’s computer interfaces have certainly grown fancier since the Windows 3.1 and Mac System 7 days, but they’re still nowhere near that gorgeous. The Arwes framework aims to change that, at least where web apps are concerned.

The framework is inspired by the cyberprep and synthwave aesthetics, while drawing from media like TRON: Legacy and Halo. You can get a peek at what it can do on the Arwes website, or look at how it runs on sites like SoulExtract or the Cyber Movie Database. It’s very much about glowing lines, 1980s computer sounds, and screens with animated text fills.

It’s still in an alpha release, and likely isn’t yet ready for business-critical production use. It currently consists of a set of basic components that can be assembled into a functional futuristic website design, but you’ll need some experience to use the tools at hand. There’s a sandbox for experimenting that should help in that regard.

You might just find that it’s the perfect tool to create an interface for your very own cyberdeck, or you might put it to work on your next website design. Either way, if you create something fantastic, don’t hesitate to drop us a line.


Watch This Beautiful Japanese Factory Manufacturing Hand Planes

If you’re a woodworker, you know the value of a good hand plane. A stout model will last a lifetime if properly cared for. [Process X] has now taken us behind the scenes of a Japanese factory that turns out quality hand planes to show us how it’s done. 

The video starts at the forge, where steel is attached to soft iron to form a blank that will become the hand plane blade. This is proper blacksmithing, with autohammers and flames akimbo. It’s also a woodworking story, though, with the hand plane bodies themselves carefully prepared for the years of faithful service ahead. We get to see the raw wood roughed into shape and put through the thicknesser, along with the more interesting machining steps that carve out the angled pockets and the blade slot.

The final assembly is great, too, particularly when the pins are nailed in to hold everything in place. The test is the icing on the cake, in which the hand plane peels a perfect contiguous strip from a long piece of lumber.

It’s still very much a manual process, with the workshop largely relying on classical machine tools. There’s not a hint of CNC control to speak of. For the Komori Small Plane Factory and the Koyoshiya Watanabe Woodworking Shop, though, the old methods are doing just fine.

Continue reading “Watch This Beautiful Japanese Factory Manufacturing Hand Planes”

Microsoft BASIC For The Dragon 64 Recovered

There are a great many pieces of software of yesteryear that are no longer readily accessible. It’s now possible to cross Microsoft BASIC for the Dragon 64 off that list, with the source code now posted for all to enjoy on GitHub.

The repository concerns the Microsoft 16K BASIC Interpreter as built for the Motorola 6809, as used in the Dragon 64 computer. This is also known as BASIC-69 or Extended Color Basic.

Hilariously, the source code was recovered from 340 pages of fan-fold tractor paper stored in four bundles. The output of a Motorola assembler was printed back in 1983 at Dragon Data’s R&D facility in Wales, and was recently recovered after being stored in an attic for much of the last four decades. The paper was carefully scanned at the 2022 Dragon Meetup, before passing the resulting images through OCR software. The output was then manually corrected and the source code was complete for both the 32K and 64K mode ROMs. There are some differences between the scanned source and what Microsoft shipped, which is outlined in the repository.

We’ve seen other heroic retrocomputer recovery efforts before, too, like the work to save the Polish CROOK OS. If you’ve been working on similar feats, be sure to let us know.

A BASIC Interpreter For The Raspberry Pi Pico

It’s pretty easy to program the Raspberry Pi Pico in Python, or you can use C or C++ if you so desire. However, if you fancy the easy language of yesteryear, you might like PiccoloBASIC from [Gary Sims].

Putting it simply, piccoloBASIC is a BASIC interpreter that runs on the Raspberry Pi Pico. It features all the good bits of BASIC such as GOTO and GOSUB commands, that fancier languages kind of look down upon. It’s also got enough built-in routines to handle regular programming life, like sleeps, delays, a basic pseudorandom number source, trigonometric functions, and the ability to deal with floating point numbers. As far as microcontroller tasks go, it’s got rudimentary support for talking to GPIOs right now via the pinon and pinoff commands. However, it’s probably not the way to go if you want to bit-bang an SD card to within an inch of its speed rating.

Down the road, [Gary] hopes to add support for features like the Pico’s I2C, SPI, and PIO hardware, along with networking protocols and Bluetooth. PEEK and POKE are also hopefully on the way for those that like to fiddle with memory directly.

Meanwhile, if you’re looking for a different yet similar take, explore the port of MMBasic to the Pico platform. Video after the break.

Continue reading “A BASIC Interpreter For The Raspberry Pi Pico”

Do-Everything LED Indicator Light Runs From 4V To 60V

If you’re working with 3.3V or 5V circuits, it’s easy for you to throw on a power or status LED here or there. [Tom Gralewicz] has found himself in a pickle, though, often working on projects with voltages like 36V or 48V. Suddenly, it’s no longer practical to throw an LED and a resistor on a line to verify if it’s powered or not. Craving this simplicity, [Tom] invented the Cheap Universal LED Driver, or CULD, to do the job instead.

The CULD is designed as a simple LED indicator that will light up anywhere from 5V to 50V. It’s intended to be set-and-forget, requiring no fussing with different resistor values and no worries for the end user that excessive current draw will result.

The key part ended up being the LV2862XLVDDCR – a cheap switching regulator. It can output 1 mA to 600 mA to drive one or several LEDs, and it can do so anywhere from a 4V to 60V input. Assemble this on a coin-sized PCB with some LEDs, and you’ve got your nifty do-everything indicator light. With a bridge rectifier onboard, it’ll even work on AC circuits, too.

[Tom] has built a handful himself, but he open-sourced the design in the hopes it will go further. By his calculations, it would be possible to build these in quantities of 1000 for a BOM cost of less than $0.50 each, not counting assembly or the PCB itself. We’d love to see them become a standard part of hacker toolkits, too. If you’ve got a pick-and-place plant that’s looking for work this week, maybe get them on to something like this and see what you can do! If it turns out to be a goer, maybe drop us a note on the tipsline, yeah?

You Can 3D Print A 12,500 RPM Brushless Motor

Typically, when most of us need a motor, we jump online to order one from a catalogue. [Levi Janssen] recently had to build his own for a college project, however, and learned a lot along the way.

[Levi] whipped up his brushless DC motor design in OnShape. The motor has six coils in the stator, with the rotor carrying eight neodymium magnets. It’s an axial flux design, with the rotor’s magnets sitting above the coils. This makes construction very easy using 3D printed components. Axial flux motors also have benefits when it comes to power density and cooling, though optimization is outside the scope of [Levi]’s work here.

[Levi]’s video covers both the development of the motor itself as well as the drive circuit, too. The latter is of key value if you’re interested in the vagaries of driving these motors, which is far more complex than running a simple brushed motor. He even gets his motor up to 12,500 rpm with his homebrewed drive circuit.

Making your own motors can help you solve some difficult engineering challenges, like building motorized rollerblades. Alternatively, if winding coils sounds too slow and too hard, you can just use off-the-shelf gear and hack it to make it work. Here, we support both methods.

Continue reading “You Can 3D Print A 12,500 RPM Brushless Motor”