DIY Soda Can Battery

sodaCanBattery

It may not be particularly useful to create some makeshift batteries out of soda and soda cans, but it’s a good introduction to electrodes and electrolytes as well as a welcomed break from lemons and potatoes. The gang at [Go-Repairs] lopped off the can’s lid and temporarily set the soda aside, then took steel wool to the interior of the can to remove the protective plastic coating. The process can be accelerated by grabbing your drill and cramming the steel wool onto the end of a spade bit, although pressing too hard might rip through the can.

With the soda poured back in, you can eek out some voltage by clipping one lead to the can and another to a copper coin that’s dunked into the soda. Stringing along additional cans in series can scale up the juice, but you’ll need a whole six pack before you can get an LED working—and only just. The instructions suggest swapping out the soda for a different electrolyte: drain cleaner, which can pump out an impressive 12 volts from a six pack series. You’ll want to be careful, however, as it’s likely to eat through the can and is one lid away from being dangerous.

Stick around for a quick video after the break, and if you prefer the Instructables format, the [Go-Repairs] folks have kindly reproduced the instructions there.

Continue reading “DIY Soda Can Battery”

Using A Raspberry Pi To Give Your Car More Features

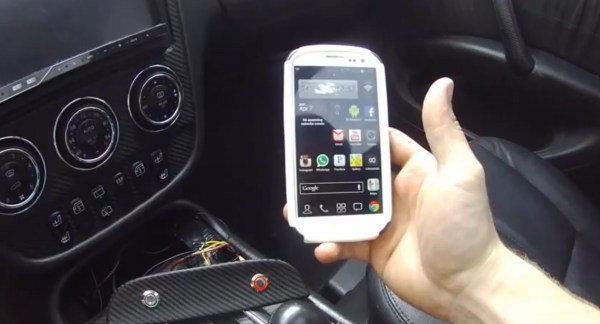
[Andrei] is cruising in style thanks to his Raspi-powered CarPC project, which is a steal at $200 considering all the functionality it provides. This is an update to the work we saw from him back in March. Rather than completely replace his car’s head unit, [Andrei] simply relocated it to the trunk, permanently set it to the “aux input” source, and connected the Raspberry Pi’s audio output. The Pi runs a Raspbian Wheezy distro with XBMC and is mounted in the storage area beneath the middle armrest. [Andrei] filled the hole left by the old stereo with a 7-inch touchscreen display, which connects to the Pi through both HDMI and USB. If you throw the car into reverse, the Pi automatically selects the touchscreen’s AV input to display the car’s backup camera, then flips back when put in drive.

The unit also provides navigation via the open-source Navit software using OpenStreetMap data. An ST22 SkyTraq GPS receiver grabs coordinates and feeds them into the Raspi, which updates the on-screen map once per second. You’ll want to watch the video after the break (Audio Warning: Tupac) to see for yourself just how well the CarPC came together,

Continue reading “Using A Raspberry Pi To Give Your Car More Features”

Game Controller Repurposed For Flea Market Find

powerPannerControlReplacement

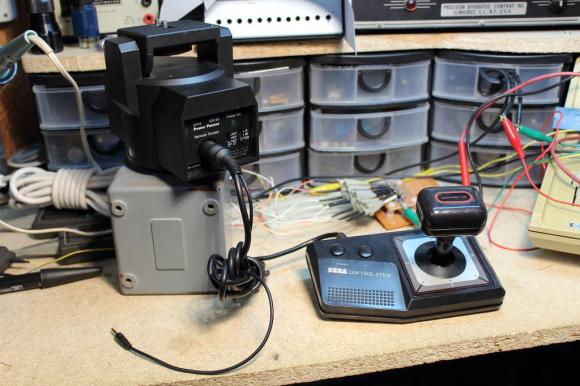
A jarring pan with your tripod can ruin a shot in your film, and tilting up or down usually requires some loosening and tightening kung fu to keep gravity from taking over. The “Power Panner” is a remote-controlled device that fits between the tripod and the camera, handling pans and tilts with ease. When [NeXT] found one at the Capitol Flea Market for $5, he didn’t care about the missing remote. He bought the Panner, dragged it home, and hacked together his own remote with a Sega Master Pad.

After researching similar devices online, [NeXT] had determined the original remote’s pinout: essentially a D-pad with adjustable speed control. He decided to ignore the speed pins and to instead search for a suitable replacement controller. A Sega Master Pad offered the most straightforward solution, so [NeXT] went to work separating out the wires and soldering them to a DIN connector. He couldn’t find the right plug to fit the Panner’s DIN-7 jack, so he substituted a DIN-8 with the extra pin snapped off.

Rather than use the remaining two buttons for speed control, [NeXT] chose to feed them directly into his camera to drive the focus and shutter, but the Master Pad’s wiring posed a problem: the camera would have to share the Power Panner’s ground, and the Panner plugs into the wall via a 6V adapter. Fingers crossed, he decided to push ahead and was relieved that everything worked. We suspect the shared ground won’t be a problem as long as one device uses a floating power supply, which the Panner can provide either through the proper wall wart or by using its 4 AA battery option.

If you’re in the mood for more camera hacks, check out the sound-dampening and waterproofing build from last week.

Smart Citizen: Arduino-compatible And Packed With Sensors

smartCitizenBoard

If you’re going to develop another Arduino-compatible board these days, you might as well take a “kitchen sink” approach. The Smart Citizen Kit piles it on, including Wi-Fi, an SD card slot, and EEPROM on its base. The attached shield—dubbed the “Ambient Board”—is a buffet of sensors: temperature, humidity, CO, NO2, light intensity, and a microphone for reading sound levels. The board’s intended purpose is to provide an open-source, interactive, environmental database by crowdsourcing data from multiple Smart Citizen Kits, but you can add your own stuff or yank the shield off altogether. Additional shields are also under development, aimed at providing agricultural data, monitoring biometrics, and more.

Stick the Smart Citizen somewhere and it can send sensor data to the web over a WiFi connection. The result is worth a look. Here’s the map with the real-time data from early release models scattered over Europe, most of which appear to be solar-powered with a small LiPo battery to keep them going overnight. There’s also an accompanying iPhone app that lets you set up the Smart Citizen, retrieve data from nearby sensors, and allows you to match your phone’s GPS location to any data you collect while carrying the board around.

The developers met their Kickstarter goals earlier this summer and the board has recently entered the manufacturing process, Rummage through their GitHub files here, and watch a video preview of the Smart Citizen below.

Continue reading “Smart Citizen: Arduino-compatible And Packed With Sensors”

Passive Bluetooth Keyless Entry System

Modern smart keys allow you to keep the key fob in your pocket or purse while you simply grab the handle and tug the door open. [Phil] decided he would rather ditch the fob altogether and instead implemented a passive Bluetooth keyless entry system with his Android phone. It’s probably unlikely for car manufacturers to embrace phone-based keys anytime soon, and [Phil] acknowledges that his prototype poses a landslide of challenges. What he’s built, however, looks rather enticing. If the car and phone are paired via Bluetooth, the doors unlock. Walk out of range and the car automatically locks when the connection drops.

His build uses an Arduino Mega with a BlueSMiRF Silver Bluetooth board that actively searches for his phone and initiates a connection if in range.  Doors are unlocked directly through a 2-channel relay module, and an LED indicator inside the vehicle tells the status of the system. A pulsing light indicates it’s searching for the phone, while a solid ring means that a connection is established.

We hope [Phil] will implement additional features so we can make our pockets a bit lighter. Watch a video demonstration of his prototype after the break, then check out the flood of car-related hacks we’ve featured around here recently: the OpenXC interface that adds a smart brake light, or the Motobrain, which gives you Bluetooth control over auxiliary electrical systems.

Continue reading “Passive Bluetooth Keyless Entry System”

50″ Multitouch Table Is Expensive, Indestructable

50inchMultiTouch

Wander through a well-funded museum these days and you’re likely to find interactive exhibits scattered around, such as this sleek 50″ projection-based multitouch table. The company responsible for this beauty, Ideum, has discontinued the MT-50 model in favor of an LCD version, and has released the plans for the old model as part of the Open Exhibits initiative. This is a good thing for… well, everyone!

The frame consists of aluminum struts that crisscross through an all-steel body, which sits on casters for mobility. The computer specs seem comparable to a modern gaming rig, and rely on IEEE1394 inputs for the cameras. The costs start to pile up with the multiple row of high-intensity infrared LED strips, which can run $200 per roll. The glass is a custom made, 10mm thick sheet with projection film on one side and is micro-etched to reduce reflections and increase the viewing angle to nearly 180 degrees. The projector is an InFocus IN-1503, which has an impressively short projection throw ratio, and a final resolution of 1280×720.

The estimated price tag mentioned in the comments is pretty steep: $12k-16k. Let us know with your own comment what alternative parts might cut the cost, and watch the video overview of the table below, plus a video demonstration of its durability. For another DIY museum build, check out Bill Porter’s “Reaction Time Challenge.

Continue reading “50″ Multitouch Table Is Expensive, Indestructable”

Upgrading Cordless Drill Batteries To Lithium

Cordless power tool battery replacements are expensive: you can easily spend $100 for a NiCd pack. [henal] decided to skip nickle-based cells and cut out the middleman by converting his old cordless battery packs to inexpensive hobby lithium cells. These batteries appear to be Turnigy 3S 1300mAh’s from Hobbyking, which for around $10 is a great bargain. As we’ve explained before, lithium batteries offer several advantages over NiMH and NiCd cells, but such a high energy density has drawbacks that should be feared and respected, despite some dismissive commenters. Please educate yourself if you’ve never worked with lithium cells.

[henal] gutted his dead battery packs and then proceeded to prepare the lithium replacements by soldering them to the cordless pack’s power connectors. To keep charging simple, he also branched off a deans connector from power and ground. After cutting some holes in the pack for access to the balancing connector and deans connector, [helan] went the extra mile by soldering on a DIN connector to the balancing wires, which he then securely glued to the side of the case.

We’ve featured lithium power tool replacements before, and these Turnigy packs pose the same problem: they don’t appear to have any low voltage cut-off protection. Check out some of the comments for a good solution.