[Furze] Sets Fire To Everything With Pyro Gloves

Pyro Build

Crazyman [Colin Furze] is back, and this time he’s setting everything on fire with his Pyro gloves. Though Hackaday readers are already a discerning bunch, this is a build we get submissions for all the time and feature fairly often. It would take an exceedingly impressive build to outshine the other fire hazards. But, as with his pneumatic Wolverine claws and his electromagnetic boots, [Furze] knows how to build the insane and then put on a good show.

The Pyro build is part of [Furze’s] 3-part celebratory X-Men extravaganza, a nod to the realm of superheroes coinciding with the release of the new X-Men film. [Furze] began with a custom reservoir cylinder that fitted with two solenoid valves: one for a pilot light and another for the big blasts. He’s also affixed a Piezo element and a AA battery, which sits in a cozy little container. The bulkier bits of the assembly sit in a backpack, hooking up, as expected, to the wrist-mounted devices. This flame cannon, however, is unique among the ones we’ve encountered here.

Continue reading “[Furze] Sets Fire To Everything With Pyro Gloves”

Koenigsegg 3D-Printing For Production Vehicles

Koenigsegg with Printed Parts

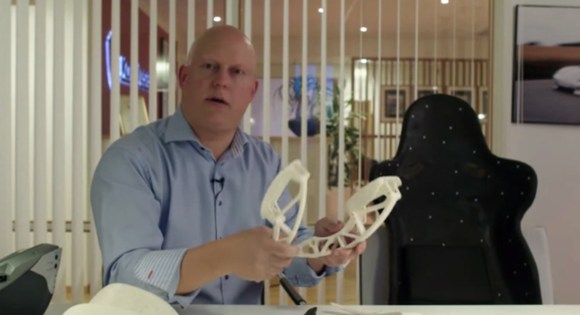
We’re not surprised to see a car manufacturer using 3D-printing technology, but we think this may be the first time we’ve heard of 3D-prints going into production vehicles. You’ve likely heard of Christian von Koenigsegg’s cars if you’re a fan of BBC’s Top Gear, where the hypercar screams its way into the leading lap times.

Now it seems the Swedish car manufacturer has integrated 3D printing and scanning into the design process. Christian himself explains the benefits of both for iterative design: they roughed out a chair, adjusting it as they went until it was about the right shape and was comfortable. They then used a laser scanner to bring it into a CAD file, which significantly accelerated the production process. He’s also got some examples of brake pedals printed from ABS—they normally machine them out of aluminum—to test the fits and the feeling. They make adjustments as necessary to the prints, sometimes carving them up by hand, then break out the laser scanner again to capture any modifications, bring it back to CAD, and reprint the model.

Interestingly, they’ve been printing some bits and pieces for production cars out of ABS for a few years. Considering the low volume they are working with, it makes sense. Videos and more info after the jump.

Continue reading “Koenigsegg 3D-Printing For Production Vehicles”

Stylish Cafe Battlestation Spoils Customers

Cafe Battlestation

[Tasos] sent us this tip about the custom battlestation he’s been working on for his Internet café. (Greek; Translated). The desk started from humble enough beginnings: a simple frame from what appears to be MDF with cabinets to secure the PCs. The goal with this build was to provide an aesthetically pleasing and user-friendly construction. [Tasos] was dissatisfied with the limitations posed by off-the-shelf monitor mounts, so he fabricated his own, more adjustable alternatives, through which he ran the necessary cords.

[Tasos] gave each monitor stand a thorough sanding, priming and painting for a finished result that exudes metallic perfection, then he attached a large pushbutton for booting the computer and some LEDs to provide soft backlight. Under the hood, [Tasos] fitted the PCs’ innards into a custom enclosure of sorts. Though he’s yet to provide full details on this part of the construction, we suspect more images are forthcoming. You can find more details in his forum post.

A Low Cost, Solar-Powered Swamp Cooler

A looming, torturous summer is preparing to bear down on many of us, making this dirt-cheap swamp cooler build an attractive hack to fend off the heat.

Though this is a pretty standard evaporative cooler, the design comes together in a tidy and transportable finished product. The base is a ~$3, 5-gallon bucket from a local hardware store with its accompanying Styrofoam liner. Three 2 1/8″ holes carved into the side of both the bucket and liner will snugly fit some inch-and-a-half PVC pipe with no need for glue.

One last cut into the lid to seat a small desk fan rounds off this build—or you can chop into the styrofoam liner’s lid if you prefer. The video demonstrates using a 15W solar panel to run the fan, and we have to admit that the cooler seems to be an excellent low-cost build. It does, however, require a frozen gallon jug inside to pump out the chilled air for around 5-6 hours per jug. Maybe one of our frugal and mathematically-inclined readers can throw out some guesstimations for the cost of stocking the bucket with a jug of frozen water a couple times a day? Video after the jump.

Continue reading “A Low Cost, Solar-Powered Swamp Cooler”

This Weekend: Hackaday At The Southeast Vintage Computer Festival

VCF

The Vintage Computer Festival hits Roswell, GA this weekend for the second year, packed with museum displays dating back to the Kenbak 1 and hobbyist vintage exhibits. The Apple Pop-Up museum is back as well, along with last year’s popular retro gaming area and a maker-styled kit building area. Here’s an album packed with images from last year’s festival, so you know what you’re getting yourself into.

You can check out the scheduled speakers and workshops here. While you’re there, look for the short, nerdy guy wearing a Hackaday shirt and I’ll be sure to throw some Hackaday stickers at you.

Auto Roll-up Tool Storage

Auto Roll-up Tool Storage

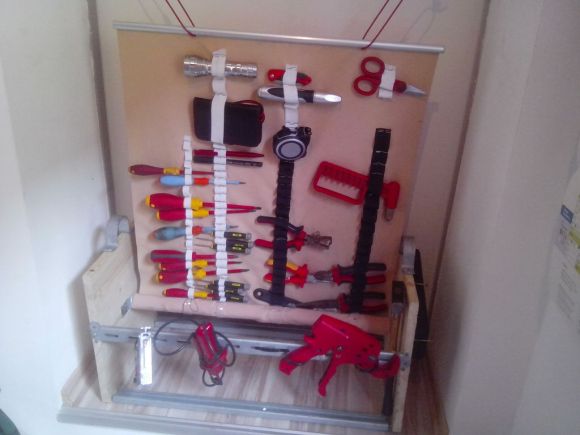
[Anred’s] got the right idea. Everybody and their mother has a toolbox: rectangular, wooden, crowded. You’re not impressing anyone with that old thing. Instead, why not spice it up by rolling it up, with a tool case that spins to store in style?

This storage hack seems to draw its inspiration from field medic roll-up bags, where everything’s laid out for easy access with a quick toss. [Anred] started by taking inventory of all the items he wanted to use on a regular basis, organizing them across a sturdy fabric. Next, he marked all the mounting spots and affixed some elastic material with needle and thread to hold each tool in place. The tools then roll up around a center rod, like an upside-down pull curtain.

Continue reading “Auto Roll-up Tool Storage”

A 3D Printed Cryptex

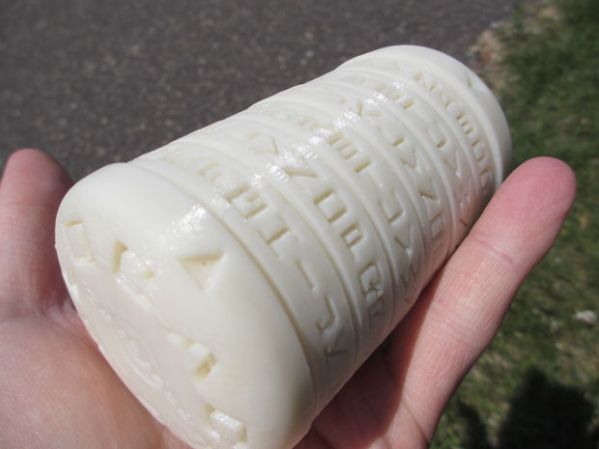
Once you’ve dialed in your 3D printer calibration settings, you enter the phase of printer ownership where you’re eager to show off what you can make, and you’re sure to impress with [pjensen’s] 3d printed cryptex spinning around in your hands.

If you’re a regular reader of our 3D Printering column, then the behind-the-scenes screengrabs should look familiar: [pjensen] used Autodesk Inventor to sculpt the shapes, staring with the cryptex’s individual rings. After embossing the alphabet across each ring, [pjensen] adds slots into the inner loops for pins to slide through. An outer chamber holds the rings in place and prohibits access to the interior chamber, which is held in place on both sides by an end cap.

Lining up the rings to spell the correct word allows the inner chamber to slide free of the whole assembly, revealing whatever goodies may lie inside. You can follow [pjensen’s] step-by-step guide to build your own cryptex, or just download his model and start printing.