Resuming a print

Multiple Ways Of Recovering A Failed Print

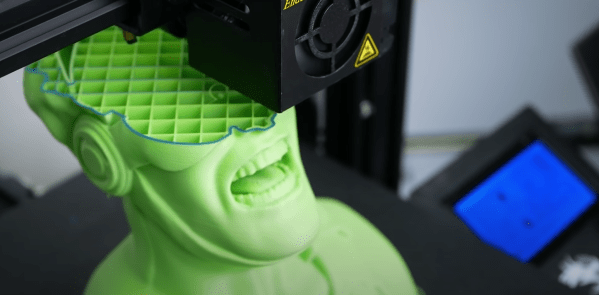
It’s a special gut-dropping, grumbly moment that most who use 3d printers know all too well. When you check on your 13-hour print, only to see that it failed printing several hundred layers ago. [Stephan] from [CNC Kitchen] has a few clever tricks to resume failed prints.

It starts when you discover your print has failed and whether the part is still attached to the bed. If it has detached, the best you can do is whip out your calipers to get a reasonably accurate measurement of how much has been printed. Then slice off the already printed section, print the remainder, and glue the two parts together. If your part is attached to your print bed and you haven’t shifted the plate (if it is removable), start by removing any blemishes on the top layer. That will make it smooth and predictable as it’s starting a new print, just on top of an existing one. Measuring the height that has been printed is tricky since you cannot remove it. Calipers of sufficient length can use their depth function, but you might also be able to do a visual inspection if the geometry is unique enough. After you load up your model in a G-Code viewer, go through it layer by layer until you find what matches what has already been printed.

The last (and perhaps most clever) is to use the printer as a makeshift CMM (coordinate measuring machine). You manually step the printer until it touches the top of the part, then read the z-axis height via a screen or M114 command. A quick edit to the raw G-Code gives you a new file that will resume precisely what it was doing before. If you can’t rehome because the head can’t clear the part, [Stephan] walks you through setting the home on your printer manually.

If all the doesn’t work, and the print is still unrecoverable, perhaps you can look into recycling the plastic into new filament.

injecto doing it's thing

Tiny Homemade Injection Molder

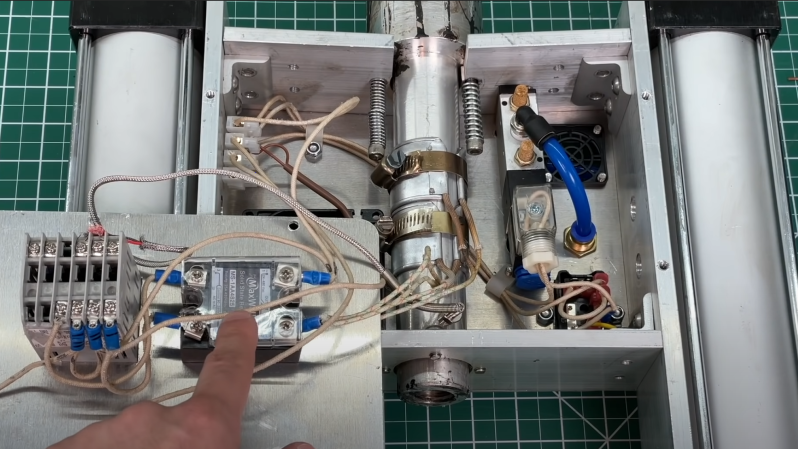
With 3D printing continually gaining ground, some hackers might not see the need for traditional injection molding. After all, you can tweak the code or the model and print dozens of different iterations with fairly minimal lead time. Things get trickier when you need to print hundreds or thousands of the same thing and that ten-hour print time adds up quickly. [Actionbox] built a tiny injection molder they dubbed INJEKTO to speed up their manufacturing.

The design was optimized to be accessible as it is held together with brackets and cheap aluminum flat stock. The hardest part to source is the heating chamber, as it is a piece of turned aluminum. A PID controller keeps the temperature relatively stable and heats the plastic pellets you can dump in the top. Next, you’ll need an external air compressor to power the dual 2″ pneumatic pistons. The pistons push the plastic out of the spring-loaded extruder nozzle. [Actionbox] is already planning on a second version with 4″ pistons that provide significantly more force to extrude larger amounts of plastic as the current version tops out at about 27 grams.

Injection molding still needs a heavy-duty mold to inject into, which can be hard to machine. So until we can 3D print an injection mold, this multi-head 3D printer is something in between a 3D printer and an injection molder, as it can print a dozen of the same thing, speeding up that print time.

Continue reading “Tiny Homemade Injection Molder”

The 3x0 in it's glory

Printing Your Own Exoskeleton

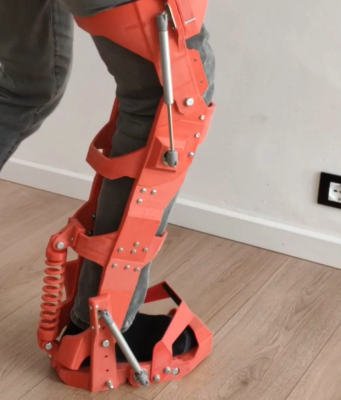
While not quite in a cave, the idea of making your own exoskeleton with limited tools does have a Tony Stark esque vibe. [Andrew Piccinno] is a mechanical engineer pursuing the dream of 3D printing a full-body exoskeleton called 3X0. It’s a project he’s been ruminating on since college, but the work really began in earnest about five months ago. Unfortunately, there are too many pictures to include here, but check out his Instagram or makeprojects for more photos.

To make sure parts fit, [Andrew] started with creating a mesh of his body. After running fifty pictures of himself holding relatively still through some photogrammetry software, he had a decent mesh. While measurements weren’t millimeter-accurate, the relative sizes of everything were reasonably accurate. While the design is modeled with his measurements in mind, all the different pieces are parametric, which in theory would allow someone to tweak the designs to fit their own body.

So far, all the parts have been entirely 3D printed, except for steel balls bearings, gas pistons, and tension bands. The non-3D printed parts are picked to be easy to obtain as the gas piston is just 100 N furniture pistons. The design process includes quite a bit of math, motion study, and simulation to make sure the part that he’s printing will not only fit but move correctly. Many parts, such as the shoulder, are built around a large custom bearing that allows the piece to move correctly with the user’s joints.

While still in the middle of development, [Andrew] has made some serious progress, and we’re looking forward to seeing it completed. The current design is primarily passive with just a few springs and pistons, but he is already looking forward to making it active to the degree that it can augment a user’s motions rather than just taking the load off. It’s clear that [Andrew] believes that exoskeletons are a look into a potential future, and we couldn’t agree more. In a similar vein, perhaps the techniques used in this powered exoskeleton arm on a budget could be used to power the 3X0?

Rich showing off

Make Your Python CLI Tools Pop With Rich

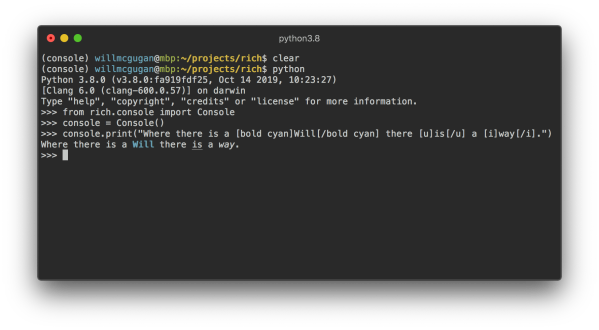
It seems as though more and more of the simple command-line tools and small scripts that used to be bash or small c programs are slowly turning into python programs. Of course, we will just have to wait and see if this ultimately turns out to be a good idea. But in the meantime, next time you’re revamping or writing a new tool, why not spice it up with Rich?

Rich showing off it's traceback

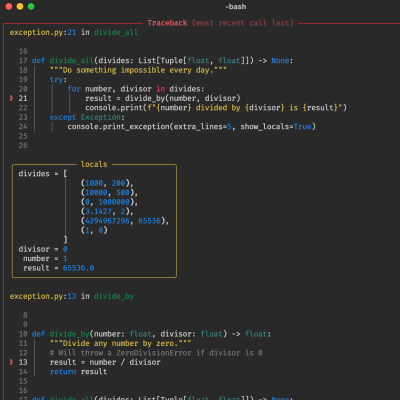
Rich is a python library written by [Will McGugan] that offers text formatting, colors, graphs, progress bars, markdown, syntax highlighting, charts, and more through the power of ANSI codes. The best part is that it works with macOS, Windows, and Linux. In addition, it offers logging solutions that work out of the box. One of the best features of Rich is the inspect functionality. You can pass in an object, and it will use reflection to print a beautiful chart detailing what exactly the object is, helpful in debugging. The other feature is the traceback, which shows a formatted and annotated snapshot of relevant code on the stack during exceptions.

The source itself is well-written python with comments and typing information. There’s a good chance you’ll pick up a trick or two reading through it. Rich is used to build Textual (also by [Will]), which aims to be a GUI API that runs in the terminal. It served as an excellent example of what Rich is capable of. It is incredible how long these protocols have been around. [Will] even ran Rich on a Teletype Model 33. If you’re working with a bit more of a constrained environment, why not bring some color to your Arduino serial terminal?

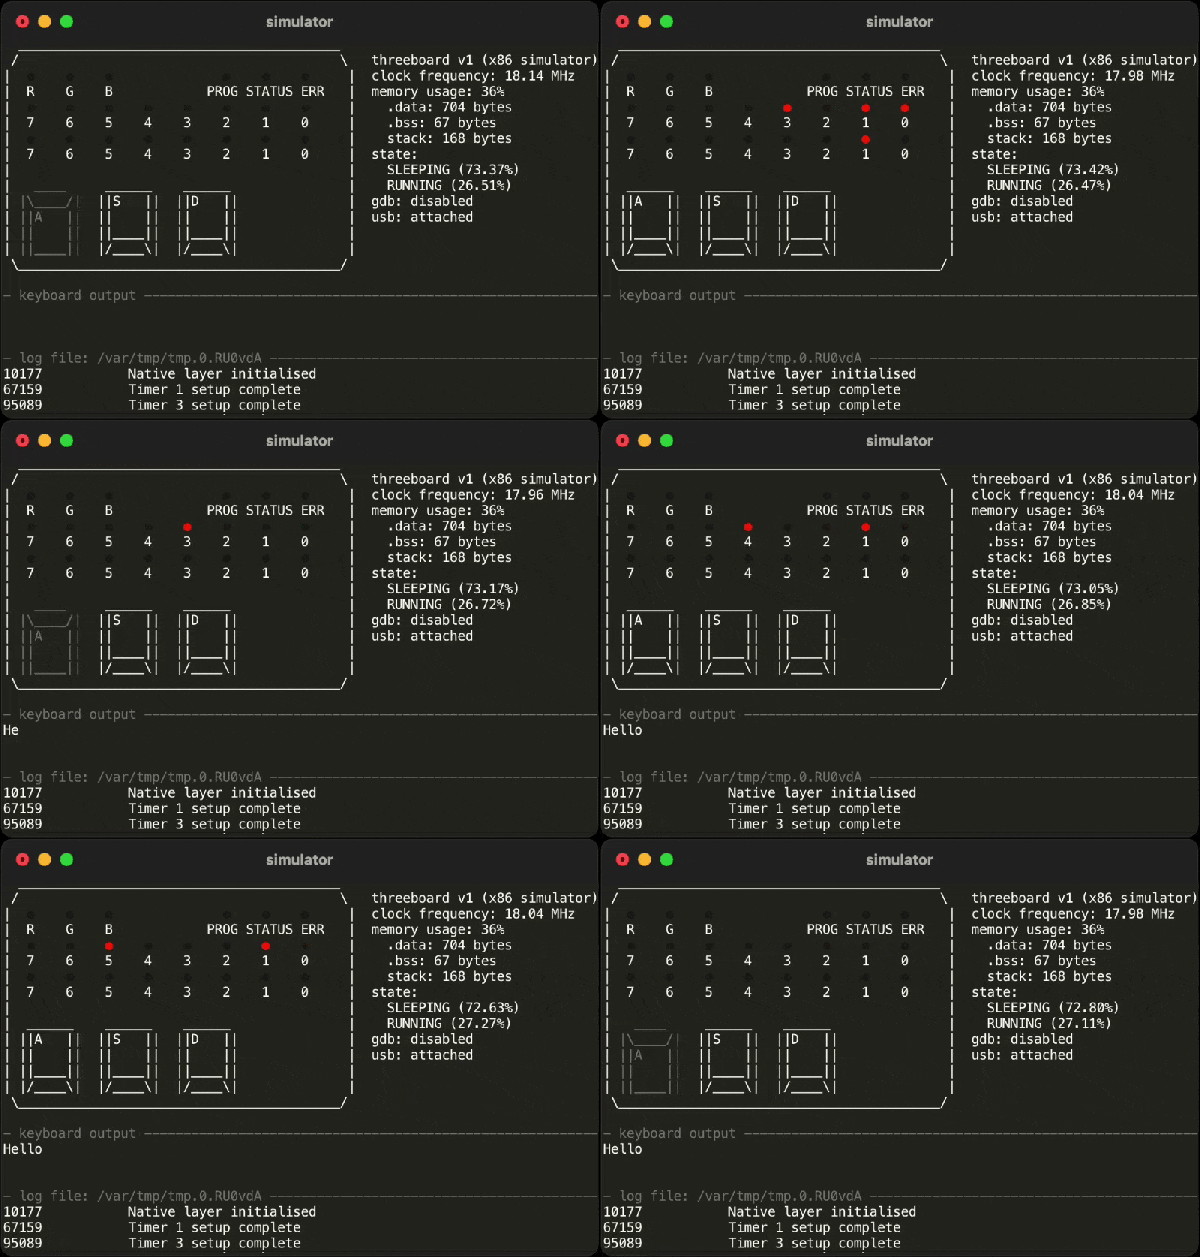
The threeboard simulator running

Threeboard: Short On Keys, Long On Documentation

As peripherals go, few are hacked on more than keyboards. The layouts, the shapes, the sizes, materials, and even the question of what a keyboard is are all on the table for tinkering. In that vein, [TaylorConor] released his simplified keyboard called the threeboard on GitHub, having only three keys and replicating a full keyboard.

We’ve covered keyboards built with chording in mind, wrapped around coffee cups, and keyboards with joysticks for added speed. So why cover this one? What makes it different? The execution is superb and is a great example to look at next time you’re making a project you want to show off. The keyboard is just three mechanical switches, two 8-bit binary displays (16 LEDs total), three status LEDs, and three LEDs showing the current layer (four layers). The detailed user’s manual explains it all. There is a reliable Atmega32U4 microcontroller and two EEPROM chips at its heart.

Where this project shows off is the testing. It has unit tests, simulated integration tests, and simulated property tests. Since all the code is in C++, unit testing is relatively straightforward. The integration and property tests are via a simulator. Rather than recompiling the code with some new flags, he uses the simavr AVR simulator, which means it simulates the same binary file that gets flashed onto the microcontroller. This approach means the design is tested and debugged via GDB. It’s an incredible technique we’d love to see more of in hobby projects. Marketing speak might call this a “digital twin” but the idea is that you have a virtual version that’s easier to work on and has a tighter iteration loop while being as close as possible to the physical version.

[TaylorConor’s] goal was to create a from-scratch microcontroller project with easy-to-read code, fantastic documentation, and best practices. We think he nailed it. So feel free to run the simulator or jump right into building one for yourself. All the hardware is under a CERN-OHL-P license, and the firmware is under GPLv3.

Parsing PNGs Differently

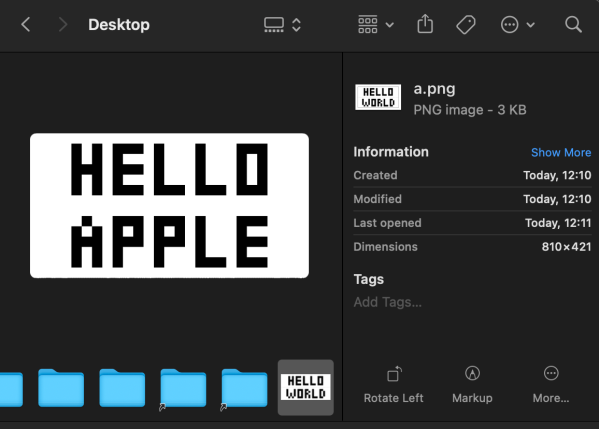
There are millions of tiny bugs all around us, in everything from our desktop applications to the appliances in the kitchen. Hidden, arbitrary conditions that cause unintended outputs and behaviors. There are many ways to find these bugs, but one way we don’t hear about very often is finding a bug in your own code, only to realize someone else made the same mistake. For example, [David Buchanan] found a bug in his multi-threaded PNG decoder and realized that the Apple PNG decoder had the same bug.

PNG (Portable Network Graphics) is an image format just like JPEG, WEBP, or TIFF designed to replace GIFs. After a header, the rest of the file is entirely chunks. Each chunk is prepended by a four-letter identifier, with a few chunks being critical chunks. The essential sections are IHDR (the header), IDAT (actual image data), PLTE (the palette information), and IEND (the last chunk in the file). Compression is via the DEFLATE method used in zlib, which is inherently serial. If you’re interested, there’s a convenient poster about the format from a great resource we covered a while back.

Continue reading “Parsing PNGs Differently”

Making Your Own Mclaren F1 LM

It isn’t often we get a project that has an eighteen-year-long timeline, as staying focused on one project for that long is a significant investment of someone’s lifetime. But when you’re making your own carbon copy Mclaren, you need to be prepared for it to take a while. Unfortunately, there are only 6 of them in the world so for most people if you want one, you need to make your own.

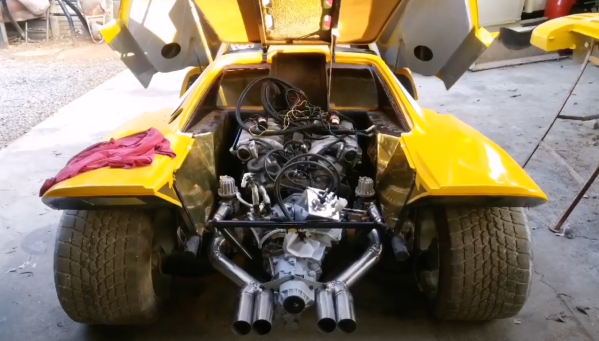
Granted, in those eighteen years, [Brough Built] freely admits there were some gaps. He scrapped most of the earlier work, and today’s current iteration took about three years. This car is made of steel, aluminum, foam, carbon fiber, and sweat. It is a close copy of the F1, and it has all the features you would expect to see on the real thing, like the centered driver’s seat and the gold cladding in the engine bay.

A BMW V12 engine mated to an Audi six-speed gearbox provides the power inside the car. A custom clutch assembly was machined to make it all work. Overall, this is an incredible build with time, and precision just poured into it. Folding and cutting all that metal alone, not to mention all the meticulous welds on everything from the gas tank to the door panels.

Making your own car is a complex and long journey that can be incredibly rewarding. Perhaps not a copy of an existing vehicle but something new; check out this soap shaped hand-made electric car.