Pre-exploded PSU close-up: shown is inductor with the heatsink it shorted against.

The Little Replacement PSU That Could: Kill A Microsoft Surface And Monitor

Recently [Big Clive], everyone’s favorite purveyor of anything electronic that’s dodgy, cheap, cheerful, decidedly crispy or any combination thereof, got sent a very dead external power supply unit. Being clearly a third-party PSU with poorly written and many (likely not truthful) safety approval markings on its label, this PSU had the dubious honor of having destroyed a Microsoft Surface computer as well as the monitor that was connected at the time.

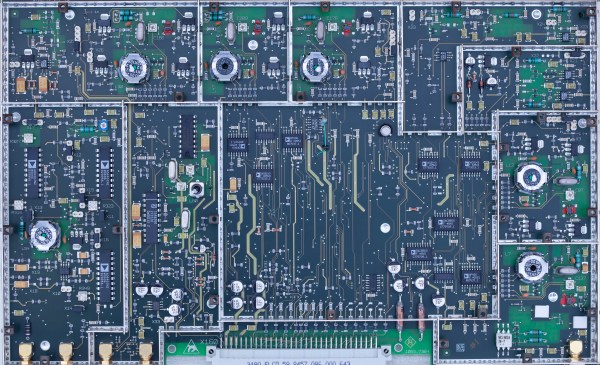
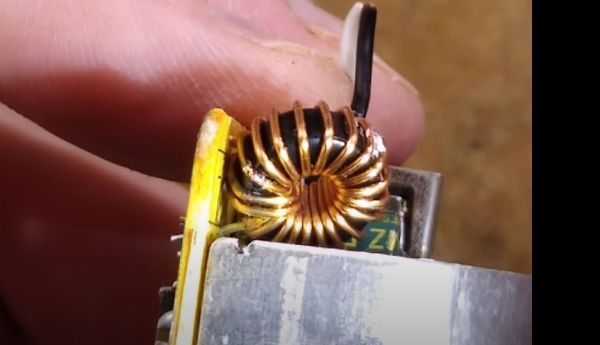
In [Clive]’s video (also embedded after the break) the black and very crispy board is examined, showing a wealth of vaporized traces and plenty of soot. What’s however most fascinating is the failure mode: instead of something obvious like e.g. the main transformer between the primary and secondary side failing, here it would seem that an inductor (see heading image) on the secondary side had its insulation rubbed off and shorted on a nearby heatsink. A heatsink that just happened to be also electrically connected on the primary (mains-level) side.

Judging by the former owner’s report and aftermath, this led to a very sudden and violent demise of the PSU, with mains power very likely making its way into the unsuspecting Surface system and connected monitor. The number of ‘very nope’ design decisions made in this PSU are astounding, and a lesson for both aspiring EEs and anyone considering getting a ‘cheap’ third-party replacement PSU.

(Thanks to [Helge] for the tip)

Continue reading “The Little Replacement PSU That Could: Kill A Microsoft Surface And Monitor”

The Electrifying Debate Around Where Lightning Comes From

Along with many other natural phenomena, lightning is probably familiar to most. Between its intense noise and visuals, there is also very little disagreement that getting hit by a lightning strike is a bad thing, regardless of whether you’re a fleshy human, moisture-filled plant, or conductive machine. So it’s more than a little bit strange that the underlying cause of lightning, and what makes certain clouds produce these intense voltages along ionized air molecules, is still an open scientific question.

Many of us have probably learned at some point the most popular theory about how lightning forms, namely that lightning is caused by ice particles in clouds. These ice particles interact to build up a charge, much like in a capacitor. The only issue with this theory is that this process alone will not build up a potential large enough to ionize the air between said clouds and the ground and cause the lightning strike, leaving this theory in tatters.

A recent study, using data from Earth-based radio telescopes, may now have provided fascinating details on lightning formation, and how the charge may build up sufficiently to make us Earth-based critters scurry away to safety when dark clouds draw near.

Continue reading “The Electrifying Debate Around Where Lightning Comes From”

Crimping Tools And The Cost Of Being Cheap

Crimp connectors provide an easy and convenient way to connect electronics while still allowing for them to be removed and swapped without having to reach for a soldering iron and desoldering wick. While browsing one’s favorite cheap shopping site, you may get the impression that all one has to do to join the world of crimp-awesome is order a $20 crimp tool and some assorted ‘JST’ and ‘DuPont’ (a Mini-PV clone) connectors to go with it. After all, it’s just a bit of metal that’s squeezed around some stripped wire. How complicated could this be?

The harsh truth is that, as ridiculous as the price tag on official JST and Mini-PV crimping tools may seem at hundreds of dollars each, they offer precise, repeatable crimps and reliable long-term stability. The same is true for genuine JST, Mini-PV and Molex connectors. The price tag for ‘saving a buck’ may end up being a lot higher than the money originally saved.

Continue reading “Crimping Tools And The Cost Of Being Cheap”

As apples travel down the conveyor belt, they are scanned using InGaAs and CMOS cameras. The InGaAs camera will show defects beginning to form under the skin that a human eye cannot see; the CMOS camera will show visible defects. (Credit: Hamamatsu)

Shining A Different Light On Reality With Short-Wave Infrared Radiation

As great as cameras that operate in the visual light spectrum are, they omit a lot of the information that can be gleaned from other wavelengths. There is also the minor issue that visibility is often impacted, such as when it’s raining, or foggy. When this happens, applications such as self-driving cars which rely on this, have a major issue. Through the use of sensors that are sensitive to other wavelengths, we can however avoid many of these issues.

Short-wave infrared radiation (SWIR) is roughly the part of the electromagnetic spectrum between 1.4 μm – 3 μm, or 100 THz – 214 THz. This places it between visible light and microwaves, and above long-wave IR at 20 THz – 37 THz. LWIR is what thermal cameras use, with LWIR also emitted by warm objects, such as the human body.

SWIR is largely unaffected by water in the atmosphere, while also passing through materials that are opaque to visible light. This allowing SWIR to be used for the analysis and inspection of everything from PCBs and fruit to works of art to capture details that are otherwise invisible or very hard to see.

Unfortunately, much like thermal camera sensors, SWIR sensors are rather expensive. Or they were, until quite recently, with the emergence of quantum-dot-based sensors that significantly decrease the costs of these sensors.

Continue reading “Shining A Different Light On Reality With Short-Wave Infrared Radiation”

Casually Chirping Into The World Of LoRaWAN

While wireless communications are unquestionably useful in projects, common wireless protocols such as WiFi and Bluetooth peter out after only a number of meters, which is annoying when your project is installed in the middle of nowhere. Moving to an LTE-based or similar mobile solution can help with the range, but this does not help when there’s poor cell coverage, and it tends to use more power. Fortunately, for low-bitrate, low-power wide-area networks (LPWAN) like e.g. sensor networks, there’s a common solution in the form of LoRaWAN, as in long-range wide area network (WAN).

The proprietary LoRa RF modulation technique that underlies LoRaWAN is based on Chirp Spread Spectrum (CSS). This modulation technique is highly resistant to channel noise and fading as well as Doppler shift, enabling it to transmit using relatively low power for long distances. LoRaWAN builds on top of the physical layer provided by LoRa to then create the protocol that devices can then use to communicate with other LoRa devices.

Courtesy of global LoRaWAN gateway and software providers such as The Things Industries and ThingSpeak, it’s possible even as a hobbyist to set up a LoRaWAN-powered sensor network with minimal cost. Let’s take take a look at exactly what is involved in setting up LoRaWAN devices, and what possible alternatives to LoRaWAN might be considered. Continue reading “Casually Chirping Into The World Of LoRaWAN”

Dirty faders.

Giving Vintage Synths New Life In A Potentiometer Cleaning Showdown

As anyone who has ever owned a piece of older equipment that has a potentiometer in it can attest to, these mechanical components do need their regular cleaning ritual. Whether it’s volume knobs on a receiver or faders on a mixer, over time they get crackly, scratchy and generally imprecise due to the oxidation and gunk that tends to gather inside them.

This is your potentiometer caked with gunk.

In this blast from the past, [Keith Murray] shows a few ways in which fader-style potentiometers can be cleaned, and how well each cleaning method works by testing the smoothness of the transition over time with an oscilloscope. It’s enlightening to see just how terrible the performance of a grimed-up fader is, and how little a blast of compressed air helped. Contact cleaner works much better, but it’s essential to get all of the loosened bits of gunk out of the fader regardless.

In the end, a soak in isopropyl alcohol (IPA), as well as a full disassembly followed by manual cleaning were the only ones to get the fader performance back to that of a new one. Using contact cleaner followed by blasting the fader out with compressed air seems to be an acceptable trade-off to avoid disassembly, however.

What is your preferred way to clean potentiometers to keep that vintage (audio) gear in peak condition? Let us know in the comments below.

Thanks, [Grant Freese], for the tip!

Rohde & Schwarz FSIQ 7 Logic Analyzer's RF module, back side. (Source: Roberto Barrios)

Rohde & Schwarz FSIQ Signal Analyzer IF-Filter Module Repair

Who can’t resist snapping up a piece of really expensive laboratory testing gear for next to nothing when browsing eBay or similar? Maybe it’s giving you mournful eyes when browsing through a yard sale. Often such gear is sold for cheap because it’s defective, but with a bit of attention, can be brought back to life. This is how [Roberto Barrios] ended up with a Rohde & Schwarz FSIQ 7 signal analyzer lounging around his place for a few months until he got it fixed.

See anything wrong with this picture?

Part of the fix was replacing a busted RF converter module (A160 IF-Filter) with a used-but-working replacement, but this left the device with odd calibration failures. In the process of tracing down the cause, [Roberto] took many high-resolution images of both sides of the PCBs in order to reverse-engineer the circuit. To complicate matters, the calibration results indicated that the unit’s filters were fine on boot-up, but would deviate after a few minutes.

After extending the filter module to work outside the enclosure and experimental use of a hot air gun, ultimately the cause was tracked down to an unsoldered pad. Considering the extremely simple cause of the failure, it would seem that R&S QA had an off-day when that replacement module was produced. If there’s a lesson to be learned here it is probably that a simple visual inspection is sometimes all that is needed to fix a hardware issue.

What are your expensive gear repair stories? What did you learn that could save others hours of their time?