Etch Your Own CPLD Development Board

etch-your-own-cpld-breakout

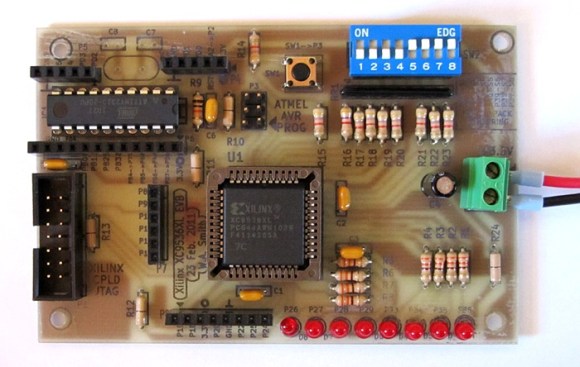
Ever wanted to make the jump from microcontrollers to logic chips? Although not technically the same thing we consider FPGA and CPLD devices to be in similar categories. Like FPGAs, Complex Programmable Logic Devices let you build hardware inside of a chip. And if you’ve got the knack for etching circuit boards you can now build your own CPLD development module. Long-time Hackaday readers will remember our own offering in this area.

Our years of microcontroller experience have taught us a mantra: if it doesn’t work it’s a hardware problem. We have a knack for wasting hours trying to figure out why our code doesn’t work. The majority of the time it’s a hardware issue. And this is why you might not want to design your own dev tools when just starting out. But one thing this guide has going for it is incremental testing. After etching and inspecting the board, it is populated in stages. There is test code available for each stage that will help verify that the hardware is working as expected.

The CPLD is programmed using that 10-pin header. If you don’t have a programmer you can build your own that uses a parallel port. Included on the board is an ATtiny2313 which is a nice touch as it can simulate all kinds of different hardware to test with your VHDL code. There is also a row of LEDs, a set of DIP switches, and a few breakout headers to boot.

Blood Glucose Monitor Data Pushed To Smart Watch

image

[Don] uses a Continuous Glucose Monitor to stay on top of his diabetes. It means carrying around an expensive and fragile device which acts as the readout. He’s an active guy and doesn’t want to destroy the thing while dirt biking or kick boxing so he’s been trying to use a TI Chronos smart watch as a display alternative.

As you can see he has already made some headway. This image shows the watch displaying data from the device. Unfortunately he’s depending on a PC to interface with the CGM display, then pushing it to the watch. He may try moving to a Raspberry Pi to help make this more mobile. This way the sensitive hardware could be tucked safely in a case inside a backpack while the watch shows his current glucose levels. We’d also love to see an embedded solution that would emulate the communications the PC is using to harvest the data. If you’ve got any suggestions in this area we’re sure that [Don] would appreciate the help.

WS2811 Can Be Addressed At 800kHz Using A 8MHz Clock

ws2811-running-at-8mhz

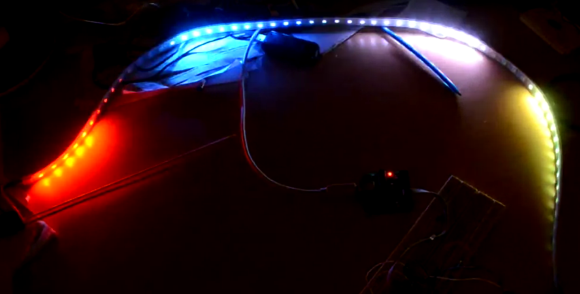
Timing is everything and that’s why most communication protocols require a very accurate clock source. The WS2811 LED strip controllers are no different. But [Danny] figured out a way to drive them reliably with an 8MHz clock source.

The WS2811 has become one of the most popular controllers for RGB pixels and strips alike. We’ve seen several hacks used to address them, including the 16MHz AVR technique that inspired [Danny] to take on this project. He planned to use that library but the 25-day shipping time for a 16MHz crystal drove home to invent a way to use the internal oscillator instead.

The gist of the hack is that he wrote assembly code to handle pairs of binary bit values. With a code block for each of the four possible combinations in hand he had to find a way to craft the conditional jumps to preserve accurate timing. After hitting the wall trying to solve this puzzle by hand he wrote a C++ program to solve it for home. The proof is in this video which shows one chip driving multiple Larson scanners on a single strip.

Continue reading “WS2811 Can Be Addressed At 800kHz Using A 8MHz Clock”

Moostar — Fortune Telling Moose Knock-off Of Zoltar

zoltare-the-fortune-telling-moose

Meet Moostar, the fortune-telling Moose inspired by Zoltar. You remember Zoltar, the coin operated fortune-teller who made [Tom Hanks] a rich movie star? Maybe you didn’t see that flick, but [Sketchsk3tch] did and he pulled this show piece together for a company-wide conference with relative ease.

If you’re good at choosing parts for your projects it makes things a lot simpler. He started with a singing Christmas moose, a mini plasma ball to act as the crystal ball, and somehow came across a collector’s basketball case which was the perfect size for the enclosure.

The electronics also came together remarkably well. He uses a thermal printer to spit out the fortunes — which are actually security tips for employees since that’s the dcpartment he works in. The coin acceptor is a Sparkfun part and he tried two ready made solutions to make the moose talk. The first is seen below and uses pre-recorded messages played by an Arduino Wave shield. This was improved upon by using an EMIC2 text-to-speech module that really opens up the moose’s range of chatter.

Continue reading “Moostar — Fortune Telling Moose Knock-off Of Zoltar”

Hackaday Links: Sunday, May 26th, 2013

hackaday-links-chain

The warmer months cometh and it’s time to think of this year’s Burning Man. [Matt’s] already set himself up with a sound-reactive LED project he calls the Seed of Life.

Older readers, and those who really know their hobby electronic history, will know the name Heathkit. Many readers tipped us off about their triumphant return. We’re not sure what form this reincarnation will take, but you can help shape it by participating in the survey.

Dust off that MSP430 launchpad and turn it into a composite video Pong console.

Here’s a way to use your Android phone as a computer mouse.

We’re not quite sure what this is, but turn your volume down before watching the video about a modular sythesizer hack.

[Arkadiusz Spiewak] wrote in to share some of the printing success (translated) he’s had recently with the H-bot style printer we saw a while back.

Strap an Arduino and an Electric Imp to your arm (and everyone else’s) and it’ll remember everyone you meet. You know, kind of like Google Glass but with geeky arm-wear instead of geeky headgear?

And finally, [Nerick] has just finished a thermometer project using Nixie tubes (translated).

Crown Earns You The Title King Of The Junkyard

crown-king-of-the-junkyard

[Greg Shikhman] wanted to use the school tools one more time before graduation. After hitting up some local motorcycle shops around town for parts he fashioned this crown for himself.

He didn’t pay ‘the iron price‘ as the motorcycle roller chain is waste material anyway. Chains do wear out and these were left over after being replaced with new ones. He first cleaned them up with a bit of WD-40 solvent, xylene, and soapy water to cut through the grime. There was also a layer of black oxide which normally keeps them from rusting which he peeled off with a dunk in some hydrochloric acid.

Chains are flexible and this would have made for a disheveled looking crown. The fix involved using an aluminum form the size of his head to keep the crown in round while he did his TIG welding. A double row of polished steel ball bearings take the place of jewels. As if the ten-pounder wasn’t painful enough he added four rings of bicycle chain as accents which he admits makes the thing unwearable because they dig into his noggin. We still don’t think that’s a good enough excuse to post about the project and not include an image of him wearing the thing during the junkyard coronation.

It would be fun to see a follow-up king-ring with similar LED features as that engagement ring but using this heavy-metal design style.

Update: Live Video Played On LED Strip Display

update-live-video-on-led-strip-display

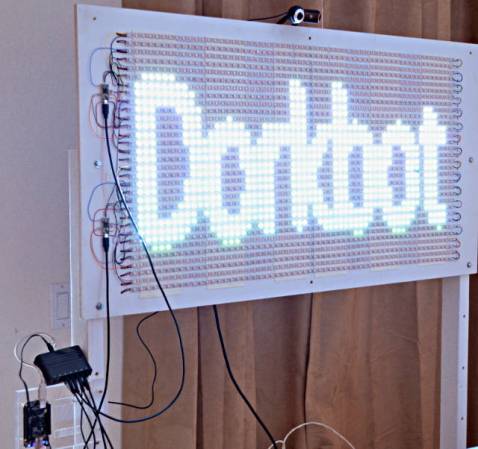
[Paul] took this LED display along with him to Maker Faire. To give it some interactivity he figured out a way to make it play live video. It is also activated using some stomp actuators built from piezo speaker elements and rubber floor mats.

This moves his original project in new directions. Back in February he was showing off the RGB LED strip display. He had it playing video but that was all dependent on using previously processed files. This upgrade uses a BeagleBone Black (the newest rendition of the ARM-based development board). [Paul] had tried using a Raspberry Pi board but had trouble with the webcam (mounted above the LED display) dropping frames. With the new board he is able to use the Video4Linux API to capture 30 frames per second and push them out to the display.

So far he’s had five out of the 1920 LEDs die on him. This shows off a couple of good things about using strips like this. A dead pixel doesn’t affect its neighbors. And replacement is as easy as cutting the ribbon on either side of the bad component, then soldering a new segment in place.