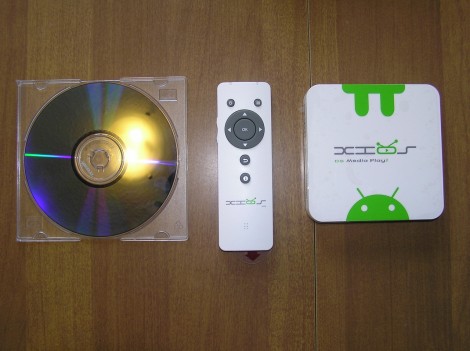
XBMC Hits Android

XBMC just issued the announcement we’ve been waiting to hear for some time now. The Android platform is now officially supported. Having seen the popularity of this open source media center software, and the willingness of some to spend hundreds of dollars on small computers to use it as their set-top-box interface of choice, we knew it was only a matter of time before a hardware manufacturer stepped up to the plate. In this case it is a company called Pivos Technology Group, who helped fund the push to bring XBMC to Android.

The good news is that the Android version of XBMC should work on a very wide range of devices. The bad news is that it will take a bit of time for that wide range of devices to support hardware video acceleration. Right now the only platform that has the hardware accelration for all video formats is the Pivos XIOS DS unit seen above. Looks a bit like a white version of the Apple TV huh? This turns out to be a great alternative to the Apple hardware, which requires a jailbreak to run XBMC and there is no jailbreak available for the current generation of that hardware. You can grab the XIOS DS for about $100-120, and as you can see after the break, it runs XBMC without a hitch, shows the ability to navigate menus while 1080p video is playing, and demonstrates working video plug-ins.

Plus, it’s an Android device with access to apps like any other. We looked around and it seems the Netflix app will work, but there is currently a problem with the video driver on units which have been upgraded to ICS. You can check out an unboxing of the device in this forum post, which is where we got the image seen above.

Continue reading “XBMC Hits Android”

Hacking A Parallel Port Flash Memory Programmer

[Pulko Mandy] doesn’t use his flash ROM programmer very often, but he does use it. When he tried to get support for a new chip and the manufacturer suggested he just buy a newer version he decided to hack the programmer and it’s software instead.

This device connects to the parallel port and was intended for use with MS-DOS systems (no wonder there’s no longer support from the company). The board uses logic chips to add read and write function. So the first step was to analyze how they connect together and come up with a set of commands. While at it he also made some changes to the board to bring the voltage more in spec and ensure the logic levels on the parallel port met the correct voltages.

His plan was to use the board with a Linux system so the parallel port interface can stay. He used what he learned from the hardware inspection to write his own interface in C++. It works with a chip he was able to use under the MS-DOS software, but he hasn’t gotten it to work with the chip that sparked this adventure. If you’re familiar with how the AT29C040A works please consider lending a hand.

Red Bull Dispenser Includes Smokey Presentation And Rejects Inferior Drinks

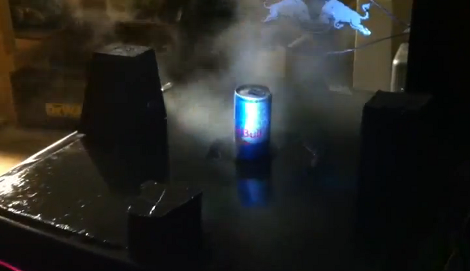
The Eugene Maker Space’s entry in the Red Bull Creation contest dispenses cans in a mysterious fog through an iris opening. But it’s also capable of disposing of the Red Bull cans… and only those cans. If you try to put a different soda in it will violently reject it!

First off we must applaud the Eugene Makers for their prolific documentation of the project. There’s a day or two worth of fun reading/watching on that page so make sure you save the bookmark (and learn from their example!). Inside the mysterious waist-high enclosure there’s a hopper to store the energy-drink reservoir. As a can is dispensed its barcode is scanned to ensure this is an approved beverage. At this point the can is elevated through an iris in the case of the enclosure, al0ng with a theatrically timed puff of fog. The parts of the iris were printed on paper and used to cut out wooden pieces using a scroll saw. The fog blast is from an inverted duster can with a 3d printed nozzle that helps make it Bullduino controlled.

When done with your beverage the can can be placed back in the opening, where it is again scanned before going into the recycling bin. But as you can see in the clip after the break, trying to sneak a soda can into the machine will launch the empty right back at you!

Continue reading “Red Bull Dispenser Includes Smokey Presentation And Rejects Inferior Drinks”

Any Flavor Sports Drink At The Push Of A Button

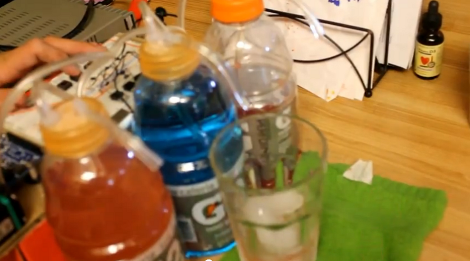
[Sage Spate] wasn’t happy with the boring flavors of orange, blue, or red sports drinks. He decided to mix it up by building this flavor-mixing drink dispenser.

He modified the caps for each bottle to work with an air-pressure system. This way the bottles themselves serve as the reservoir and can easily be replaced when empty. Each cap has two openings, one is used by the dispenser nozzle and includes a hose that will reach all the way to the bottom of the bottle. The other hole connects to an air pump. Raising the pressure in the bottle forces sports drink up and out of the dispenser hose.

One air pump is used for all three reservoirs with a set of solenoids to enable each flavor individually. [Andreas] sent in the tip and mentioned that some of the parts are salvaged from an ink jet printer but we’re not sure which ones. At any rate, the next step in the project is to add Arduino control which will allow for custom mixing based on preset recipes.

We’ve embedded the demo video after the break.

Continue reading “Any Flavor Sports Drink At The Push Of A Button”

GPS Dog Collar Keeps Track Of Your Walks

[Becky Stern] came up with a way to make sure you and your dog are getting enough exercise. It’s a dog collar mounted GPS that measures how far you have walked. Just set your target distance and the progress bar in the middle of this flower will let you know when you reached it.

The most obvious piece of hardware is the OLED board which is sticking out like a sore thumb. But if you’d like to be a little more discreet you could forego the full-featured display for some carefully places LEDs to make up a circular progress bar. The GPS module itself fits well in the center of the flower, which [Becky] shows us how to make out of wire-edged ribbon. Hidden on the other side is an ATmega23u4 breakout board running the Arduino bootloader.

If you’re interested in sewables and textiles [Becky] uses a lot of basic techniques that are good to learn. Check it out in the clip after the break. She’s always shown a remarkable ability to develop projects which won’t scare away the villagers in the way our wire-sprouting breadboard hacks sometimes do.

Continue reading “GPS Dog Collar Keeps Track Of Your Walks”

Hacking A Brother Thermal Printer To Use Non-OEM Continuous Rolls

You can get your hands on a Brother thermal label printer for $65-75. But if you don’t want to buy the Brother branded continuous feed paper for it you’re out of luck. Unless you pull off this hack which lets you use any thermal paper you want with a Brother QL-500 printer.

The printer is tied to the OEM paper because of a pattern printed on the back of the roll. It’s basically an encoder strip made up of black rectangles spaced at regular intervals. Surely there are other brands that come with this pattern on them, but if you want to use paper without it the secret is in moving the sensor that reads that strip.

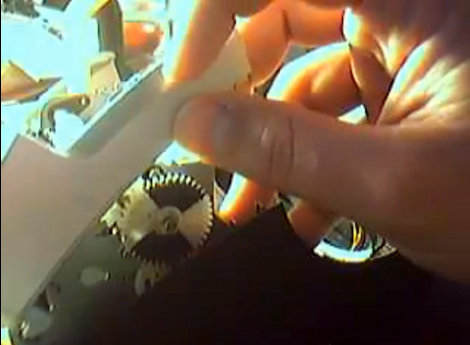
The brilliant solution is to use one of the white feed-gears as an encoder wheel. [CheapSkateVideo] used a magic marker to paint two opposite quarters of the gear black. He then removed the optical sensor and placed it on the side of the case facing the wheel. It needs to be adjusted along the radius of that gear until the timing is just right, but once it is you’re ready to go. The sensor is a safety feature to ensure there is media in the printer. If there’s not you can burn up the print head so keep that in mind. See the explanation in the video after the break.

Continue reading “Hacking A Brother Thermal Printer To Use Non-OEM Continuous Rolls”

Fabricating Headlights For An F250

The amount of time that is going into these custom headlights is just staggering. [Mcole254] is working on his brother’s truck, replacing the stock headlights with High-Intensity Discharge (HID) lamps and rolling some nice LED features into the mix while he’s at it.

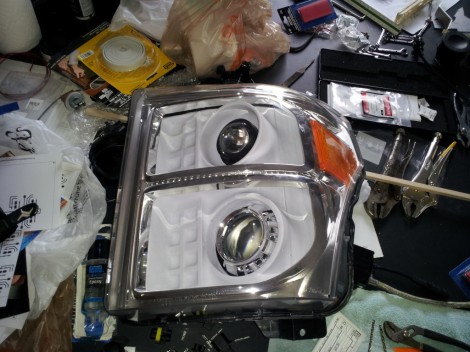
The build starts by removing and disassembling the stock headlight assembly. In order to get the enclosure apart he heated it in the oven until the glue was softened and the parts could be pried apart. The goal is to replace the reflectors with an assembly that suits the new lamps and LEDs. Above you can see the white pieces which were vacuum formed from a mold that [Mcole254] made from wood and PVC. He tried several iterations using his home-made vacuum former but couldn’t get the definition he really wanted. The most recent posts from him show some massive 3D printed parts that will be used instead.

While inside he added a line of amber LEDs for the turn signal. You can seem them mounted along the silver strip between the upper and lower reflectors. A demo of those super bright additions is embedded after the break.

Continue reading “Fabricating Headlights For An F250”