Toaster Oven Reflow Project Goes Way Overboard

This project may take the cake on high-end reflow retrofits. It’s a HUGE project which uses a toaster oven to reflow surface mount circuit boards. And the fact that it bursts with features makes us giddy.

So what parts have we come to expect on these devices? Obviously a heat source which usually comes from a reused toaster oven. Then you need a way to switch the heating elements on and off based on feedback. Since solder profiles have precise timings and temperatures a clock is usually involved. All of this can be done with a temperature probe on a multimeter and a smartphone as the timer. But what we have here is full-automation and then about a thousand more features.

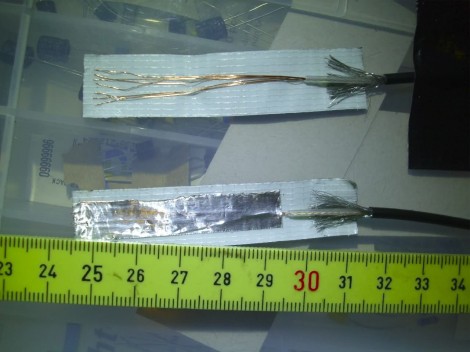
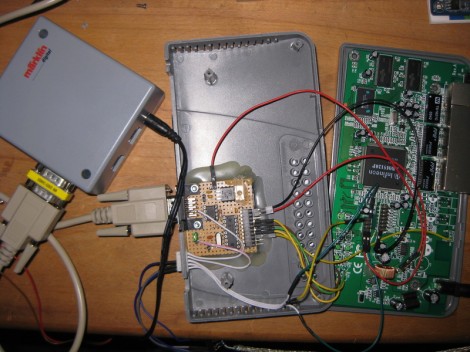
The driver above has a full user interface. It’s got its own PID routines which help to ensure proper holding temperatures and accurate ramping when going from one temperature to the next. The cable exiting the controller below the red buttons is providing feedback via a thermocoupler.  So program in your solder profile and let it go. But wait, don’t you want to record and graph what actually happened during this reflow run? Well that’s what the serial connection is for. In fact, you can even load new profiles and control all aspects of the device from a PC interface.

Switching for the toaster oven is done in a different way as well. Instead of just switching mains power, the circulation fan and the heating elements have been electrically separated. This way the fan can run whether the elements are on or not.

New And Improved Potentar

We like what we’re seeing and hearing with [Dorian Damon’s] newest version of the Potentar. This is revision 2.0 of the instrument we saw in a December links post. He calls it the Potentar, since it uses a linear potentiometer in a way similar to how the frets on a guitar work (Potentiometer + Guitar = Potentar).

The first thing you should notice is the case upgrade. The original used what looked like unfinished scrap wood, but finished wood of this case really makes the thing look like a traditional instrument. With this design he loses the Arduino in favor of a standalone ATmega328 chip. You’ll notice knobs and a switch on the face of the body. This allows for selecting a couple different kinds of scales and turning the power off. The linear potentiometer and sewing machine button are the same as before. After the break you can catch his description and a quick performance thanks to the audio jack for patching it into an amp.

Continue reading “New And Improved Potentar”

Lucid Dreaming Mask Marries Economy With Comfort

Here’s an effort to make a cheap lucid dreaming mask that is also comfortable. The idea is in response to the goggles we saw in April (which would not be too comfortable to sleep in) and the wildly successful Remee (which has an $80 target price).

The mask itself is sewn from a child’s fleece blanket. Inside is a piece of foam cut from some recreation mat. You know, those squares made for a play area that connect together like a jigsaw puzzle. You may have already spotted the Arduino in the image above, but the project is designed to run from an AVR chip embedded in the foam. The design only uses three LEDs, which may or may not work for you — we’d guess it depends on how they line up with your eyes. The video after the break does a great job of illustrating each point in the construction.

If you’re looking for something less soothing and more recreational you could always try out these trippy goggles.

Continue reading “Lucid Dreaming Mask Marries Economy With Comfort”

DIY EMG Uses An Audio Recorder

[Ericdsc] is looking to capture the electrical impulses of his muscles by using an EMG. He went through several prototypes to find the right recipe for sensors to pick up the electrical signal through his skin. Above you can see the version that worked best. Each sensor is made starting with a piece of duct tape and laying out a patch of stripped wire on it. A 5cmx1xm piece of aluminum foil then covers this, and second smaller piece of foil covers the cable’s shielding (not pictured here). This will stick to your skin to hold the sensor in place after applying a dab of sugar syrup to help make a good electrical connection.

In this case, an audio recorder is taking the measurements. [Ericdsc] had been having trouble sleeping and wanted to find out if he’s restless in bed. The audio recorder can log hours of data from the sensors which he can later analyze on the computer. Of course, it wouldn’t be hard to build your own amplifier circuit and process the signals in real-time. Maybe you want to convert that mind-controlled Pong game over to use abdominal control. You’ll have a six-pack in no time.

Hackaday Links: June 17, 2012

Portal gag-video

These guys make your own video editing chops look just plain sad. They put together a video demonstrating the portal gun in real life.

Unleashing the beast

We have this problem all the time. The noise regulations were preventing [Massimiliano Rivetti] from letting the true voice of his Ferrari be heard. He hacked into the control system and can now adjust it via iPhone to roar with power. [Thanks Claudio via openPicus]

Music so bad you want to throw something

Here’s a novel way to include the worker bees in music selection around the office. A piezo element was attached to the back of a framed poster and when you throw something at it, the next track is played. We really loved the demo video for this one. [Thanks Calum via DontBelieveTheHype]

Acrylic frame for a CNC machine

[Jake] wrote in to show off his progress on a CNC build. He’s got a frame made of acrylic and some other materials. It’s not up and running yet, but what he’s got so far looks very nice.

Helo built for one

All we can think with this one-man helicopter is failure of those propellers. At least with an ultralight plane you can glide to a gentler crash-landing. [Thanks Filespace]

Router Controlling Choo-choos Over The CAN Bus

This setup is used to control a model railroad. Well, not entirely this setup. [Gerhard Bertelsmann] already has a proper railroad controller, and it just happens to offer CAN bus communications. He’s using OpenWRT and a cheap router to connect the bus to the network.

Originally he wanted to use a Raspberry Pi board for the project, but the incredible backorder  situation with that hardware led him to grab an old router. After loading OpenWRT he started working out how to connect a couple of ICs (MCP2515 and MCP2551) that will take care of the CAN bus communications. The hardware connections end up being pretty simple, with five data lines (and their pull-up resistors) connecting to the router’s serial header. From there it was a matter of mapping the device in software so that the hardware can be controlled over the network.

We like this example since CAN is used is a lot of other applications.

Template For Building STM32F0-Discovery Project In GCC

Yep, that blue light is blinking and I made it happen. I’ve been hard at work since I got my free STM32F0-Discovery board in the mail. Most recently I put together a starting template for building STM32F05x project on Linux. You’ll still need to install your own tool chain (I’m using the Code Sourcery G++: Lite Edition), but this makes it a snap to compile your projects with support for STM’s peripheral libraries.

As for programming, you may remember that I added support for writing to RAM in the stlink project. I’ve wasted spent a ton of time trying to get support for writing to Flash into that project. It’s just less of a hassle to use stlink than it is to work with OpenOCD. But I’ve really hit a wall getting the flash loader code to work. If you want to check out what I’ve done so far in that area I committed a very messy branch (see the commits for what code changes I’ve made).

In the mean time you can use OpenOCD to write images compiled with the template to your device. I included the ‘make program’ option in the Makefile to do this from command line. If you need help compiling OpenOCD check the readme in the template repository.