Transformer-based PSU Repair

Repairing someone else’s design mistakes is much more difficult than starting from scratch. So whenever we come across someone who’s good at this type of trouble-shooting we pay attention. [Jim] had a Sangean HDR-1 in his home. It’s a tabletop HD radio that stopped powering up for some reason. He cracked it open and got to the bottom of the problem.

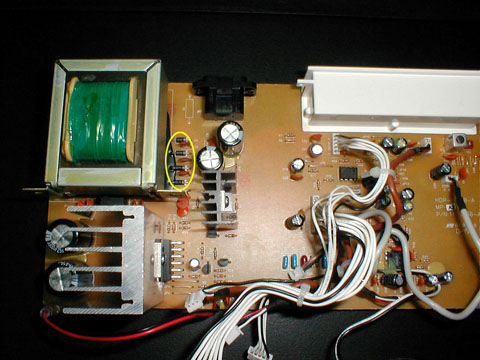
The first order of business is disassembly, which isn’t too hard with this model. With multimeter in hand he started probing the transformer and found that the contacts for the primary are an open circuit; signaling a problem. There’s no inline fuse for protection, and further study of the secondary winding let him to discover the use of 1N5817 diodes. These are underrated parts for this particular transformer. He replaced them with 1N4003 diodes to bring the device in spec. But there was still the issue of fuse protections. A bit of circuit free-forming allowed him add a fuse and varistor  by soldering the directly to the transformer’s contacts.

Why stop there? While [Jim] had the case open he also swapped out the low-end op-amp and a few electrolytic capacitors to improve the sound quality of the radio. Op-amp replacement seems to be a popular way to improve the sound from HD radios.

Get The Lead Out Of The Arduino Compile Process

Relief is here from long compile times when developing firmware for your Arduino project. [Paul] was puzzled by the fact that every file used in a sketch is fully recompiled every time you hit upload–even if that file didn’t change. To make things more confusing, this behavior isn’t consistent across all Arduino compatible hardware. The Teensy has an additional feature not seen when working with other hardware boards in that it reuses previously compiled code if nothing has changed. It even tells you which files are being reused, as shown in the image above.

After the break we’ve embedded [Paul’s] video that walks us through the process of editing the Arduino IDE to reuse previously compiled files. It’s a one-liner addition to the boards.txt file. For example, if you’re working with the Arduino Uno all that needs to be added is ‘uno.build.dependency=true’. [Paul] had previously submitted a patch to roll this into the Arduino IDE source code, but it was not accepted citing a need for more testing. He’s asking for help with that testing and wants you to post your thoughts, or any bug information, on the new issue he’s opened regarding this feature. Continue reading “Get The Lead Out Of The Arduino Compile Process”

Android Phone Serves As Arduino Terminal

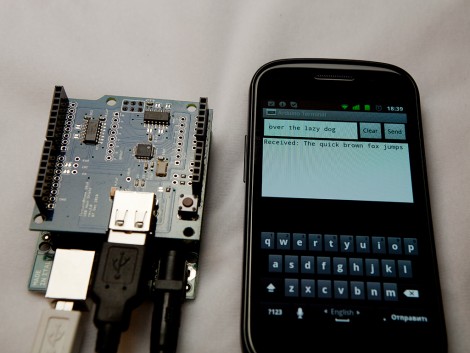
Looking to use his Arduino when on-the-go, [Oleg] has been working on a way to use the Android ADK terminal emulator with the Arduino. The Android side uses ADK features along with a custom application. [Oleg] received help from his friend [Victor] when developing the program for Android (you can check out our own Android Development tutorials if you’re interested in learning how this is done). The .apk file is available for download, but they’re waiting to release the source code until they can clean it up and get some of the gnarly bugs out of the beta version.

A USB host shield for the Arduino is needed to connect to an Android hand set. You’ll be able to send and receive strings via the terminal, with support for carriage return and life feed characters. Unfortunately this doesn’t allow you to change, compile, or write sketches to the Arduino. But it might come in very handy when trouble shooting a project when a computer is not around, or just for using an Android phone as an output.

Use Droid Bionic As A Mobile Hotspot Without Paying Extra

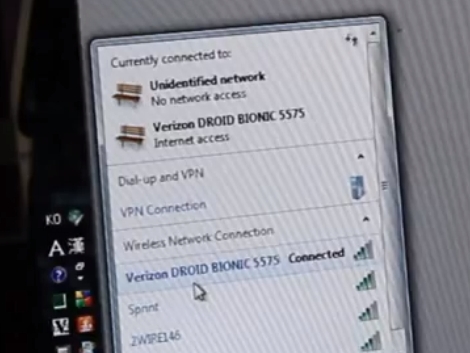
Apparently Verizon customers are expected to pay for a second data plan if they want to be allowed to use a cellphone as a mobile hotspot. This means one data plan for the phone, and a second for the tethering. [DroidBionicRoot] thinks this is a little silly since there is already a data cap on the phone’s plan. But he’s found a way around it if you don’t mind rooting the phone to enable free tethering.

Not surprisingly it’s a very simple alteration. The phone is already capable of tethering, to enable the feature without Verizon’s permission just edit one database value. In the video after the break, [DroidBionicRoot] starts the process with a rooted Droid Bionic handset. He purchases an app for $2.99 which allows him to edit SQL databases on the handset. From there he navigates to the ‘Settings Storage’ database and changes the ‘entitlement_check’ key value to 0. Reboot the phone and tethering is now unlocked.

Continue reading “Use Droid Bionic As A Mobile Hotspot Without Paying Extra”

Digging Deep Into The Neato’s LIDAR Module

[Hash] is going to great lengths to learn about the parts used in his Neato XV-11 LIDAR (dead link; Internet Archive). We looked in on his work with the XV-11 platform recently, where he used the dust bin of the vacuum as a modular hardware housing. This hack is a hardware exploration aimed at figuring out how an equivalent open hardware version can be built.

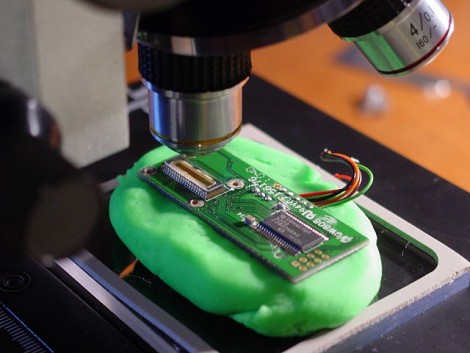
The LIDAR module is made of two big chunks; the laser and optic assembly, and the sensor board seen above. [Hash] put it under the microscope for a better look at the line scan imager. The magnification helped him find the company name on the die, this particular part is manufactured by Panavision. He figured out the actual model by counting the bonding wires and pixels in between them to get a pretty good guess at the resolution. He’s pretty sure it’s a DLIS-2K and links to an app note and the datasheet in his post. The chip to the right of the sensor is a TI digital signal processor.

Putting it back together may prove difficult because it will be impossible to realign the optics exactly as they were–the module will need to be recalibrated. [Hash] plans to investigate how the calibration routines work and he’ll post anything that he finds. Check out his description of the tear down in the video after the break.

Continue reading “Digging Deep Into The Neato’s LIDAR Module”

Wall-climbing Bot Does It With Ease

Paraswift is a robot that can climb vertical surfaces with ease. Here you can see the robot motoring up the side of a building with a parachute packed on it’s back for use on the way down. The team that built the robot is calling it a base jumper, but after seeing them catch the falling robot in a net we’d say it’s still a bit too fragile to make that claim.

The parachute isn’t the only way for this guy to get down after a long climb. As you can see in the video after the break, it has no trouble driving in any direction on a wall. Like other wall-climbers the Paraswift is using air to stick to the surface. A vortex of air, similar to a tornado, generates a large amount of negative pressure, sucking the body of the robot to the surface it is climbing. I you’re the one who traded a good portion of your life to spend building the Paraswift we’re guessing you added the parachute to hedge your bets against a power failure.

Continue reading “Wall-climbing Bot Does It With Ease”

Chumby’s New NeTV Makes Almost ‘any TV’ Into An Internet Connected Device

Check out the new set-top box on the block, the NeTV from Chumby Industries. That link will take you to their video demonstration of the device, which is a humble-looking black box with no apparent user interface. You’ll see a few cool tricks that may impress you, like pairing the device with an Android phone through the use of a QR code. Once the two have mated you can do things like share images on the TV and load webpages from addresses entered into the smart phone. There are options for scrolling alerts when you receive an IM or SMS, and a few other bells and whistles. All of this from a device which connects with two HDMI ports to sit between your TV and whatever feeds it a video signal. Read all about the features here.

But its the hacking potential that really gets our juices flowing. The developer page gives us a look inside at the Spartan-6 FPGA that lives in the little case. We don’t often quote [Dave Jones] but we’re certain he’d call this thing ‘sex on a stick’. They’ve made the schematic and FPGA information available and are just begging for you to do your worst. The power for the device is provided by a USB connection but curiously is just above spec when drawing a max of 700 mA. We have a USB port on the back of our TV and would love to velcro this thing in place and power it from that. What would you plan to do with it?

[via Reddit]