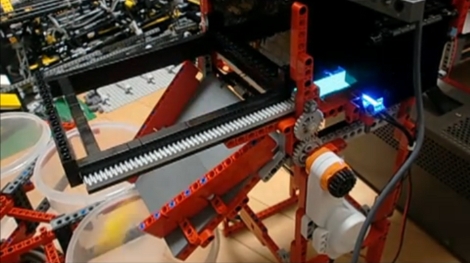
NXT Machine Sorts LEGO Blocks Automatically

Smart people don’t put their toys away, they build machines to do it for them. Case and point: this NXT project which can sort LEGO pieces. Just dump a bucket of random blocks in a hopper on one end of the machine. One slice at a time, these plastic pieces will be lifted onto a conveyor system made up of several different belts, which allows for separation of the parts. One block at a time, each piece enters a specially lighted chamber where they are visually identified by the NXT brick. Once it identifies the block, a carousel of plastic containers rotates to place the correct home for the block below the output shoot seen above.

So do we now have a completed LEGO circle of life? Not quite. You can build structures automatically using a 3D LEGO printer and this sorter will have no problem organizing the parts for that purpose. But we still need a LEGO machine that can tear assembled bricks apart.

Continue reading “NXT Machine Sorts LEGO Blocks Automatically”

Converting From Clutter Closet To Dreamy Datacenter

[DocDawning] had a nice home network up and running, but the messy pit housing the hardware made him avoid that part of the house. In an effort to cut down on noise, and clean up the clutter, he built himself a very nice data center inside a small closet.

One of the biggest changes in the setup provides adequate cooling. He cut a vent hole into a wall shared between the closet and a hallway. This was just the right size for a few large cooling fans which suck air into the enclosed space. But cool-air intake must be accompanied by hot-air outflow so he added an exhaust vent in the ceiling. This also received a trio of big fans, and as you can see above, the integrated LEDs act as a light source for the server farm.

The final part of the plan involved machine-specific brackets mounted to the walls of the enclosure. These racks were built out of 1×1 white wood. They hold the hardware in place leaving plenty of room to run cables. The new setup even opened up enough wall space to mount power and networking hardware. Now everything has its place, and [DocDawning] can finally close the door on his noisy servers.

Mayor Is A Hacker And Wants To Use DIY Parking Meters

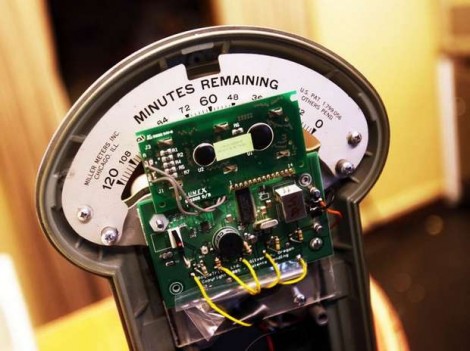
The Mayor of Silverton, Oregon is a hacker and wants to use roll-your-own hardware in the town’s parking meters. It’s not that he thinks he can do a better job than companies selling modern meters (although there have been notable problems with those), but he wants to retain the sentiment of the 1940’s era parking meters that are being replaced. Those meters are known as penny parking meters, because you can get 12 minutes of time for just one penny.

Many municipalities have gone digital with parking payment systems due to costs associated with servicing mechanical meters and collecting coins from each one of them. This hack aims to keep the look of the vintage meters, but replace the mechanical readout with a digital screen. The meter would still offer a reasonable parking deal; five minutes for free. Cost for replacing the internals is estimated at $150 per meter… which seems just a bit high if they are looking at a 250 unit run. The main problem that we see with the idea is that the original parking meter bodies don’t have a slot which can accept quarters.

[Thanks Rick]

Sequencer Built On A Cycle II FPGA Board

[Matt’s] finishing up his computer science degree. As part of a class assignment he programmed his own sequencer which runs on a Cyclone-II FPGA development board. We’ve embedded a video below the fold that shows you what it can do. The buttons and LEDs offered on the board actually allowed him to create a nice user interface. Each slide switch has a surface mount LED above it, giving feedback for which beats in the loop are on and off. There’s also a bank of momentary-push buttons seen in blue above. [Matt] uses these to tweak settings like the pitch that is stored for each slide switch. He even puts on a light show with the VGA output.

We’ve seen this Altera board before, used to drive a falling sands game. The hardware will run you around $200 but that’s not bad considering all of the fun things you can do with it.

Continue reading “Sequencer Built On A Cycle II FPGA Board”

Geiger Counter Built In An Ohmmeter Enclosure

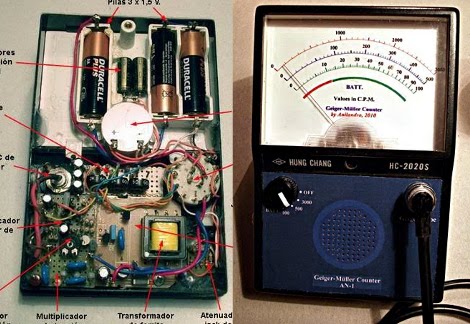
Here’s a Geiger Counter that makes itself at home inside of an old Ohmmeter (translated). [Anilandro] set out to built this radiation detector in order to learn how they work. Like other diy Geiger Counter builds we’ve seen, this project assembles a circuit to interface with a gas-filled tube which serves as the detector. [Anilandro] takes a few paragraphs to discuss how this works; the Geiger tube is basically a capacitor whose electrical characteristics change as an ionizing particle passes through it.

Once he had the theory worked out he scavenged some parts to use. A broken emergency light donated its transformer to provide the high voltage needed. The rest of the circuit was built on some protoboard, and a speaker was added to output the clicking noises that have become a familiar part of the detector hardware. The tube itself is housed in a wand that attaches to the base unit through a cable. Check out some test footage of the finished unit after the break.

Continue reading “Geiger Counter Built In An Ohmmeter Enclosure”

Shift Register Is All It Takes To Make A 3-wire Serial LCD

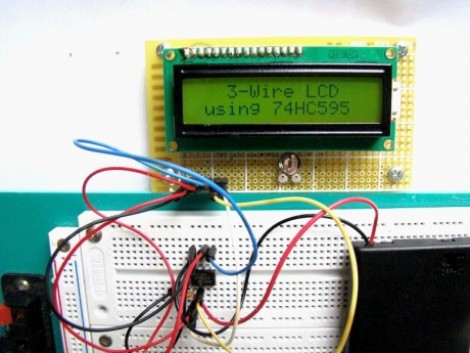
This hack is a bit older, but one aspect of the setup makes it worth sharing. Shift registers are a common component to include in a project when you need to increase the number of I/O pins available. We’ve used them to drive LCD screens before, but we never realize you could use a 595 chip to make a 3-wire serial LCD interface. That’s because we’ve always thought of shift registers as having three control pins which must be addressed: data, clock, and latch. But it seems that’s not the case. This hack gangs the pins for clock and latch (called the storage register clock input on this chip) together. This causes the shifted data to be latched to output register one clock cycle after it is shifted into the chip.

This means you can operate the 595 chip with just two pins, but alas, you do need one more connection to drive the LCD properly. This is an HD44780 compliant display. It is being used in 4-bit mode; four of the shift register pins provide that data, while a fifth controls the Register Select pin. Since the shifted data from the 595 appears on the pins after each clock strobe, you must control the Enable pin on the LCD separately or it will behave sporadically.

So there you have it, control an HD44780 display with just 3-pins by using a $0.42 part. Are we going a little too fast for you? Check out this 595 tutorial and give the shift register simulator a try. That should bring you up to speed.

[Thanks Rajendra]

IR Remote Control Jammer Makes You Lord Of The Livingroom

Bring communications jamming technology into your TV viewing experience by building this infrared LED driver circuit. You’re probably familiar with the TV-B-Gone, which let’s you turn off any television at the touch of a button. But what if you actually want to watch the program that’s currently on the screen when the person with remote-in-hand doesn’t? That’s where this little marvel comes in.

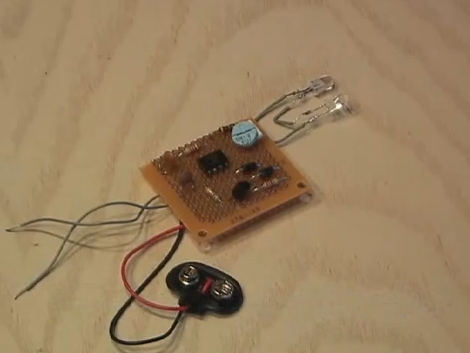
[KipKay’s] IR jammer uses a 555 timer to constantly transmit infrared traffic. The signals it’s sending out don’t correspond to commands the TV (or any other IR remote-controlled device) will respond to. But if the light intensity is strong enough, they will interfere with any signals coming in from a remote or even from a TV-B-Gone. [KipKay] wisely hides this circuit inside of another remote control so that the other couch potatoes you are thwarting won’t get wise to what’s happening. If they want to watch something else they’ll have to get up and walk over to the entertainment center to do something about it, and what’s the chance that’s going to happen?

Don’t miss [KipKay’s] infomercial-esque presentation of this gadget after the break.

Continue reading “IR Remote Control Jammer Makes You Lord Of The Livingroom”