Controlling An AC Drill Using One PWM Connection

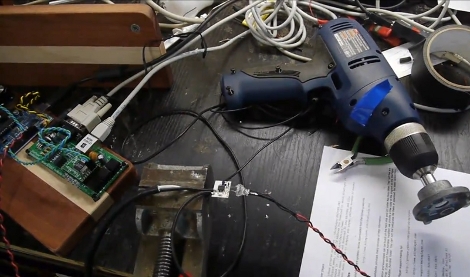
This peculiar setup allows [Ben Krasnow] to control an alternating current device using one pin on a microcontroller. He’s experimenting with a power drill and has relocated the trigger circuitry that makes it spin. On that board he found a variable resistor combined with a capacitor which control a triac, actuating the speed of a drill. [Ben’s] solution works great and isolates the drill from the control circuitry. He replace the variable resistor with a cadmium sulfide photoresistor (basically a variable resistor whose resistance depends on the intensity of light). Pulse-width modulation is used to adjust the brightness of an LED shining on that photoresistor and thereby affect the speed of the drill. This is such as simple alteration to the drill we’d call it MacGyver-esque.

See a demonstration after the break.

Continue reading “Controlling An AC Drill Using One PWM Connection”

Pressure Mapping Sensor Mat

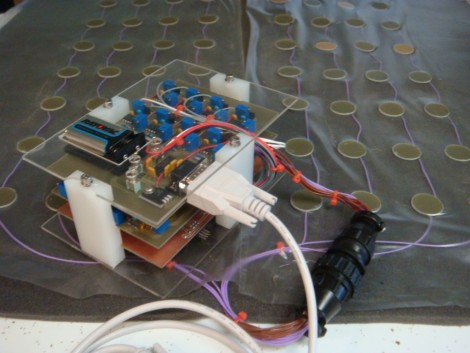
[imsolidstate] built his own pressure sensitive mat. It utilizes two discs of copper clad board with a piece of foam in between for each of 64 sensors. As the foam gets compressed, the capacitance between the two pieces of copper changes, a measurement that is fairly easy to make with an analog to digital converter. The mat is being used to measure how well a horse saddle fits the animal. Data is read in through a serial port and then mapped using Excel. This prototype proves that the concept works but [imsolidstate] mentions that there’s room to improve the sensitivity and that there could be more noise filtering incorporated into the design.

Use A Big Magnet To Set The Time

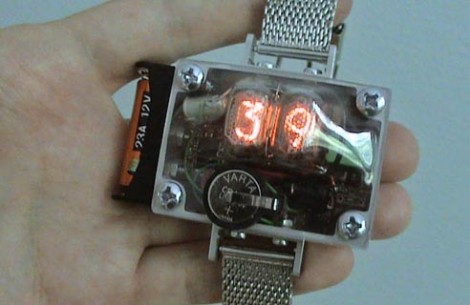
This bulky package is a Nixie tube wristwatch. We still like [Woz’s] watch better but this one has a few nice tricks of its own. Notably, there aren’t any buttons to set the time. Instead, a large magnet is used to actuate a magnetic switch inside the body. Speaking of enclosures, the case is aluminum and the face plate is polycarbonate but looks like it’s been vacuum formed. Check out the clip after the break.

Continue reading “Use A Big Magnet To Set The Time”

Arduino Based Thermal Printer

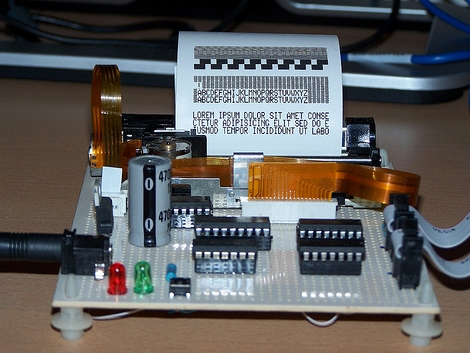
[Manuel] built his own thermal printer based around an Arduino. We’re a bit confused about the parts, his webpage specifies an EFA-1019HW2 print head but the bill of materials on his github shows EPT-1019W2. We can’t find a source for either product number, but we did find similar thermal line printers for as low as $32.00. The controller boards on the other hand look to be around $150 so building your own is a definite win. [Manuel’s] version can print 96 points and has a font set that prints 32 characters per line. Check out the video after the break and let us know if the noise of the print head is a deal killer for you.

Continue reading “Arduino Based Thermal Printer”

Hackaday Links: August 29, 2010

Hotel room door lock picking

Here’s further proof that you should never leave anything of value in your hotel room. We’re not worried about someone getting in while the room is occupied. But these methods of defeating the chain lock and opening the door without a keycard (YouTube login required) do show how easy it is for the bad guys to steal your stuff.

iPhone frequency generator

Need one more way to make that iPhone a useful lab tool? Why not use it as a frequency generator. Start with a free app and mix in an audio cable with test leads and you’re in business.

Drag Soldering

[Andrei] sent us a link to a video about drag soldering. This is a method of soldering fine-pitch chips using a small bit of solder and a fat solder tip. The link he sent is dead now but we found another great example of the process. We were just using this method earlier in the week to solder a TSSOP38 package for an upcoming project and it worked like a charm.

Laser etched PCB

Here’s some art in PCB form thanks to a laser. We thought this might be interesting to share after seeing those art pieces made from old circuit boards. This example is laser etched, but not directly. As you probably guessed, the copper clad board is coated with resist and the laser etches some of it away. Whatever got zapped by the laser dissolves when the board is placed in acid, leaving [Riley Porter’s] art behind.

From RepStrap To RepRap; A 3D Printer Is Born

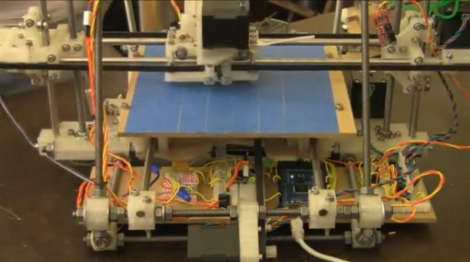
[Gavilan Steinman] just printed and assembled his own RepRap machine and filmed the process. This isn’t news but we found it very interesting to watch. He started with a RepStrap, a rapid-prototyping 3D printer that as built by hand instead of printed by a similar machine. This is the seminal step in the self-replicating process.

From there he prints an extruder head which improves the quality of the parts the RepStrap can produce. We then see time-lapse footage of the printing process for a Mendel unit, the second generation of RepRap machines. We’ve embedded the video after the break. It’s a great way to spend ten minutes on a Sunday afternoon.

Continue reading “From RepStrap To RepRap; A 3D Printer Is Born”

Make Switched-mode Power Supplies Do Your Bidding

[Ken] needed to supply 3.3 volts of regulated power. He started by using a linear voltage regulator but after a few calculations he discovered that 72% of what he put in was lost to heat. The solution to this is a switched-mode power supply. Rather than burn off energy through a voltage divider, an SMPS turns the power on and off very quickly to achieve the desired voltage.

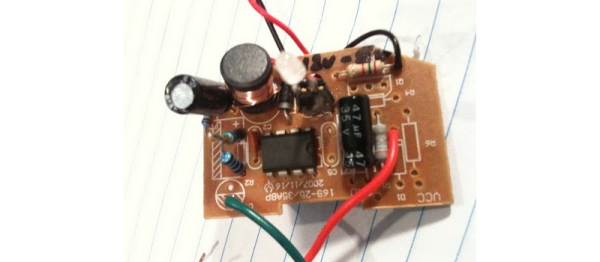
A car charger-type USB regulator was chosen as [Ken’s] donor device. He figured that making adjustments to the resistors inside would affect the output voltage and he was right. He adjusted the potential divider and ended up with a steady 3.295V.

We asked him to share the schematic that he put together from studying the board and he came through. See that and get the link to the DC-DC converter datasheet after the break. Continue reading “Make Switched-mode Power Supplies Do Your Bidding”