GSoC Takes On XBMC On The Beagleboard

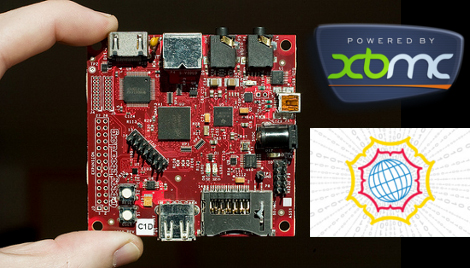
Imagine a tiny little device that you velcro to the back of your TV that delivers all of the media found on your home network. We’ve been dreaming about that since we saw early working examples of XBMC running on a Beagleboard. We’ve heard little about it since then but now there’s cause for hope. XBMC optimization for the Beagleboard has been approved as a Google Summer of Code project. The fruits of these projects tend to take a year or so to ripen, but we don’t mind the wait.

[Topfs2] is the student coder on the project and will be posting weekly updates as well as idling in IRC so if you’re interested in lending a hand with testing or words of support you should drop him a line.

[Beagleboard photo: Koenkooi]

USB Morse Code Keyboard

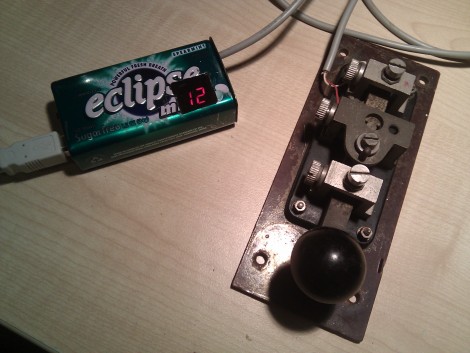
Looking for motivation to practice morse code [BenB] built this morse code keyboard. It uses USB and is recognized as a standard keyboard thanks to the V-USB stack running on the ATmega168. The project is rounded out with a clean look thanks to the chewing gum container that serves as an enclosure.

His design is simple enough that any morse key you have on hand can be used. You could even adapt that glove coder you built a couple of years back.

Unlocking The Crippled Potential Of An Unmanaged Switch

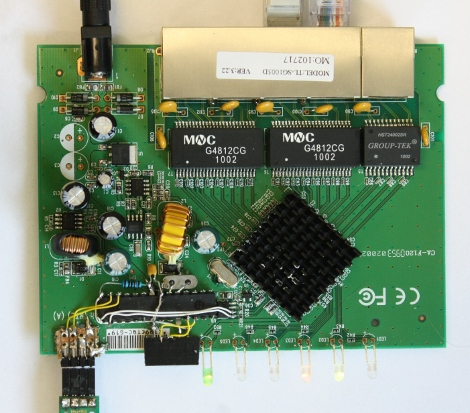
[Sprite_TM] outgrew the features of the cheap unmanaged TL-SG1005D switch he was using on his home network. Instead of buying a new and much more costly switch he cracked the cheap one open and found that the RTL8366SB chip inside possessed the ability to work harder but was crippled for sale as a low-end model. It wasn’t as easy as that oscilloscope firmware upgrade we saw a while back. He had to add an AVR ATmega88 to send I2C commands to the switch. Turns out that the I2C protocol wasn’t standard and after much head scratching he found some Linux drivers for the chipset that gave him enough info to send the configuration commands he needed. Now he’s go the managed switch he needed for his VLAN for the cost of a microcontroller and some wire.

PLCC Replaces Game Boy Cartridge ROM

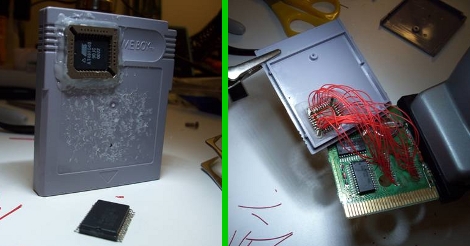
[Gerry] sent us pictures and a few details on replacing the Game Boy cartridge chip with a flash chip. For the prototype he used a PLCC and a little wire porn to interface a flash chip with the cartridge’s PCB while still having access to it for programming. In retrospect he plans to use a 32-pin ZIF socket on the next version to make things easier. It does work and he’s had some success loading his own code and getting it to run. There are other cartridge hacks that let you load code onto a cartridge but if you have the knowhow and the parts this makes for a fun weekend project. We’ve posted the rest of the photos that [Gerry] sent us after the break.

Update: Gerry is working on a video and a pinout. We’ll post info once we get a hold of it.

Continue reading “PLCC Replaces Game Boy Cartridge ROM”

One-armed Coding Using A Half-qwerty Hack

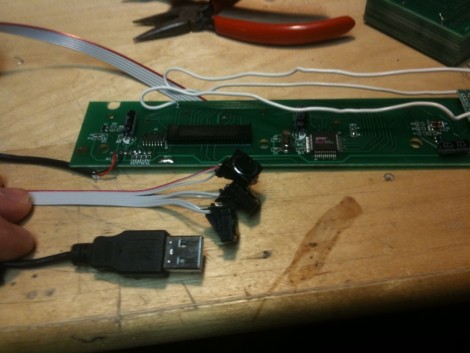
[Matthew Daughtrey] is going to have one of his paws out of service for a while following some hand surgery. Making a living as a coder seems a bit harder with one hand but he was able to find some solutions online only to balk at price tags reaching $600. He came up with a way have similar functionality on a standard keyboard with creative key mapping and a few auxiliary buttons.

The product he’s trying to mimic is the half-qwerty keyboard produced by Matias Corporation. It sounds crazy, but you can easily use your right hand to type all of the letters the left hand normally would just by mirroring the key locations. That big gray thing you store in your mellon and frequency put at risk handles this automatically. You should give the demo a try. We found that we’re quite good at it and only get confused when switching between the two halves of the keyboard.

But we digress. [Matthew] wrote a script that will mirror all the key mappings when he holds down the Windows key. He then hacked a second keyboard to extend momentary push sensors as seen above. He plans to use them with a partially mobile thumb after the surgery, or to build a foot pedal (we say build the pedal). An elegant hack that is a pittance compared to the official hardware.

Sound Card Driven Servo Motor

[youtube=http://www.youtube.com/watch?v=1LG2Ecsk13Q]

[Darrell] is using a sound card to drive this servo motor. The motor draws power from a cellphone battery with the control signal coming from one of the audio channels. It’s not too surprising that this works since the motor just needs a PWM signal to operate and that’s what is used to create the different frequencies of sound on electronic speakers. We’re not sure what [Darrell’s] got planned for this system but he mentions that two servos can be used, one on each audio channel. If you’re not using your sound card this would be a way to stop using the Arduino for that mail checker and just use a little flag attached to a servo. When mail comes in the appropriately engineered sound raises the flag.

32-bit ARM7 Gaming rig

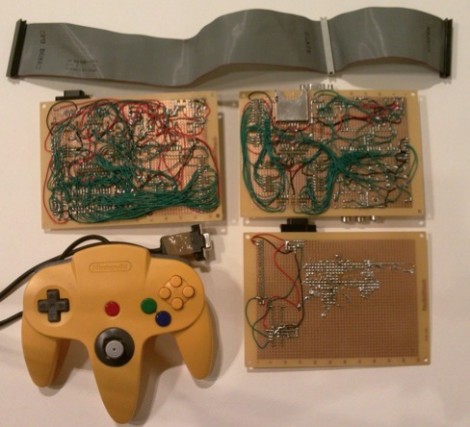
Are you hardcore enough to build your own 32-bit ARM powered gaming console AND use point-to-point soldering to accomplish this? [Craig Bishop] did just that when building his GameSphere console project. First thing’s first, click through the jump and watch the game play video. He wrote that game in the C language in less than a day which in itself is quite remarkable. On the hardware side of things he’s got an interesting mix; an Ateml AT91R40008 chip drives this system with PIC 18F4682 for VGA signal generation and a PIC 18F2685 to interface with the N64 controller. We like what he’s done so far and would love to see this end up in its own game cabinet. Continue reading “32-bit ARM7 Gaming rig”