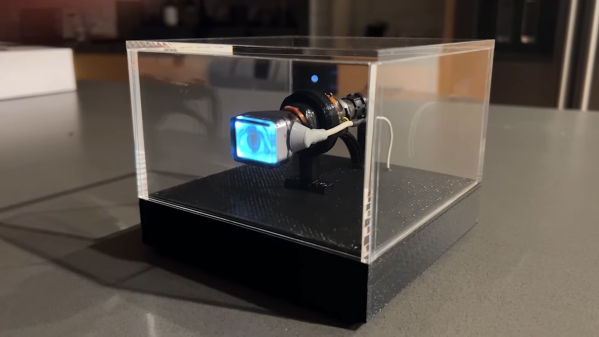
A tiny CRT showing an eye, inside a plexiglass enclosure

This Eye Is Watching You From Its Tiny CRT

The days of cathode ray tubes, or CRTs, are firmly behind us, and that’s generally a good thing. Display tubes were heavy, bulky and fragile, and needed complicated high-voltage electronics in order to work. But not all of them were actually large: miniature display tubes were also produced, for things like camcorder viewfinders, and [Tavis] from Sideburn Studios decided to turn one of those into a slightly creepy art project.

The heart of this build is a one-inch CRT that was salvaged from an RCA video camera. [Tavis] mounted the tiny tube inside an acrylic box on a 3D printed base. Inside that base sits a Raspberry Pi along with a high-voltage driver and a power management board. The Pi continuously plays a video that shows a human eye blinking and looking in various directions. Just an eye, floating in space, looking at the world around it.

The magic is briefly lost when the Pi starts up, because it then shows a microscopic version of the Pi’s standard bootup sequence, but once the thing is running it adds a weird vibe to a room. It actually looks like something you’d find in an avant-garde art exhibition — in the video (embedded below) it’s accompanied by eerie music that gives it an even more unsettling feel. Electronic eyes are always a bit scary, especially when they’re actually looking at you.

Continue reading “This Eye Is Watching You From Its Tiny CRT”

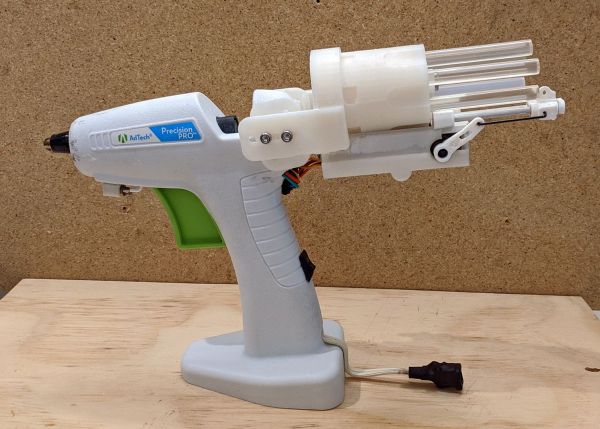
A hot glue gun with a revolving stick holder on the back

Quick Reload For Your Glue Sticks: The Glue Gun Six Shooter

They say that the two essential items in any toolbox are WD-40 and duct tape: one thing to make stuff move and another thing to stop stuff from moving. Many hackers would argue that the third essential tool should be hot glue — it stops stuff from moving, but still allows you to move it later if you decide that’s better after all. It also works on loads of stuff ranging from macaroni to microcontrollers. And let’s be honest: who hasn’t done the “pew pew” thing with their glue gun?

[Vije Miller] decided to give his hot glue dispenser a bit of a western vibe and built himself a Glue Gun Six Shooter. Like an Old West revolver, it has a rotating cylinder with six rounds of ammunition that lets you continue gluing right away even if your glue stick runs out in the middle of a job. A tiny switch on the side of the barrel starts the reloading sequence: one servo rotates the cylinder, then another one chambers a round. Both are controlled by an Arduino Nano, which is powered by a 5 V USB power supply hidden in the grip.

A red laser below the barrel gives the user a better aim, as well as a bit more “pew pew” ability. The rest of the gun is pretty standard, similar to what we’ve seen before in a teardown. If you’re looking for something more high-tech, check out [Ben Heck]’s ultimate glue gun.

Continue reading “Quick Reload For Your Glue Sticks: The Glue Gun Six Shooter”

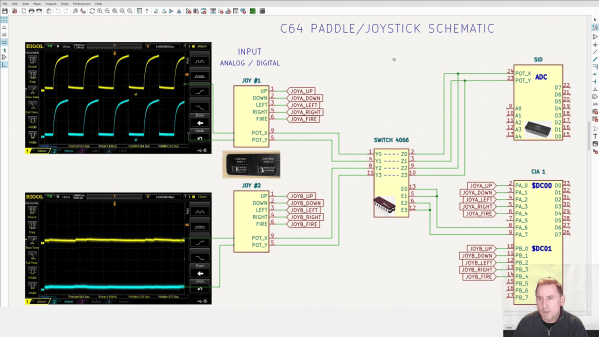
A schematic explaining the workings of the Commodore 64's joystick port

Bluetooth Interface Adds Rumble Feedback To Commodore 64 Games

Nothing says “1980s gaming” like a black joystick with a single red fire button. But if you prefer better ergonomics, you can connect modern gamepads to your retrocomputers thanks to a variety of modern-to-classic interface adapters. These typically support just the directional pad and one or two action buttons, leaving out modern features like motion control and haptic feedback.

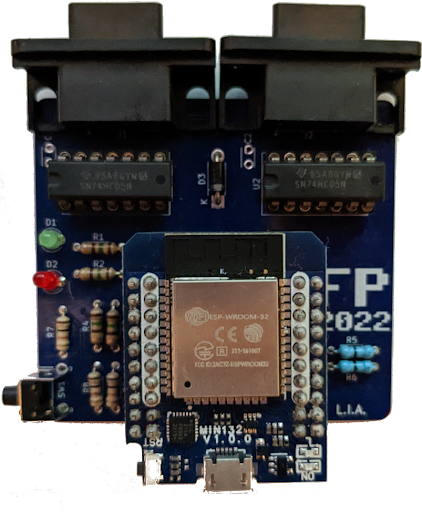
That’s a bit of a shame, because we think it would be pretty cool to feel that shock in our hands whenever Pitfall Harry drowns in quicksand or Frogger gets hit by traffic. We’re therefore happy to report that [Ricardo Quesada] has decided to add rumble functionality to the Bluetooth-to-Joystick-port interface that he’s been working on. He demonstrates the feature on his Commodore 64 in the video embedded after the break.

Naturally, any software needs to be adapted to support haptic feedback, but a trickier problem turned out to be the hardware: joystick ports are input-only devices and therefore cannot send “enable rumble” signals to any connected gamepads. [Ricardo] found a clever way around this, using the analog inputs on the joystick port that were typically used for paddle-type controllers.

The analog-to-digital converter inside the computer works by applying a pulse signal to the analog port and measuring the time it takes to discharge a capacitor. The modern gamepad interface simply detects whether these pulses are present; they can be enabled or disabled through software by toggling the analog readout on the joystick port. This way, the joystick port can be used to send a single bit of information to any device connected to it.

[Ricardo] developed patches for Rambo: First Blood part II and Leman to enable rumble functionality. He describes the process in detail in his blog post, which should enable anyone who knows their way around 6502 machine code to add rumble support to their favorite games.

The adapter works with a variety of retro systems that use the Atari-style joystick interface, but if you’re an Apple II user, you might want to look at this Raspberry Pi-based project that interfaces with its nonstandard joystick interface. If you’re into wireless gaming in general, be sure to also check out our history of wireless game controllers.

Continue reading “Bluetooth Interface Adds Rumble Feedback To Commodore 64 Games”

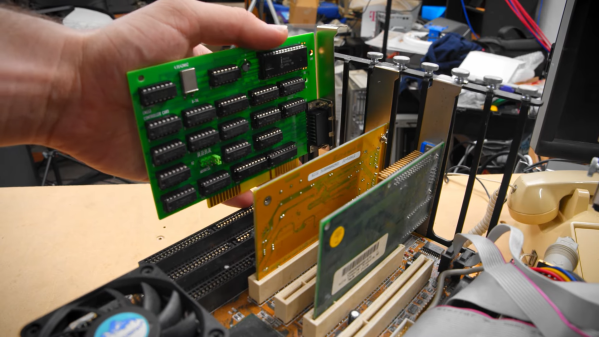
An 8-bit ISA card being plugged into a motherboard

Reverse-Engineering An ISA Card To Revive An Ancient CD-ROM Drive

Being an early adopter is great if you enjoy showing off new gadgets to your friends. But any new technology also brings the risk of ending up at the wrong side of a format war: just ask anyone who committed to HD-DVD fifteen years ago. If, on the other hand, you were among the few who invested in CD-ROM when it was first released in the mid-1980s, you definitely made the right choice when it came to storage media. However, it was a bit of a different story for the interface that hooks up the CD drive to your computer, as [Tech Tangents] found out when he managed to get his hands on a first-generation CM100 drive. (Video, embedded below.)

That wonderful piece of 1985 technology is not much smaller than the IBM PC it was designed to connect to, and it originally came with its own CM153 ISA interface card. But while most eBay sellers recognized the historic value of a pioneering CD-ROM drive, the accompanying PC was typically a dime-a-dozen model and was thrown out with the rare interface card still inside. Even after searching high and low for over a year, the only information [Tech Tangents] could find about the card was a nine year old YouTube video that showed what the thing looked like.

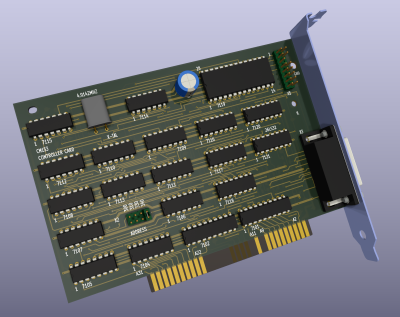
A 3D rendered image of an 8-bit ISA cardLuckily, the maker of that video was willing to take high-resolution pictures of the card, which allowed [Tech Tangents] to figure out how it worked. As it turned out, the card was entirely made from standard 7400 series logic chips as well as an 8251 USART, which meant that it should be possible to design a replacement simply by following all the traces on the board. [Tech Tangents] set to work, and after a few weeks of reverse-engineering he had a complete schematic and layout ready in KiCAD.

After the PCBs were manufactured and populated with components, it was time to test the new card with the old drive. This wasn’t a simple process either: as anyone who’s tried to get obscure hardware to work in MS-DOS will tell you, it involves countless hours of trying different driver versions and setting poorly documented switches in CONFIG.SYS. Eventually however, the driver loaded correctly and the ancient CD-ROM drive duly transferred the files stored on a Wolfenstein 3D disk.

If you’re lucky enough to own a CM100 or a similar drive from that era, you’ll be happy to know that all design files for the CM153 clone are available on GitHub. This isn’t the first time someone has had to re-create an interface board from pictures alone: we’ve seen a similar project involving a SCSI card for a synthesizer. Thanks for the tip, [hackbyte]!

Continue reading “Reverse-Engineering An ISA Card To Revive An Ancient CD-ROM Drive”

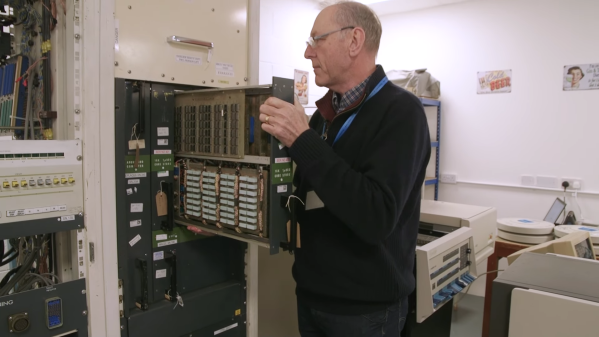
A man removing a module from a 1960s computer

Ancient Nuclear Plant Computer Finds New Home In Bletchley Museum

Although technology keeps advancing every year, safety-critical systems in factories and power plants typically stay with the technology that was available when they were built, in the spirit of “don’t fix it if it ain’t broke”. When it comes to safety, there are probably few systems more critical than nuclear power plants, and as a result one power station in Dungeness, in the south-east of England, was controlled by the same Ferranti Argus 500 computer from the early 1970s until the reactor was shut down in 2018.

The national Museum of Computing in Bletchley was lucky enough to be allowed to scavenge the old computer from the decommissioned plant, and volunteers at the museum have managed to get it running again in its new home. They describe the process in the video embedded below, and demonstrate a few features of this rather unique piece of 1970s technology.

The computer consists of several large cabinets that house enormous PCBs full of diode-transistor logic (DTL) chips, made by Ferranti itself. It comes with 32 kilo-words, or 96 kilobytes, of magnetic core memory, and was designed to run programs stored on punched tape. However, the paper tape reader was removed at some point in the computer’s life and replaced with a PC-based system that emulates the tape reader’s output through its parallel port. This was probably sometime during the 1990s, judging from the fact that the https://hackaday.com/tag/magnetic-core-memory/PC runs OS/2.

Setting up the computer in its new home was complicated by the fact that hundred of cables had to be disconnected in order to move the system out of the power plant. With the help of decades-old documentation, and the experience of one volunteer who used to be a Ferranti engineer, they eventually got it into a state where it could run programs again.

Ultimately, the Argus 500 will be turned into a live exhibit that will simulate a power station alongside another computer that was rescued from a different nuclear plant. Depending on the availability of some parts that are still missing, this might happen later this year, or perhaps next year. In any case, the museum already has a collection that’s well worth visiting if you’re in the area. The story of how they rescued a neglected IBM 360 also makes for fascinating reading. Continue reading “Ancient Nuclear Plant Computer Finds New Home In Bletchley Museum”

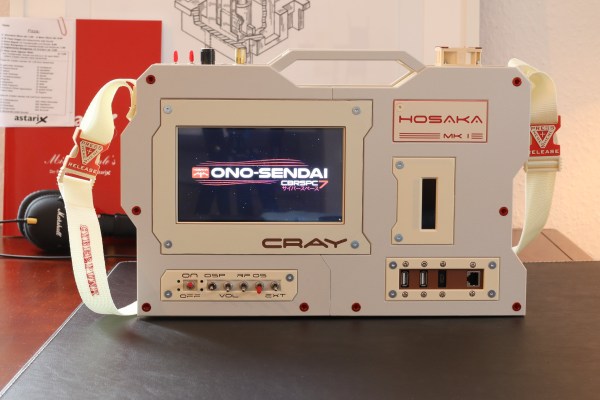
A retro-futuristic portable computer with a touch screen and a shoulder strap

2022 Cyberdeck Contest: The Hosaka MK I Connects You To Cyberspace, Neuromancer Style

It’s hard to pin down exactly what a cyberdeck is, as we’ve seen through the huge variety of designs submitted to our 2022 Cyberdeck Contest. The most basic requirement is that it is a type of portable computer, typically with a futuristic, cyberpunk-style design, but beyond that, anything goes. The original concept was introduced in William Gibson’s novel Neuromancer, where it refers to portable devices used to connect to cyberspace. The design of the ‘decks is not described in detail, but we do know that Case, the protagonist, uses a Hosaka computer which is supposedly “next year’s most expensive model”.

Inspired by Gibson’s novel, [Chris] designed and built the Hosaka MK I “Sprawl Edition” as he imagined it would have looked in the Sprawl universe. The result is an impressive piece of retro-futuristic hardware with lots of chunky tumbler switches, exposed metal screws, and even a shoulder strap. Processing power is supplied by a Raspberry Pi, with input and output happening through a 7″ touchscreen. There’s also an ESP32, which controls a set of RGB LEDs on the back as well as an FM radio module.

The Hosaka’s functionality can even be extended by adding modules to the side, which will snap into place thanks to a set of neodymium magnets integrated into the housing. The whole case is 3D printed, and a full set of .stl files is available for download, although [Chris] warns that the larger parts might be too big for some 3D printers: the whole thing barely fits inside his Prusa MK3s.

We’ve seen several cyberdeck creators that aimed to recreate Gibson’s vision: the XMT-19 Cutlass is one example, as is the massive NX-Yamato. If you’ve designed your own, be sure to submit it to this year’s contest.

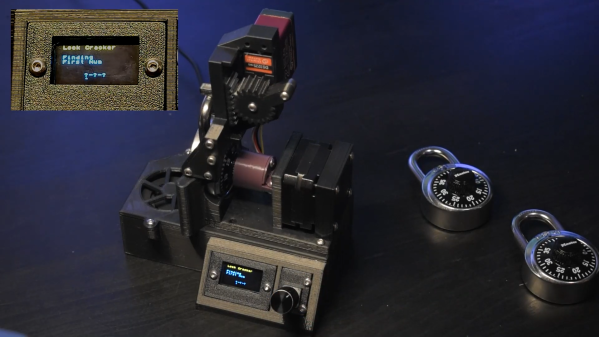
A machine that holds a combination padlock and turns its dial, with two padlocks next to it

Robot Opens Master Combination Locks In Less Than A Minute

A common trope in bank heist B-movies is someone effortlessly bypassing a safe’s combination lock. Typically, the hero or villain will turn the dial while listening to the internal machinery, then deduce the combination based on sounds made by the lock. In real life, high-quality combination locks are not vulnerable to such simple attacks, but cheap ones can often be bypassed with a minimum of effort. Some are so simple that this process can even be automated, as [Mew463] has shown by building a machine that can open a Master combination lock in less than a minute.

A machine that holds a combination padlock and turns its dialThe operating principle is based on research by Samy Kamkar from a couple of years ago. For certain types of Master locks, the combination can be found by applying a small amount of pressure on the shackle and searching for locations on the dial where its movement becomes heavier. A simple algorithm can then be used to completely determine the first and third numbers, and find a list of just eight candidates for the second number.

[Mew463]’s machine automates this process by turning the dial with a stepper motor and pulling on the shackle using a servo and a rack-and-pinion system. A magnetic encoder is mounted on the stepper motor to determine when the motor stalls, while the servo has its internal position encoder brought out as a means of detecting how far the shackle has moved. All of this is controlled by an Arduino Nano mounted on a custom PCB together with a TMC2208 stepper driver.

The machine does its job smoothly and quickly, as you can see in the (silent) video embedded below. All design files are available on the project’s GitHub page, so if you’ve got a drawer full of these locks without combinations, here’s your chance to make them sort-of-useful again. After all, these locks’ vulnerabilities have a long history, and we’ve even seen automated crackers before.

Continue reading “Robot Opens Master Combination Locks In Less Than A Minute”