A Homebrew AC Upgrade For The Fluke 8840A

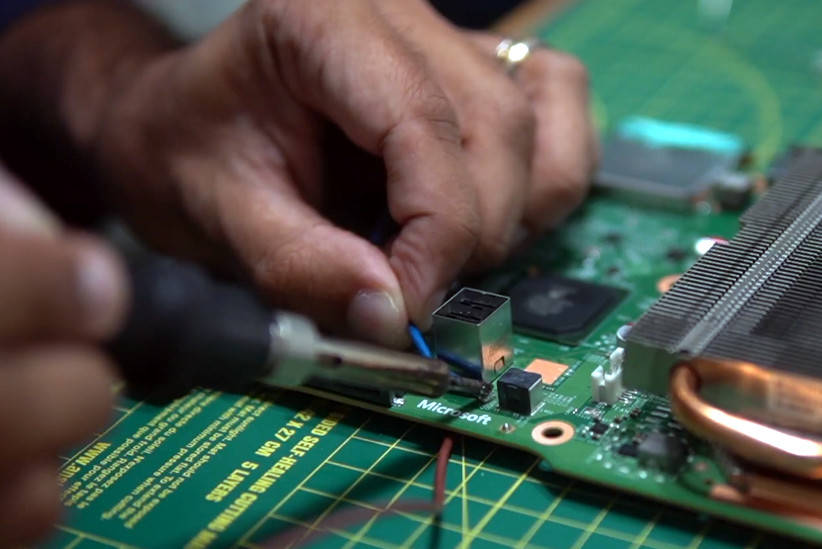
[William Dudley] picked up a Fluke 8840A bench multimeter at an auction, but was sad to find out that it was reading resistances inaccurately. It was also missing the optional board to enable AC measurements. Desiring to use the otherwise lovely meter, he set about repairing and upgrading the device.

Thankfully, the 8840A was from a time when Fluke used to openly publish schematics in its manuals. Thus, combined with taking a look at some photos online, it was straightforward for [William] to recreate the original AC “Option 09” board to enable the desired functionality. As is usually the way, his efforts didn’t work first time, but after some bodge wires were installed, all was well. [William] reports the measurements are “reasonable, maybe even sufficient” with no calibration undertaken.

Repairing the resistance issue was easy. It turned out to be corrosion on the selector switches, revealed when high-resistance measurements were accurate, but low-resistance measurements weren’t. A bit of flick-flacker with some contact cleaner sprayed into the switches got things working again nicely.

It’s nice to see old hardware restored to full functionality, particularly when it’s as attractive and well-built as an old Fluke meter. Bringing back old tools from the dead? You know we wanna hear about it!

Forearm Muscle Contraction Sensor Is Useful Component For Open Source Prosthetics

Being able to actuate parts of a prosthetic limb can make it much more useful. To help in this goal for partial arm or hand amputees, [TURFPTAx] has developed a sensor for detecting forearm muscle contractions. 

The sensor itself is cost-effective and simple to build.

The build is part of the Open Prosthetics project, which aims to offer open designs for various types of prosthetic devices. It apes common commercial designs using a simple electromechanical system.

The build relies on magnets mounted on twelve pistons that move when the muscles contract under the skin. The pistons are sprung to allow them to follow the expansion and contractions of the muscles, and the motion of the magnets is detected by hall effect sensors. The system is bulkier than some other solutions, but has the benefit of clean output and the ability to detect the movement of several distinct muscle groups. The data is all collected by an ESP32 which is then sent wirelessly to a computer for measurement, with [TURFPTAx] using the PyGame library to plot the sensor data.

[TURFPTAx] notes that the output of the sensors would be perfect to input into a machine learning system. Video after the break.

Continue reading “Forearm Muscle Contraction Sensor Is Useful Component For Open Source Prosthetics”

Catch The Stick Game Is A Tidy Build

There are many different ways to test one’s reaction times; a simple way is to simply drop a ruler and see how far it falls before you can catch it. Take that same concept to a greater level, and you get this impressive “Catch The Stick” game.

The creation of one [Romain Labbe], the build has a wooden frame that holds up several sticks roughly seven feet off the ground. When the game is triggered, a beeper counts down, and then sticks start dropping. Each stick is held in place with a small solenoid-controlled latch, and the game simply energizes the solenoids in turn to drop the sticks randomly. On easier modes, the sticks are released gently, one at a time. On higher difficulty levels, they’re released in a near-continuous stream that would tax even a team of several players.

It’s not a complicated build, but it is very nicely executed. It certainly looks to be good fun to play with friends. Alternatively, you could try out this more distributed-style build. Video after the break.

Continue reading “Catch The Stick Game Is A Tidy Build”

Rubber Stamping Your Way To Custom PCBs

Many of us now outsource PCB production to board houses overseas, which offer high-quality boards with increasingly impressive turnaround times. You might still brew up your own PCB, though, and a reader found this great old hack from [William Hare] that might be worth a look.

Forget toner transfer or marker pens — this build is all about speed. [William] decided to use a rubber stamp to quickly transfer ink to a copper board that can then be etched to produce a PCB. It’s simple and straightforward enough. We’ve used the same technique for silkscreen and pad art, but never as an etch resist.

The trick is to make several rubber stamps with different circuit elements, though. The genius part is that you can then assemble a PCB by simply stamping down the various circuit components you need. The boards will still need to be drilled if you’re working with through-hole parts, but tipster [Shri] notes that the technique is super useful for producing single-sided surface mount boards.

We’ve seen some other unique methods to producing PCBs at home, such as using a 3D printer to help out. If you’ve got your own innovative homebrew PCB hacks, be sure to drop us a line!

Thanks [Shri Hari Ram] for the tip!

UV Monitoring Budgie Keeps An Eye On Exposure Levels

UV rays are great at helping us generate vitamin D, but they can also be harmful, causing sunburn and even melanoma. To help kids keep track of the UV index in his local area, [Jude Pullen] created the UV Budgie.

The build is based around an Arduino Nano 33 IoT board, which queries the Met Office’s API to determine the UV level in the area. The relevant data is then displayed on a small e-ink display, with cute little sun characters telling you about the prevailing conditions. It also announces the current risk level with recorded voice samples, advising on whether precautions should be taken, such as using sunscreen or sheltering inside for the worst days. Plus, there’s a bird that flaps its wings to announce an update, actuated by a small servo in the base.

It’s a fun build that should help [Jude] and his family remain sun safe in the summer. [Jude] notes the build could also be reprogrammed to share other warnings, too. APIs to query local air quality or radiation levels are just some of the ideas that come to mind. Video after the break.

Continue reading “UV Monitoring Budgie Keeps An Eye On Exposure Levels”

Hackaday Prize 2022: A Cheap And Effective Mouth Joystick Mouse

Some people have issues using regular computer mice, and need alternative input devices that suit their needs. [Olman Orozco] designed an affordable mouth-joystick intended to work as a mouse to suit that very use case.

A simple frame allows the controller to be held near the mouth for use.

The build is based on a simple USB gamepad. A mouse emulator program is used to turn the thumbstick movements into mouse movements, and button presses into mouse clicks.

The trick is that the thumbstick is turned into a mouth-activated joystick, making the device perfect for those with limited-to-no movement in their arms. This is achieved with a pen body used to extend the joystick so it can be readily actuated with the mouth. A custom puff-switch is also integrated into the mouth-joystick, built out of a balloon, bottle caps, and a micro switch. This enables the user to click on things without the need for another button.

Overall, it’s a great hack that turns cheap, everyday components into a useful piece of accessibility hardware. As a bonus, it can be built using only simple tools. [Olman] notes there’s no need for a 3D printer or other advanced parts or tools to build the device.

Game controllers are often important devices when it comes to accessibility hacking, as we’ve seen before. Continue reading “Hackaday Prize 2022: A Cheap And Effective Mouth Joystick Mouse”

How To Achieve Knurling On A Flat Surface

Knurling is a popular way to finish handles of tools and other hardware, with a pattern of crossed lines rolled into metal to provide better grip and an attractive finish. It’s most commonly done on a lathe to round stock, but it can also be achieved on flat surfaces if you have the right tool. Of course, you can make one yourself.

The build is simple, and is based around by creating a special carrier out of a solid piece of steel. It’s a long bar has a space milled out to hold two wheels in the middle. A pair of off-the-shelf knurling wheels are then installed in the bar, with socket head bolts serving as axles.

With the tooling complete, it’s then a simple matter of installing the carrier bar in a lathe and running it back and forth over a flat workpiece. The workpiece is rolled back and forth to allow the wheels to do their work, while also being shifted horizontally to allow the entire flat surface to be worked over.

A nice knurled finish really can elevate the form and function of any tool or other piece of metal craftsmanship. We’ve explored how to create your own knurled knobs before, too.

Continue reading “How To Achieve Knurling On A Flat Surface”