Pocket-Sized Deauther Could Definitely Get You In Trouble

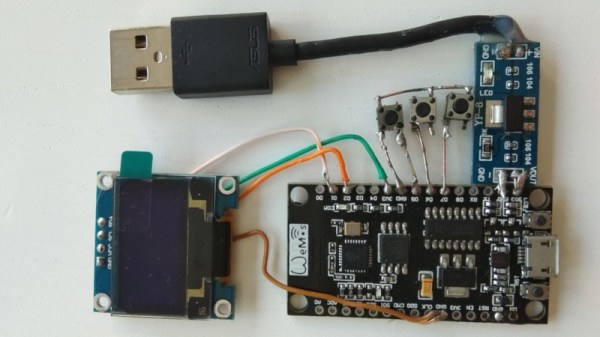
Interfering with radio communications, whether through jamming, deauthing attacks, or other meddling, is generally considered a crime, and one that attracts significant penalties. However, studying such techniques should provide a useful edge in the electronic wars to come. In this vein, [Giorgio Filardi] has recently built a WiFi deauther the size of a credit card.

The device has a simple interface, consisting of 3 buttons and a small OLED screen. It can also be accessed remotely and controlled through a web interface. A NodeMCU ESP8266 board runs the show, using [spacehuhn]’s deauther firmware. The point-to-point construction probably won’t hold up to much rough and tumble out in the field, but it’s fine for a bench test. We’d recommend constructing an enclosure if it was to be used more regularly.

There’s plenty of functionality baked in – the device can scan for networks, perform deauth attacks, and even create spoof networks. It’s a tricky little device that serves to highlight several flaws in WiFi security that are yet to be fixed by the powers that be.

Using one of these devices for nefarious purposes will likely get you into trouble. Experimenting on your own networks can be educational, however, and goes to show that wireless networks are never quite as safe as we want them to be.

If you’re wondering as to the difference between deauthentication and jamming, here’s your primer.
TI-83 Gets CircuitPython Upgrade

Graphing calculators are an interesting niche market these days. They’re relatively underpowered, and usually come with cheap, low resolution screens to boot. They remain viable almost solely due to their use in education and the fact that their limited connectivity makes them suitable for use in exams. The market is starting to hot up, though – and TI have recently been doing some interesting work with Python on their TI-83.

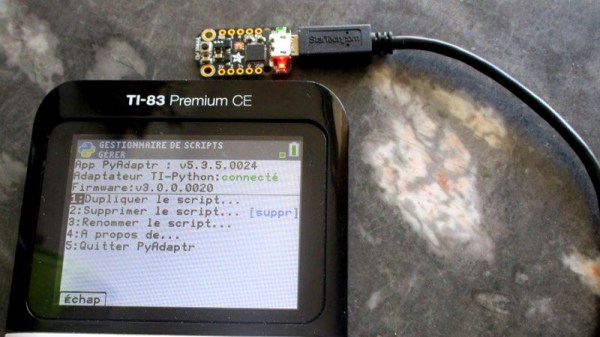
Rumor has it that TI have been unable to get Python to run viably directly on the TI-83 Premium CE. This led to the development of the TI-Python peripheral, which plugs into the calculator’s expansion port. This allows users to program in Python, with the TI-Python doing the work and the calculator essentially acting as a thin client. The chip inside is an Atmel SAMD21E18A-U, and is apparently running Adafruit’s CircuitPython platform.

This discovery led to further digging, of course. With some hacking, the TI-Python can instead be replaced with other boards based on Atmel SAMD21 chips. For those of you that aren’t in Atmel’s sales team, that means it’s possible to use things like the Adafruit Trinket M0 and the Arduino Zero instead, when flashed with the appropriate CircuitPython firmware. It’s a tricky business, involving USB IDs and some other hacks, but it’s nothing that can’t be achieved in a few hours or so.

This is a hack in its early days, so it’s currently more about building a platform at this stage rather then building fully-fledged projects just yet. We’re fully expecting to see Twitter clients and multiplayer games hit the TI-83 platform before long, of course. When you’ve done it, chuck us a link on the tip line.

[Thanks to PT for the tip!]

Reinking Dot Matrix Printer Ribbons Because It’s Fun, Okay

Ink! No matter the printer you’ve got, whether it be inkjet, laser or otherwise, it’s the consumables that will send you broke. At times, the cost of Hewlett-Packard black ink has exceeded the price per volume of human blood, and shareholders around the world have rejoiced.

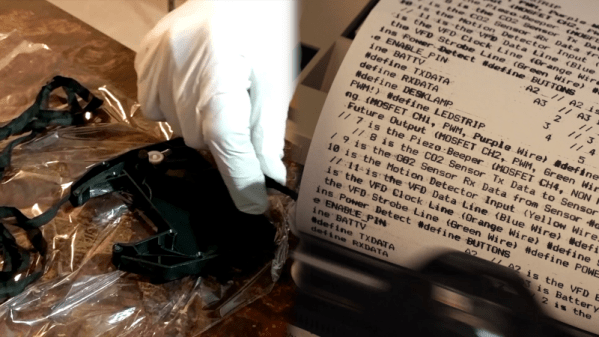
As a retrocomputing reprobate, I have a personal dilection for printers of the vintage persuasion. My previous dalliances have involved fully fledged office copiers, but lately I’ve found myself tinkering with dot matrixes of a 1980s vintage. These workhorses are now reaching middle age, and as you’d expect, their ribbons are a little worse for wear after all this time.

Replacements are cheap enough for the most common printers, but shipping takes weeks and hackers are an impatient bunch. Plus, if you’ve got one of the more obscure models, it’s unlikely you’ll find a fresh cart just sitting on the shelf. It was these factors that spurred my good friend [Cosmos2000] and I into action.

Continue reading “Reinking Dot Matrix Printer Ribbons Because It’s Fun, Okay” →

Building A Slimline Portable NES

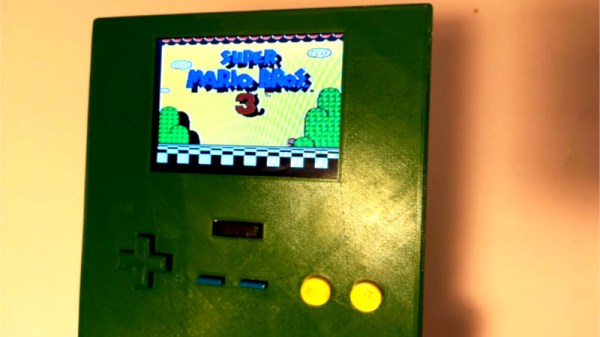
Emulation of classic consoles has long been a solved problem. It’s now possible to run thousands of vintage games on a computer the size of a stick of gum, and to do so with all the benefits emulation brings. [M-Parks] isn’t the biggest fan, however – and decided to build a slimline NES handheld instead. The goal was to produce a portable NES in as compact a package as possible.

Things have come a long way in the handheld console modding scene in the last ten years. 3D printing has largely replaced vacuum forming, and it’s no different here. [M-Parks] modeled up a case and sent it off to be 3D printed in PLA, somewhat mimicking the general layout of the original Game Boy. It’s a little larger, but given that it accepts full-size original NES carts, it can only be so small.

A Retro-bit NES-on-a-chip console was used to provide the motherboard and cartridge connector for the build. Rounding this out is a power supply from Adafruit, an LM386 audio amplifier, as well as a digital volume control which is a nice touch.

While such a build may sound daunting to the absolute beginner, all it takes is a soldering iron, some hot glue, and a willingness to have a go. There’s nothing wild or groundbreaking about this build, but to dwell on that would be missing the point. [M-Parks] now has a portable NES to play on those long train rides, and learned some great skills doing it –  a solid result for any project!

If you’re keen on seeing another take, check out [Dave]’s build from a few years back.


Farming Items With RasPi-Modified Joycons

The Pokémon games have delighted legions of Nintendo gamers over the years, and show no signs of slowing down any time soon. Despite its popularity, there are certain aspects of the games that are unarguably about simply grinding your way to success. For [Mori Bellamy], this simply wouldn’t do – yet their thirst for gold bottlecaps was insatiable. What to do? Automate it, of course.

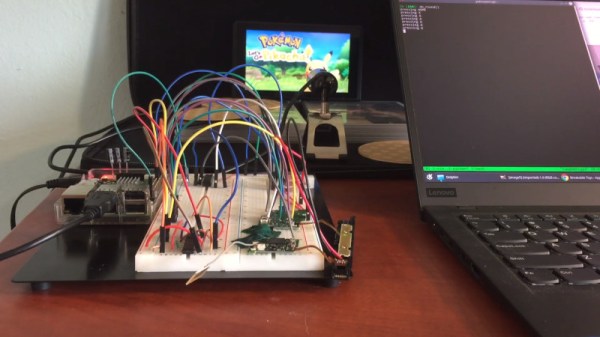
The first step was to hack the Joycons from the Nintendo Switch. A DG333A analog switch IC was hooked up to the buttons inside, and controlled by the GPIO pins of a Raspberry PI. The joystick was then controlled with an MCP4725 DAC, allowing the system to fully emulate control inputs to the console.

With the console now under control by the Raspberry Pi, the next step was to add intelligence. Google’s Tesseract OCR platform was combined with a helping of Python code. This allows the script to read dialog boxes from the game, and use this data to determine which buttons to press to farm items.

[Mori] has provided the code on GitHub for others to use, noting that it should be generalizable to other games with a little work. Fundamentally, the underlying hardware could readily be repurposed to other controllers, too. There’s plenty of other ways to automate the drudgery of gaming, even if you have to use a touch screen. Video after the break.

Continue reading “Farming Items With RasPi-Modified Joycons” →

Build Your Own Metal Roller

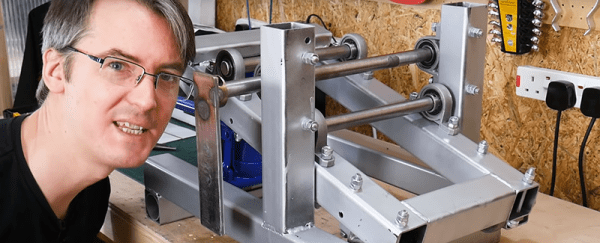
Metal fabrication is a useful skill to have. There’s plenty you can achieve in your workshop at home, given the right tools. There’s lathes for turning, mills for milling, and bandsaws and dropsaws for chopping it all to pieces. But what do you do if you need to make hoops and bends and round sections? You build a metal roller, of course – and that’s precisely what [James Bruton] did.

The main body of the tool is built out of box section, chosen largely as it’s what [James] had lying around. Bearings are of the familiar pillow block variety, with 20 mm bright steel serving as the rollers due to its better tolerance than mild steel stock. Set screws hold the shafts in place to avoid everything sliding around the place. A 10-ton bottle jack then provides the force to gently bend the workpiece as it passes through the rollers.

Initial tests were positive, with the roller producing smooth curves in 4 mm thick steel bar. There were some issues with runout, which were easily fixed with some attention to the parallelism of the shafts. It’s a tidy build, and can serve as a basis for further upgrades in future if necessary.

We’ve seen DIY roll benders before, too. Video after the break.

Continue reading “Build Your Own Metal Roller” →

ROS Gets Quick Sensor Debugging In The Terminal

Sensors are critical in robotics. A robot relies on its sensor package to perform its programmed duties. If sensors are damaged or non-functional, the robot can perform unpredictably, or even fail entirely. [Dheera Venkatraman] has been working to make debugging sensor issues easier with the rosshow package for Robot Operating System.

Normally, if you want to be certain a camera feed is working on a robot, normally you’d have to connect a monitor and other peripherals, check manually, then put everything away again when you’re finished. [Dheera] considered this was altogether too much of a pain for basic sensor checks.

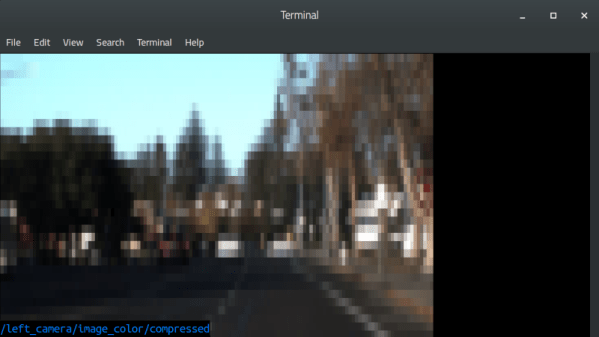
Instead, rosshow uses the power of SSH to speed things along. Log in to the robot, fire off a few command line instructions, and rosshow will start displaying sensor data in the terminal on your remote machine. It’s achieved through the use of Unicode Braille art in the terminal.  Sure, you won’t get a full-resolution feed from your high-definition camera, and the display from the laser scanner isn’t exactly perfect. But it’s enough to provide an instant verification that sensors are connected and working, and will speed up those routine is-it-connected checks by an order of magnitude.

Robot Operating System is a particularly useful platform if you’re thinking about the software platform for your next build. If you do put something together, be sure to let us know.