A Garbage Bag Skirt Is Fit For A Hovercraft

The hovercraft is an entertaining but much maligned form of transport. While they have military applications and at times have even run as ferries across the English Channel, fundamental issues with steering and braking have prevented us all driving them to work on a regular basis. They do make great toys however, and [HowToMechatronics] has built an excellent example.

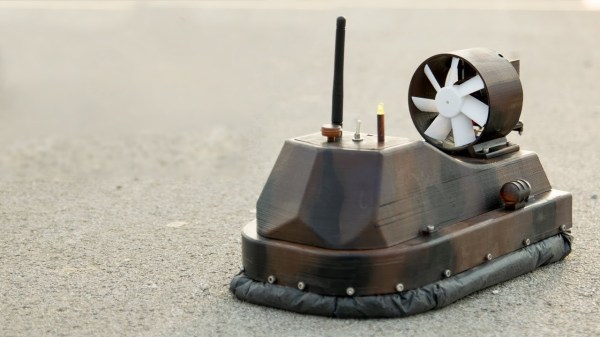
The build is primarily a 3D printed affair, with the hull, ducting, and even the propellers being made in this way. The craft is sized to be readily printable on a 30cm square build platform, making it accessible to most printer owners. Drive is via brushless motors, and control is achieved using their previously-featured self-built NRF24L01 radio control transmitter.

What stands out among most other hovercraft builds we see here is the functioning skirt. It’s constructed from a garbage bag, and held on to the hull with a 3D printed clamping ring. Most quick builds omit a skirt and make up for it with light weight and high power, so its nice to see one implemented here. We’d love to see how well the craft works on the water, though it holds up well on the concrete.

Finished in a camouflage paint scheme, the craft looks the part, and handles well too. We’d consider a small correction to the center of gravity, but it’s nothing a little ballast wouldn’t fix. Video after the break. Continue reading “A Garbage Bag Skirt Is Fit For A Hovercraft” →
RemoteDebug For ESP Platforms

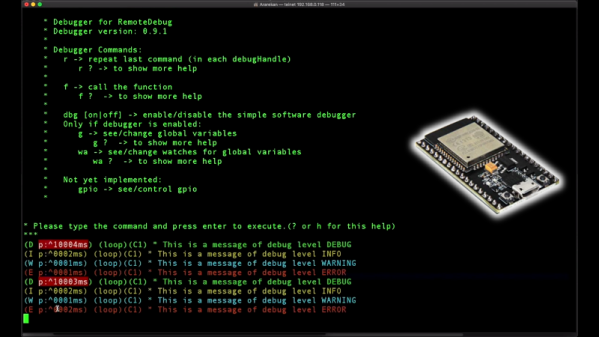
Debugging tools are critical to quick and effective development. Without being able to peek under the hood at what’s really going on, it can be difficult to understand and solve problems. Those who live on the Arduino platform are probably well acquainted with using the serial port to debug, but it’s far from the only way. [JoaoLopesF] has coded the RemoteDebug tool for ESP platforms, and the results are impressive.

RemoteDebug does away with the serial interface entirely, instead using the ESP’s native wireless interface to send debug data over TCP/IP. It’s all handled over telnet, making it completely platform agnostic. By handling things over the WiFi connection, it negates issues with physical access, as well as hassles with cables and limited serial ports. It’s also of benefit to robotics projects, which no longer need a tether when debugging.

It comes with a similar set of features to [JoaoLopesF]’s earlier work, SerialDebug. Things like verbosity and timestamps are all built in, making it easy to get high-quality debug data without having to reinvent the wheel yourself. Video after the break.

Continue reading “RemoteDebug For ESP Platforms” →

ESP32 Drives Controllerless Display Using I2S Hack

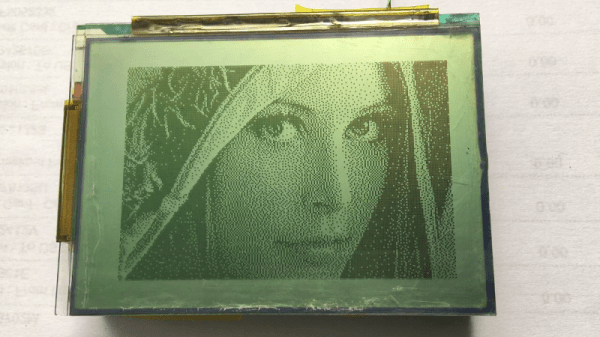
It’s possible to find surplus LCDs in all kinds of old hardware. Photocopiers, printers – you name it, there’s old junk out there with displays going to waste. Unfortunately, unlike the displays on sale at your favourite maker website, these often lack a controller and can be quite difficult to drive. [pataga] took on the challenge to drive a LCD of unknown provenance, using the power of the ESP32.

The LCD in question is a 240×160 monochrome device, that was initially being driven successfully with a Microchip PIC24 with a dedicated LCD driver peripheral. This allowed [pataga] to study the display interface under working conditions with the help of an oscilloscope. Inspiration was then taken from a project by [Sprite_tm], which used the I2S peripheral to drive a small LED display without placing load on the CPU.

Using the ESP32’s I2S peripheral in parallel mode makes it possible to shift data out in the correct format to drive the LCD without bit-banging IO pins and using up precious CPU time. This leaves processor cycles free to do interesting things, like generating 3D images using [cnlohr]’s routines from the Channel 3 project. There’s a little extra work to be done, with the frame signal being generated by an external flip flop and some fudging with the arrangement of various registers, but it’s a remarkably tidy repurposing of the I2S hardware, which seems to be the gift that keeps on giving. (Here it is spitting out VGA video through a resistor DAC.)

Code is available on Github for those looking to get at the nuts and bolts of the hack. It’s another build that goes to show, it’s not the parts in your junk box that count, but how you use them.

Hacking The IPod Nano Display: Beautiful!

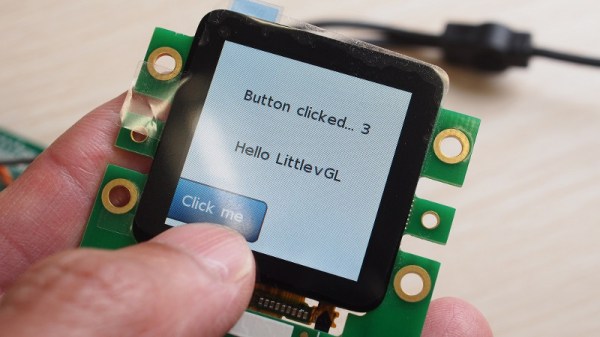
The 6th Generation iPod Nano was something of a revelation on launch. Packing a color screen, audio hardware, and a rechargable battery into a package no bigger than a large postage stamp remains impressive to this day. They’re now being used in various maker projects for their displays, but if you’re doing so, you might want to think about how you’re going to build a graphical interface. Not to worry – just grab an ESP32 and the right GUI library, and you’re on your way.

The Nano screen uses a MIPI DSI interface, which isn’t the easiest thing to use directly with the ESP32. Instead, a SSD2805 interface chip converts parallel input data to MIPI DSI signals to drive the display. Driving the display is only part of the game, however – you need something to display on it. Combining the LittlevGL GUI library with the screen’s touchpad makes creating a full graphical interface easy.

Hacked screens are something we don’t see as much these days, with the proliferation of display products aimed directly at the maker market. However, it’s always awesome to see a successful hack pulled off well. We’ve seen the display reverse engineered, too – and it certainly wasn’t easy.


3D Printing Photos Is Slow But Awesome

Historically speaking, lithophanes are images made in porcelain with an etching or moulding process, in which an image is visible when backlit due to the varying thickness of the material. Porcelain isn’t the easiest thing to work with, but thankfully for those of us in the present, 3D printers are here to make everything better. [RCLifeOn] has been experimenting with printing lithophanes with great results.

The trick to printing a good lithophane is all in the preparation. It’s important to pick an image that looks good in greyscale, as this is not a process that reproduces color in any way. [RCLifeOn] then discusses the finer points of printer setup to get a nice looking print. Layer heights should be as small as possible to avoid visible vertical bands, and the lithophane should be printed in a vertical orientation, to avoid the print sagging due to a lack of support.  Infill is best set to 100%. Most importantly, the printer should avoid crossing the outline of the print to avoid any stringy plastic artifacts spoiling the final product.

It’s a great guide that should help even a 3D printing novice create a great print with the minimum of fuss. A lithophane can make a wonderful gift and is also a good test of a printer’s capabilities, due to the fine detail required. We’ve seen them produced before too, in a wonderful lightbox configuration. Video after the break.

Continue reading “3D Printing Photos Is Slow But Awesome” →

Hydrogen Desk Cannon Is Fun With Electricity And Water

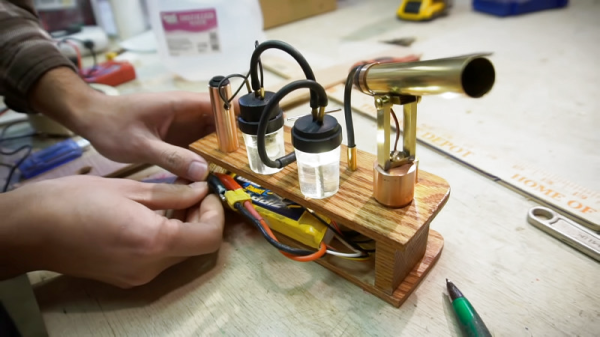
Water is a stable chemical, but with the addition of a little electricity, it can be split into its component parts. The result is just the right mix of H2 and O2 to convert back into water with a bang. [Peter Sripol] has built a charming desktop cannon in just such a way.

The build consists of a contact lens canister filled with a solution of water and potassium hydroxide. By running a DC current through this solution, oxyhydrogen is produced, which then passes through a flash arrestor and into a combustion chamber. Upon the chamber is affixed a rocket, which is propelled when the charge is lit by a piezoelectric ignitor.

The chemical side of the build was easy, but it took significant experimentation to get the rocket side of things working well. Eventually success was found by creating a blast cap out of paper and hot glue which allowed the energy of the blast to be more effectively transferred to the rocket body. With this in place, the cannon is capable of firing small paper rockets in excess of 20 feet.

With the brass and copper components mounted upon stained wood, this contraption would look beautiful on any desk and would be great for assailing one’s fellow coworkers. If your office doesn’t have an explosives policy yet, once you bring this in to work, it will soon. [Peter] uses similar technology in his Nerf blasters, too. Video after the break.

Continue reading “Hydrogen Desk Cannon Is Fun With Electricity And Water” →

3D Print Your Own Electric Screwdriver

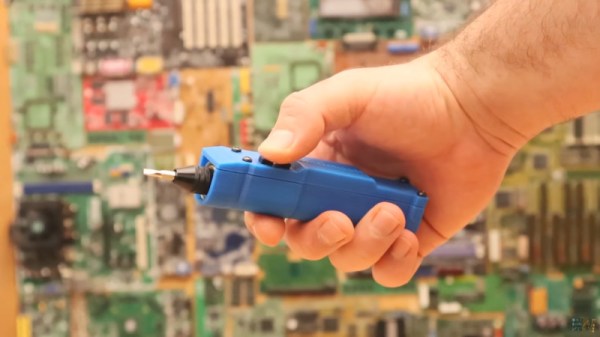
For the odd job every now and then, a regular screwdriver does the job. However, in situations like a small production operation, it can quickly become uncomfortable to use. In these situations, an electric screwdriver is incredibly useful. There’s no need to rush out to the store, however – you can build one yourself, and [Electronoobs] did just that.

The build is simple, consisting of a series of cheap modules hooked up together. An 18650 battery provides power through a boost converter to an H-bridge motor controller, which allows the DC geared motor to be driven both forwards and backwards. There’s also a USB battery charge module, that allows the screwdriver to be recharged from a standard micro USB charger. It’s all neatly packaged in a 3D printed case with a couple of tactile buttons for forward and reverse operation.

It’s a testament to the quality of modern supply chains that one can assemble a usable tool like this at home from prepackaged modules. All the parts, including the bearing and drill chuck, were sourced from eBay.

We’ve seen servos repurposed into electric screwdrivers, too. Video after the break.

Continue reading “3D Print Your Own Electric Screwdriver” →