How A 1981 RAM Expansion Worked

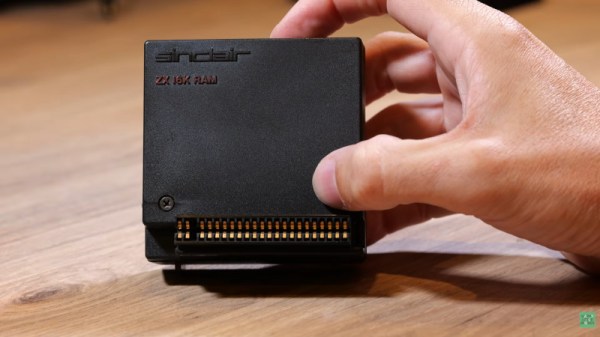
Sir Clive Sinclair and his company were notorious for pushing the limits of electronic parts in search of a low price, and his ZX series 8-bit computers were fine examples of this art. The ZX81 came with a meagre 1K of memory, and a popular upgrade was a 16K RAM pack. [Happy Little Diodes] has opened one up, and to his surprise, found many more parts than expected.

Inside the box is a pair of PCBs connected by ribbon cables, one of which has a selection of 74 chips and the other the 4116 RAM chips and a discrete component power circuit. This complexity comes from that cheapness, the 4116 is an inexpensive DRAM chip and requires an eclectic set of power supplies.

The functions of address selection are straightforward enough, as is the DRAM refresh circuitry. The power supply is clever in that it’s a self-oscillating switcher that provides +12 and -5 volts with a single transistor. We particularly like the quench diode in the 12 V Zener diode regulator  circuit.

The ZX81 gave a huge number of British kids their first taste of computing, and learning to use a limited memory space is something that stays with you for life. The film doesn’t mention the most notorious feature of the 16K pack though, that it had been developed with a machine clamped to the desk. Using one in a real-life location was an exercise in not jogging your machine, because the slightest disturbance would trigger a reset.

The ’81 was also famous for its membrane keyboard. Another popular upgrade back then was a new one.

Continue reading “How A 1981 RAM Expansion Worked”

“I’m Not Dead Yet!” Reverse Polish Notation Calculators You Can Still Buy

If you used a scientific calculator in the 1970s or 1980s, there was a fair chance that it worked differently from almost every calculator you see today. Instead of typing:

2 + 3 =

you entered:

2 ENTER 3 +

There wasn’t even an equals key. Hewlett-Packard made this system — Reverse Polish Notation, or RPN — practically synonymous with serious scientific calculators until other players like TI and Casio got serious. Once you got used to it, ordinary algebraic calculators could feel annoyingly clumsy.

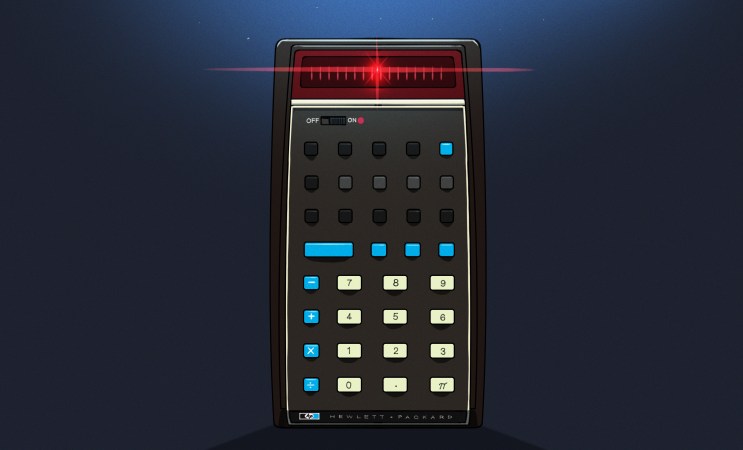
Today, RPN calculators look like a nearly extinct species. HP left the calculator market, licensing the HP calculator line to Moravia Consulting. Old HP-15Cs, 16Cs, 32Ss, 42Ss, and 48s have become collectibles. But RPN isn’t dead. You can still buy new hardware, build your own, or turn almost any computer or phone into a very capable RPN machine. There are reasons some of us still want to.

But Why Polish?

The name goes back to Polish logician [Jan Łukasiewicz], who devised a notation in which operators precede their operands. Instead of writing:

A + B

you can write:

+ A B

The big advantage is that parentheses aren’t required. The structure of the expression tells you exactly what operates on what. Reverse Polish notation simply puts the operator at the other end:

A B +

[Łukasiewicz] wasn’t designing calculators, of course, but the same idea turned out to be extremely convenient for computers and calculators. Your software doesn’t have to remember what operation is in progress. Each operator is ready to go and can simply work on the operands that you’ve already read.

RPN isn’t exactly the way people calculate with pencil and paper, and it certainly wasn’t derived from the slide rule, but there is a similarity in the way you work. With a slide rule, you generally establish some value, operate on it, and continue from the result. When doing a long-hand calculation, you often calculate a subexpression, write down the answer, and use that answer in the next step. You will probably start with the inner parenthesis and work outward, just like someone with an RPN calculator does. RPN formalizes that process with a stack.

Suppose you want:

(3 + 4) × (5 + 6)

On a conventional calculator, you either need parentheses, or you have to calculate one result and remember it. On an RPN calculator:

3 ENTER

4 +

5 ENTER

6 +

×

The first + leaves 7 on the stack. The second leaves 11 above it. The multiply consumes both and leaves 77.

Notice what’s missing: parentheses, an equals key, and any need to tell the calculator about precedence. This isn’t much of a win for a five-key calculation. It becomes more apparent with something like computing the value of a bunch of parallel resistors:

R=1/(1/R1+1/R2+1/R3…)

An RPN user can calculate each reciprocal, add it to the running result on the stack, and finally take the reciprocal. Intermediate answers stay in the calculator naturally instead of being stuffed into memory registers or enclosed in increasingly impressive collections of parentheses.

Is RPN better? Calculator users have been arguing about that for half a century. But once RPN gets wired into your fingers, it can be surprisingly hard to give up.

Continue reading ““I’m Not Dead Yet!” Reverse Polish Notation Calculators You Can Still Buy”

HDMI For The Color Computer 2

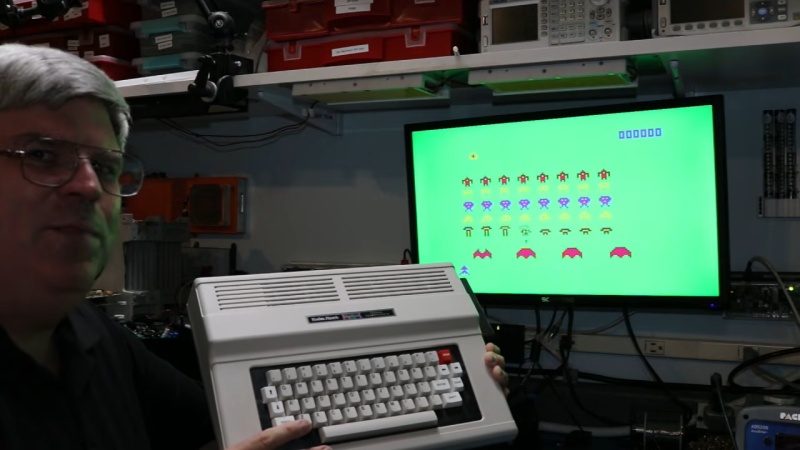
[Scott Baker] bought a TRS-80 Color Computer off eBay some five years ago. He’d always intended to add a CoCoVGA or CoCoDV upgrade to hook it up to a monitor, but the device was sold out and his name never made it off the waitlist. Thus, he decided to build his own solution to give the classic machine a proper HDMI output.

The concept behind the project is simple enough—grab the digital signals which feed the MC6847 IC responsible generates the analog video output, and use them to create an all-digital video output over HDMI. [Scott] achieved this by using a Tang Nano board, which hosts a Gowin GW1N-1 FPGA. It’s able to snoop the signals heading to the MC6847 and, with some supporting components and level shifters, it can spit out video befitting modern screens. To make the system nicely complete, an analog-to-digital converter is also included to pick up the analog sound output from the TRS-80 and spit it out down the same HDMI cable. Such convenience!

There’s something strangely anachronistic about grabbing a TRS-80 off the shelf and hooking it up to a flatscreen with a single HDMI cable. Regardless, it’s a pretty great way to play with your old machine without having to futz with heavy old CRTs. We’ve featured plenty of similar projects before, too. Continue reading “HDMI For The Color Computer 2”

Creating The Greenest Possible Clothing With Living Fungi

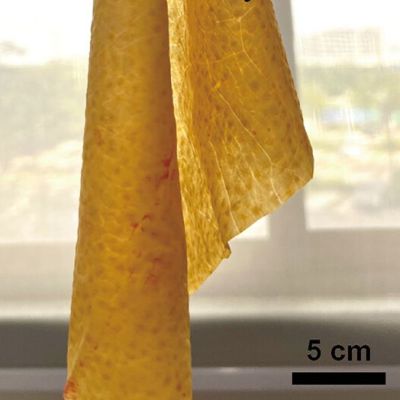
Despite the wide variety of fabrics used for our clothing, they all share the property of not being living tissues. This could be due to them never having been part of an organism, or having been removed from said organism. Another approach here entails so-called engineered living materials (ELMs), with a recent research article by [Ke Li] et al. in Science Advances providing a good example of a fungal platform for such living textiles.

Although it may seem frivolous to create something like this, the direct benefits would be to have a fabric that can self-heal and respond to its environment, including blocking UV radiation and changing its coloring through pigmentation.

The research demonstrated in this paper covers essentially a platform for creating a living textile that can be adapted to a wide variety of applications and colorizations. Of note is that the researchers have not yet tested aspects like washability, abrasion resistance, breathability and wearer comfort, so this should definitely be regarded as setting the stage for more research.

For the basic material the fungi Cordyceps militaris was chosen, which were subsequently placed between films. To this additional microbial cultures were added, including the pigment-producing S. cerevisiae and melanized A. niger for UV blocking.

As for what it can look like with clothing, this article at De Zeen gives somewhat of an idea, as well as how the living textile is prepared.

A Defrag Simulator In Your Browser

Disk Defragmenter was a wonderful utility that Microsoft included with Windows back in the day. Back then, you’d use it to theoretically speed up disk access. Today, you can run a fun simulation right in your browser thanks to [Dennis Morello].

The theory behind defragmenting hard disks was simple. Your hard drive would store data on spinning magnetic platters. Sometimes, a given file or group of files would end up with their different parts scattered across different parts of a platter, or even multiple platters, as the file system tried to slot everything into the space available over time. On a drive accessed with a literal physical mechanism, this fragmentation of files across multiple areas of a disk could cause functional read speeds to drop. To solve this, you could defragment the drive, wherein a utility would grab disparate bits of different files and put them physically closer together on the drive platters, such that the read heads could access larger contiguous chunks of files more easily.

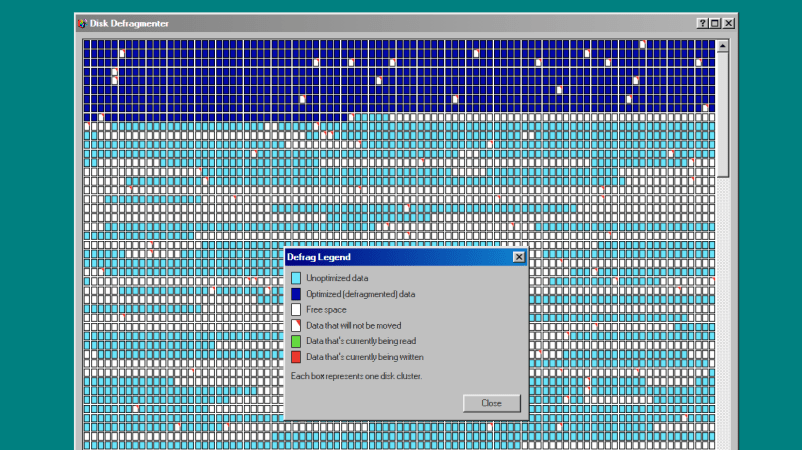
[Dennis’s] project does none of that. It just simulates the visuals and sound of running Microsoft’s disk defragmenter tool from Windows 98. It’s got the little rows of squares that get rearranged, blue for unoptimized data, dark blue for defragmented data, and white boxes for free space. It’s got the progress bar along the bottom, too, and a nice little simulated sound of a hard disk ca-chunking away as it shuffles little bits of data to and fro. This was the kind of thing you’d do on a rainy Saturday afternoon in the 1990s, just watching your PC make itself a few percent faster while you drank coffee and wondered if your ex-wife Jacinta was ever coming back. She never did, but you did notice that Age of Empires II loaded a fair bit quicker after you ran a full defrag on your main drive. Sometimes, that’s as good as it gets.

Modern file systems are better at managing issues like fragmentation, and the virtually instant seek speeds of solid-state drives essentially eliminated the need for defragmentation for good. Still, it’s fun to visit an ancient tool from yesteryear and remember what it meant to us way back when. Maybe you could give Jacinta a call, too, just for old times sake, and discuss that time a Janet Jackson song started crashing brand-new Windows laptops right out of the box…

Haiku OS Releases Beta 6

After just a little over 25 years of the Haiku project trying to keep the BeOS spirit alive, the team has now released Beta 6. The spicy details of what is now all better can naturally be found in the detailed release notes. Part of the size of these release notes is due to the previous beta release being two years ago, though nightly builds have kept Haiku users appeased in the meantime.

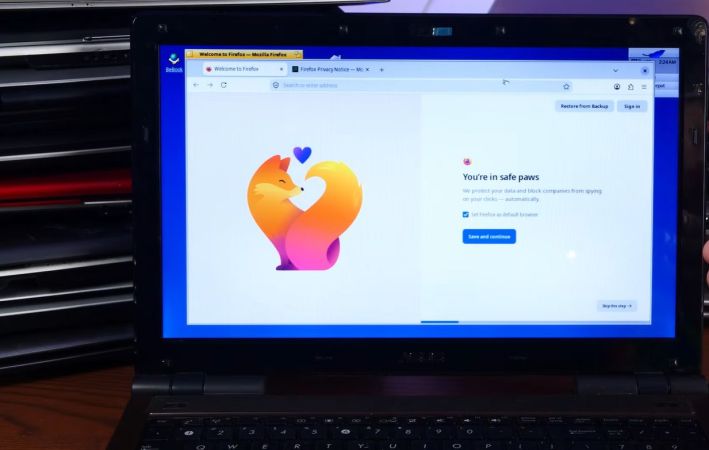
The headline features that are new compared to the previous release include the ability to run the Firefox browser and derivatives, QEMU hardware virtualization using the NetBSD Virtual Machine Monitor (NVMM), improved POSIX and hardware compatibility, as well as many bug fixes. Unfortunately 64-bit ARM support still has to wait a bit longer.

Naturally, such a joyful new release wouldn’t go unnoticed by [Action Retro], who decided to celebrate by installing this new release on a stack of old laptops that he bought for a dollar each. With system requirements starting at a Pentium II with 256 MB of RAM, it’s very zippy to install and boot on. As [Action Retro] noticed, a fresh install on a random 2000s Asus laptop both WiFi and audio worked out of the box.

Wrestling through his e-waste pile of laptops, the functional laptops provided a pretty good experience, making these at least an excellent target for a fresh Haiku install as a daily driver.

We looked at Beta 5 and the nightlies back in 2024, with recently attempts being made to port Nvidia GPU drivers to Haiku, with good results.

Continue reading “Haiku OS Releases Beta 6”

Building An Airsoft Claymore Mine

The Claymore mine is a rather fearsome weapon of war, using explosives to blast a cone of shrapnel towards advancing enemies. It’s not really something you should try and build at home. An airsoft version, though, is altogether more appropriate. [RegiBlackwood] has developed a simple way to build exactly that.

It’s a cheap and cheerful build, with the claymore housing itself built out of cardboard. Wooden dowels are used to stake it into the ground, just like the real thing. In the center of the housing sits a regular old mouse trap. Only, it’s been modified to hold a sling carrying a payload of BBs. The trap is also tweaked to make its spring more powerful, and to enable it to be triggered with the tug of a tripwire. When triggered, the mousetrap fires and hurls the sling forth, spewing a rain of BBs from the front of the device—ideally quelling the advance on your position.

Built properly, it’s a fun piece of airsoft hardware that could really change the dynamics of your regular game. If you’re looking to do point defence, you might also consider building yourself some automated turrets as well…