Walk Like A Xenomorph

[James Bruton] is busy working on his latest project, a “scrap metal sculpture”-inspired Alien Xenomorph suit.  However, he wanted to get a boost in height as well as a digitigrade stance. To that end, [James] 3D-printed a pair of customized stilts. Each stilt consisted of a lifter with several parts laminated together using acetone. He bolted an old pair of shoes onto the stilts, adding straps across the toes to keep the shoes from lifting up.

While the stilts worked very well, [James] wanted to add soles to them to give him some traction as he walked – falling while in a Xenomorph costume composed of sharp plastic sounds painful enough! He decided to hybrid print the soles using ABS and Ninjaflex. The ABS part of the sole was then acetone-welded to the bottom of the stilts.

[James] hopes to add some claws for effect, so long as they don’t impede his walking too much. He has already completed a good amount of the 3D-printed suit. We know the finished project is going to be amazing: [James] has created everything from Daleks to Iron Man!

Continue reading “Walk Like A Xenomorph”

NES Controller

Turning A Classic NES Controller Into A Bluetooth Controller

[Pietronet] is like many of us in that he enjoys playing some classic console video games from time to time. He usually plays them on his PC using a Wiimote as a controller. The Wiimote has most of the classic buttons in a comfortable configuration. Plus, it’s got Bluetooth built-in, which makes it easy to pair up to your PC. [Pietronet] decided to take it a step further, though. He managed to cram all of the guts from a Wiimote inside of the original NES controller for a more authentic feel.

The first step was to crack open the Wiimote and locate pads for each button. Once they were located, [Pietronet] used a Dremel to cut the board into a smaller size. He cut off part of the circuit board that contained the directional pad as well as the connector for the nunchuck. Next he had to solder very thin wires to each of the button pads he located earlier.

The original NES controller has a very limited number of buttons, and [Pietronet] wanted to modify the original controller as little as possible. Therefore, he attached a magnetic reed switch to the Wiimote’s sync button. This way if he ever needs to sync the Wiimote to a new console, he can do it by holding a magnet in the right place. This is a function that isn’t often used, so the inconvenience should be negligible.

The next step was to connect the buttons from the original NES controller up to the wires that were added to the Wiimote. [Pietronet] left the original circuit board mostly intact. He did have to cut a small chunk of it away in order to make room for two AAA batteries, but this didn’t affect the functionality of the controller.

The inside of the NES controller had to be cleaned out of various standoffs and plastic bits to make room for all of the extra components. The Wiimote has an LED to indicate that the controller is connected properly. [Pietronet] soldered a red SMD LED in its place on the end of two thin wires. This LED was then placed on the bottom left side of the directional pad. It’s visible through a translucent filter. This allows [Pietronet] to see when the NES controller is synced up properly.

The case fits back together and everything is held in place. The result is what looks and feels like a classic NES controller, only this one has Bluetooth connectivity and a vibration motor. Check out the video demonstration below to get an idea of what it looks like in use. Continue reading “Turning A Classic NES Controller Into A Bluetooth Controller”

STEAM Carnival Hacker Preview Day

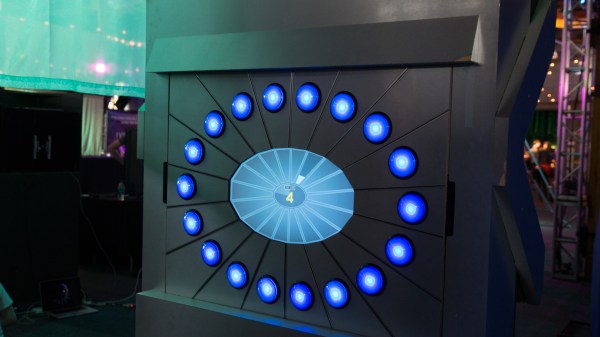
Last week we wrote about the guys over at TwoBitCircus and their upcoming STEAM Carnival. This Thursday we managed to make it down to the Hacker Preview day where they showed us all the toys and games that will be exhibited over the weekend.

The preview day went pretty well until the evening, when unexpected power problems occurred and the site lost power for a little while. But this is why you have a preview day right? Organizer [Brent Bushnell] even commented that he should have put a BETA badge on the ticket. Thankfully the outage coincided with the food truck arriving so everyone stopped for a burger.

Sadly all the fire based pieces were not active on the preview day since they didn’t have the appropriate safety measures in place yet, but they did get to show us most of their games. My personal favorites were the Hobby Horse Racing, and the Laser Foosball.

Here’s a quick run down of some of the stand out pieces.

Continue reading “STEAM Carnival Hacker Preview Day”

Power Glove LED Suit

Prototype LED Light Suit Runs Off Of A NES Power Glove

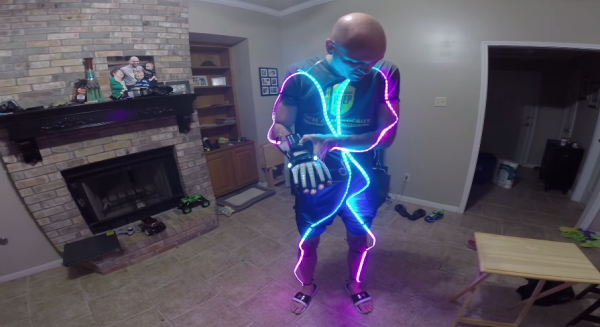
[Greg’s] been playing around with wearable hacks for quite some time now, and he’s decided to add a new twist for his latest LED light suit (Mk 4) — An ancient NES Power Glove to control it.

He was inspired by the band Hypercrush who had a music video where one of the guys was wearing a laser-shooting power glove — awesome. Having already made light suits before, he thought it’d be fun to do something similar.

The suit is controlled by an Arduino Pro Mini which has been hacked into the Power Glove for ultimate button pushing capabilities. He’s using 5 meter LED strips of the classic WS2812  RGB variety, which allow for individual LEDs to be addressed using a single pin. It’s powered by a 5V 2A USB battery pack, and he’s made all the components very modular, you could even say it’s “plug and play”!

Continue reading “Prototype LED Light Suit Runs Off Of A NES Power Glove”

The Pyro Board: A Two Dimensional Ruben’s Tube

Like visualizing music? Love fire? If so, you’re going to want to take a look at this Pyro Board.

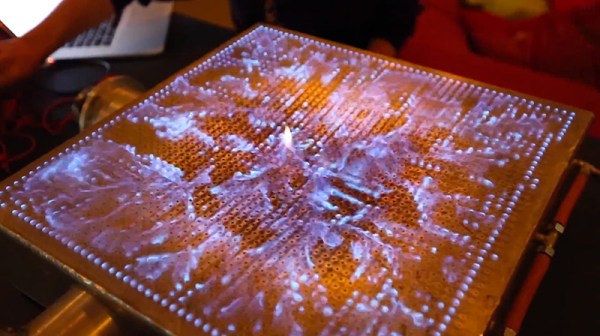
What happens when you take a tube, put some holes along it, add a speaker on one end, pump some propane in, and then light it on fire? You get an awesome fire visual — also known as a Ruben’s Tube. It works because the sound pressure from the speakers causes the flow rate of gas leaving the holes to vary, which results in a visible “standing frequency” of flames, i.e. a flaming VU meter.

The folks over at [Fysikshow] decided to step it up a notch by building a 2-dimensional Ruben’s tube with 2500 holes. They have a steel box with the evenly spaced holes on the top, and two speakers attached to the sides. And it works amazingly well — see for yourself after the break.

Continue reading “The Pyro Board: A Two Dimensional Ruben’s Tube”

Extremely Precise Positional Tracking

lumi

A few folks over at Carnegie Mellon have come up with a very simple way to do high-speed motion tracking (PDF) with little more than a flashlight. It’s called Lumitrack, and while it looks like a Wiimote on the surface, it is in reality much more accurate and precise.

The system works by projecting structured light onto two linear optical sensors. The pattern of the light is an m-sequence – basically a barcode where every subset of the m-sequence is unique. By shining this light onto a linear sensor, Lumitrack can calculate where the light is coming from, and thus the position of whatever is holding the light.

Even though the entire system consists of only an ARM microcontroller (in the form of a Maple Mini board), two linear optical sensors, and a flashlight with an m-sequence gel, it’s very accurate and very, very fast. The team is able to read the position at over 1000 frames/second, nearly the limit of what can be done with the Maple’s serial connection.

Already there are some interesting applications for this system – game controllers, including swords, flight yokes, and toy cars, and also more artistic endeavors such as a virtual can of spray paint. It’s an interesting piece of tech, and with the right parts, something any of us can build at home.

You can see the Lumitrack demo video below.

Continue reading “Extremely Precise Positional Tracking”

Step Into The Box

thebox

Take three industrial robots, two 4’ x 8’ canvases, and several powerful video projectors. Depending on who is doing the robot programming you may end up with a lot of broken glass and splinters, or you may end up with The Box.  The latest video released by the creators project, The Box features industrial robots and projection mapping. We recently featured Disarm from the same channel.

The Box is one of those cases of taking multiple existing technologies and putting them together with breathtaking results. We can’t help but think of the possibilities of systems such as CastAR while watching the video. The robots move two large canvases while projectors display a series of 3D images on them. A third robot moves the camera.

In the behind the scenes video, the creators revealed that the robots are programmed using a Maya plugin. The plugin allowed them to synchronize the robot’s movements along with the animation. The entire video is a complex choreographed dance – even the position of the actor was pre-programmed into Maya.

Continue reading “Step Into The Box”