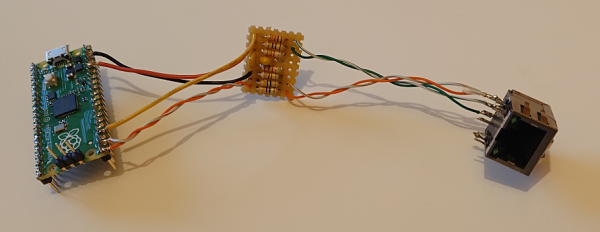
Magnetic jack version of the bit-bang ethernet peripheral for Raspberry Pi Pico

Bit-Banging Bidirectional Ethernet On A Pi Pico

These days, even really cheap microcontroller boards have options that will give you Ethernet or WiFi access. But what if you have a Raspberry Pi Pico board and you really want to MacGyver yourself a network connection? You could do worse than check out this project by [holysnippet] that gives you a bit-banged bidirectional Ethernet port using only scrap passive components and software.

This project is similar to one we shared back in August by [kingyo], but differs in that what [holysnippet] has achieved is a fully-functional (albeit only around 7 Mbps) Ethernet port, rather than a simple UDP transmit device. The Ethernet connection itself is handled by the lwip stack. Connection to the RJ45 socket can be made from any of the Pi Pico pins, provided TX_NEG is followed directly by TX_POS, but the really hacky part is in the hardware.
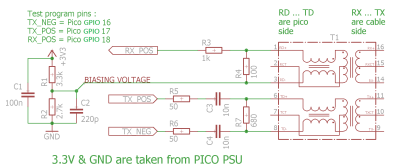
schematic of Pi Pico bit-banged ethernet peripheral
Schematic showing the empirically-determined passive component values required.

Rather than developing hardware that would protect the Pico, this design admits that it “shamefully relies on the Pico’s input protection devices” to limit the Ethernet voltages to 3.3 V.

You’ll need an isolation transformer from some old Ethernet-enabled gear (either standalone or as part of a magnetic jack), but then it’s only resistors and capacitors from there. There are warnings not to connect this to PoE networks for obvious reasons, and the component layout needs to keep in mind the ~20 MHz frequencies involved, but to get this working at all feels like quite a feat.

Normally, there’d be no reason to go to these lengths, but it’s always educational to see if it can be done and, with the current component shortages, this is another trick to keep up your sleeve for emergencies!

Putting ports where they shouldn’t belong is not a new idea, of course.  Back in the day we even shared an inadvisable ATTINY implementation of bit-banged Ethernet with no protection at all.

Thanks to [biemster] for the tip-off

Nixie Display Module Is Addressable Via SPI

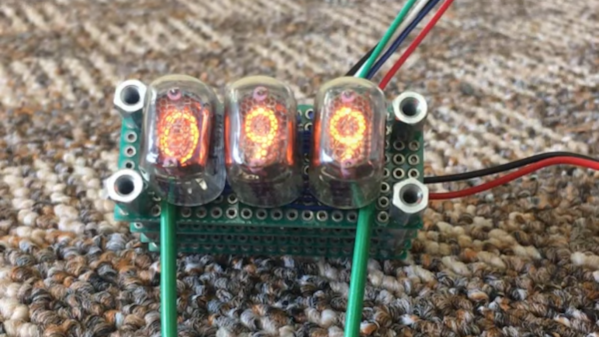
There are plenty of SPI interface screens on the market, but few of them have the charm of the good old Nixie tube. [Tony] decided to whip up a simple three-Nixie module that could be addressed via SPI. 

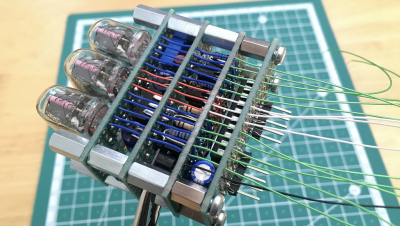
The stacked construction keeps things compact.

The module relies on a PIC16F15344 microcontroller to run the show, using its built-in SPI interface. It’s built with four stacked-up PCBs for ease of assembly and testing. It uses an internal buck converter to create the 170 volts required for the Nixie tubes from a 6 to 12 volt input. The high-voltage lines are routed towards the inside of the stack to minimize any nasty shocks when handling, though caution would still be advisable.

Driving the display is as simple as sending 16-bit words over the SPI interface, with the device operating in SPI client mode 1. If you’re looking for a simple way to have projects write output to a nice Nixie display, this module could be just what you’re looking for. Alternatively, if you can’t lay your hands on the tubes, there are other pretty solutions out there, too. Video after the break.

Continue reading “Nixie Display Module Is Addressable Via SPI”

Cargo Culting And Buried Treasure

I have no idea how true the stories are, but legend has it that when supplies were dropped on some Melanesian islands during WWII, some locals took to replicating runway signs in order to further please the “gods” that were dropping them. They reportedly thought that making landing strips caused laden airplanes to visit. Richard Feynman later turned this into a metaphor about scientific theory – that if you don’t understand what you’re doing deeply, you may be fooling yourself.

I’d like to be a little bit more forgiving of adherents of technological cargo cults. Because the world around us is very complicated, we often just take things as they are rather than understanding them deeply, because there’s simply only so deep you can go into so many fields.

Is someone who doesn’t know the i386 machine language cargo-culting their way through a job as a web backend developer? Probably not. But from the perspective of an assembly-language programmer, any of us who write in compiled or interpreted programming languages are cargo-culting coding. You don’t need to understand a cell phone to dial home, but can you really say that you understand everything about how one works?  Or are you just going through the motions?

So while some reliance on metaphor and “well, it worked last time” is perfectly normal, I think noticing when you cargo-cult is also healthy. It should also be a warning sign, or at least a flag to remind yourself that there may be dragons here. Or maybe just a buried learning opportunity, the X that marks the spot where digging deeper might be productive.

Bring Out The Fine Detail In Small Objects With This Coaxial Lighting Rig

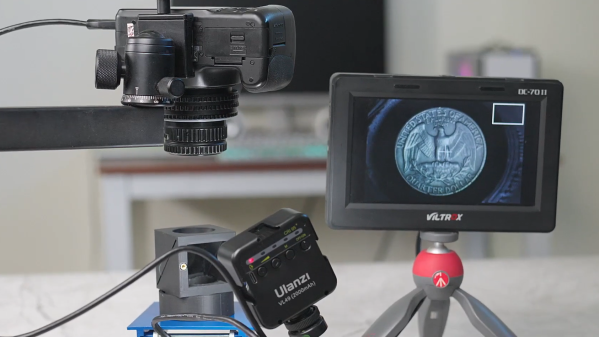
All things considered, modern photography is pretty easy. It’s really just a matter of pointing the camera at the thing you want to take a picture of and letting the camera do the rest. But that doesn’t mean good photographs are easy to make, especially when fine detail is required. And that’s the reason this 3D printed coaxial lighting setup was built — to make quality photographs of small objects a snap.

The objects of [Peter Lin]’s photographic desire are coins, no doubt of the collectible variety. Since the condition of a coin is essential to determining its value, numismatic photographers really need to be meticulous about the quality of their work. The idea here is to keep the incoming light parallel to the optical axis of the camera, for which purpose ring lights around the camera lens are often used. But they can result in lighting artifacts, and can be awkward to use for such smaller subjects.

So for this setup, [Peter] essentially built a beam-splitter. The body is a printed block that’s painted matte black to keep reflections down; a little self-adhesive flocking paper helps with that too. The round aperture on the top is for the camera lens, with the square window on the side admitting light. The secret is a slot oriented at 45 degrees to both of those openings, into which the glass element from a cheap UV filter is inserted. The filter acts like a beam splitter which reflects light down onto the coin on the bottom of the block and lets it pass up into the camera lens directly above the coin, parallel to the optical axis. Genius!

The video below shows it in use with both DSLR and smartphone cameras, and the image quality is amazing. While most of us probably aren’t photographing coins, we do enough high-resolution photography of small objects that this seems applicable. In a way, it reminds us of [Big Clive]’s “TupperCam” method of high-res PCB photography (final item).

Continue reading “Bring Out The Fine Detail In Small Objects With This Coaxial Lighting Rig”

Hanging Christmas Lights With No Ladder And No Fuss

Getting up on a ladder to hang Christmas lights is a great way to hurt yourself if you’re not careful, and winter conditions only add to the peril. One enterprising hacker has whipped up a neat way to avoid ladders entirely, by hanging their lights while planted safely on the ground.

Result!

The build uses hefty magnets and triangle eye bolts, attached at regular intervals to the string of Christmas lights. The magnets are used to hold the lights to metal roof siding, while the hooks allow the lights to be lifted into place using a hook on a large extendable pole. Washers, spacers, and screws are used to attach the magnets and hooks to the lights.

For a layout that follows the lines of a simple peaked roof, this hack works great. For more complicated installations, you might still have to climb up a ladder. We’ve featured great primers on getting started with advanced Christmas light displays before, if you’re looking to up your game.

Meanwhile, no matter how much you enjoy seasonal decoration brinkmanship, don’t even think about watching Deck the Halls (2006). Danny Devito has saved a lot of films, but he couldn’t save this. Happy holidays!

Stack Trace From The 1950s Punches Again

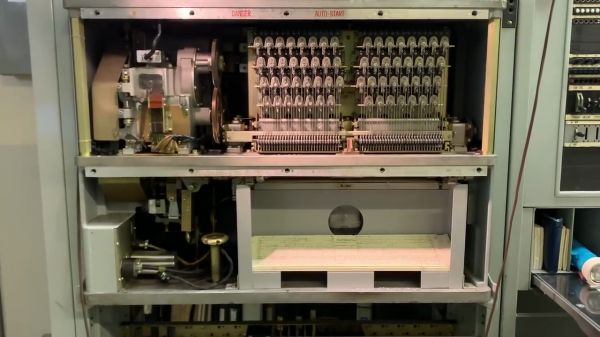
This repair/tutorial video by the telephone Connections Museum of Seattle features an amazing piece of electro-mechanical technology from the 1950s — the 5XB trouble recorder. Museum volunteer Sarah the “Switch Witch” has a deep passion for old phone equipment, and gives an excellent description of the trouble recorder, the problems it solved, and how it works, and how they went about fixing it.

As central office switching became more complex and more dense, the manual methods of hunting down faults became unmanageable. Semi-automatic approaches using trouble lamps, but even that had its limits. This “stack trace”, which could have hundreds of indicators, had to be frozen while the technician recorded the status on a form. If another fault came along during this time, it was lost. The solution, using the available technology of the day, was a mind-boggling punched card apparatus that punches over a thousand bits of information when an switching error is detected or when various watchdog timers expire.

Continue reading “Stack Trace From The 1950s Punches Again”

Hackerboards: Making Finding The Right Single-Board Computer Easy

The great thing about the wide availability of single-board computers (SBCs) is that it offers such a large selection of options, in terms of CPU performance, GPU features, RAM size, I/O options and much more. This is however also the largest issue, especially with the annual surge of new boards with new feature sets. Trying to make sense of all these offerings is the recently overhauled Board-DB, also known as Hackerboards.

As [Martijn Braam] explains in the blog post on the changes, a major upgrade over the old Hackerboards (which we covered in 2016) is a far more extensive set of parameters that can be filtered against. This makes a fine-grained selection of detailed features significantly easier, which is also reflected in the technical specifications comparison feature. With over 450 active entries there are a lot of boards that can already be filtered on, but manufacturers are invited to take up contact to add further entries, which should keep the list up to date.

Incidentally, if you’d like to know how [Martijn] gets those gorgeous PCB photographs, he wrote a whole a separate write-up that goes over his camera setup.

Thanks to [Vlad] for the tip.