A photograph with labels showing the parts of a DIY scanning spectrometer.

DIY Scanning Spectrometer Is A Bright Idea

Spectroscopy seems simple: split a beam of light into its constituent wavelengths with a prism or diffraction grating, and measure the intensity of each wavelength. The devil is in the details, though, and what looks simple is often much harder to pull of in practice. You’ll find lots of details in [Gary Boyd]’s write-up of his optical scanning spectrometer project, but no devils.

Schematic diagram of [Gary Boyd]'s spectrometer, showing optical elements and rays of light as well as major physical elements like the motor and linear stage.
Schematic diagram of [Gary Boyd]’s Czerny-Turner type scanning spectrometer.
A scanning spectrometer is opposed to the more usual camera-type spectrometer we see on these pages in that it uses a single-pixel sensor that sweeps across the spectrum, rather than spreading the spectrum across an imaging sensor.

Specifically, [Gary] has implemented a Czerny-Turner type spectrometer, which is a two-mirror design. The first concave mirror collimates the light coming into the spectrometer from its entrance slit, focusing it on a reflective diffraction grating. The second concave mirror focuses the various rays of light split by the diffraction grating onto the detector.

In this case [Gary] uses a cheap VEML 7700 ambient light sensor mounted to a small linear stage from amazon to achieve a very respectable 1 nm resolution in the range from 360 nm to 980 nm. That’s better than the human eye, so nothing to sneeze at — but [Gary] includes some ideas in his blog post to extend that even further. The whole device is controlled via an Arduino Uno that streams data to [Gary]’s PC.

[Gary] documents everything very well, from his optical mounts to the Arduino code used to drive the stepper motor and take measurements from the VEML 7700 sensor. The LED and laser “turrets” used in calibration are great designs as well. He also shares the spectra this device is capable of capturing– everything from the blackbody of a tungsten lamp used in calibration, to a cuvette of tea, to the sun itself as you can see here. If you have a couple minutes, [Gary]’s full writeup is absolutely worth a read.

This isn’t the first spectrometer we’ve highlighted– you might say we’ve shown a whole spectrum of them.

Hackaday Links Column Banner

Hackaday Links: April 13, 2025

It’s been a while since we’ve dunked on an autonomous taxi foul-up, mainly because it seemed for a while there that most of the companies field testing driverless ride-sharing services had either ceased operation or curtailed them significantly. But that appears not to be the case after a Waymo robotaxi got stuck in a Chick-fil-A drive-through. The incident occurred at the chicken giant’s Santa Monica, California location at about 9:30 at night, when the autonomous Jaguar got stuck after dropping off a passenger in the parking lot. The car apparently tried to use the drive-through lane to execute a multi-point turn but ended up across the entrance, blocking other vehicles seeking their late-evening chicken fix. The drive-through-only restaurant ended up closing for a short time while Waymo figured out how to get the vehicle moving again.

Continue reading “Hackaday Links: April 13, 2025”

This Week In Security: AI Spam, SAP, And Ivanti

AI continues to be used in new and exciting ways… like generating spam messages. Yes, it was inevitable, but we now have spammers using LLM to generate unique messages that don’t register as spam. AkiraBot is a Python-powered tool, designed to evade CAPTCHAs, and post sketchy SEO advertisements to web forms and chat boxes around the Internet.

AkiraBot uses a bunch of techniques to look like a legitimate browser, trying to avoid triggering CAPTCHAs. It also runs traffic through a SmartProxy service to spread the apparent source IP around. Some captured logs indicate that of over 400,000 attempted victim sites, 80,000 have successfully been spammed.

Continue reading “This Week In Security: AI Spam, SAP, And Ivanti”

Fiber Laser Gives DIY PCBs A Professional Finish

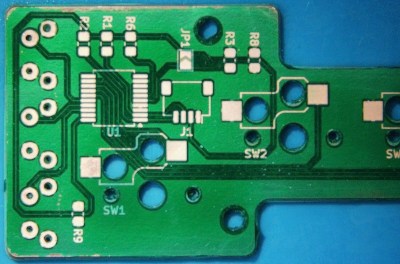
While low-cost professional PCB fabrication has largely supplanted making circuit boards at home, there’s still something to be said for being able to go from design to prototype in an afternoon. Luckily we aren’t limited to the old toner transfer trick for DIY boards these days, as CNC routers and powerful lasers can be used to etch boards quickly and accurately.

But there’s still a problem — those methods leave you with a board that has exposed traces. That might work in a pinch for a one-off, but such boards are prone to shorts, and frankly just don’t look very good. Which is why [Mikey Sklar] has been experimenting with applying both a soldermask and silkscreen to his homemade boards.

The process he describes starts after the board has already been etched. First he rolls on the soldermask, and then sandwiches the board between layers of transparency film and clear acrylic before curing it under a UV light. After two coats of the soldermask, the board goes into a fiber laser and the silkscreen and mask layers are loaded into the software and the machine is set to a relatively low power (here, 40%). The trick is that the mask layer is set to run four times versus the single run of the silkscreen, which ensures that the copper is fully exposed.

Since the board doesn’t need to be moved between operations, you don’t have to worry about the registration being off. The end result really does look quite nice, with the silkscreen especially popping visually a lot more than we would have assumed.

We’ve previously covered how [Mikey] uses his CNC router and fiber laser to cut out and etch the boards, so this latest installment brings the whole thing full circle. The equipment you’ll need to follow along at home isn’t cheap, but we can’t argue with the final results.

Continue reading “Fiber Laser Gives DIY PCBs A Professional Finish”

Ditto That

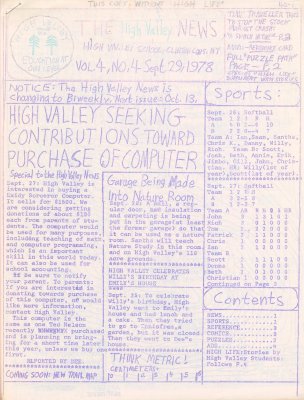
A ditto'd school newsletter from 1978.
All the news that was fit to print. Image via Wikipedia

In the 1982 movie Fast Times At Ridgemont High, a classroom of students receives a set of paperwork to pass backward. Nearly every student in the room takes a big whiff of their sheet before setting it down. If you know, you know, I guess, but if you don’t, keep reading.

Those often purple-inked papers were fresh from the ditto machine, or spirit duplicator. Legend has it that not only did they smell good when they were still wet, inhaling the volatile organic compounds within would make the sniffer just a little bit lightheaded. But the spirit duplicator didn’t use ghosts, it used either methanol (wood alcohol), isopropyl, or, if you were loaded, ethyl alcohol.

Invented in 1923 by Wilhelm Ritzerfeld, ditto machines were popular among schools, churches, and clubs for making copies of worksheets, fliers, and so on before the modern copy machine became widespread in the 1980s. Other early duplicating machines include the mimeograph, the hectograph, and the cyclostyle.

Continue reading “Ditto That”

Supercon 2024: A New World Of Full-Color PCBs

Printed circuit boards were once so simple. One or two layers of copper etched on a rectangular fiberglass substrate, with a few holes drilled in key locations so components could be soldered into place. They were functional objects, nothing more—built only for the sake of the circuit itself.

Fast forward to today, and so much has changed. Boards sprout so many layers, often more than 10, and all kinds of fancy geometric features for purposes both practical and pretty. But what catches they eye more than that, other than rich, saturated color? [Joseph Long] came to the 2024 Hackaday Supercon to educate us on the new world of full color PCBs.

Continue reading “Supercon 2024: A New World Of Full-Color PCBs”

Glow In The Dark PCBs Are Pretty Cool

What if circuit boards could glow in the dark? It’s a fun question, and one [Botmatrix] sought to answer when approached by manufacturer PCBWay to run a project together. It turns out that it’s quite possible to make glowing PCBs, with attractive results. (Video after the break.)

Specifically, PCBWay has developed a workable glow-in-the-dark silkscreen material that can be applied to printed circuit boards. As a commercial board house, PCBWay hasn’t rushed to explain how precisely they pulled off this feat, but we don’t imagine that it involved anything more than adding some glow-in-the-dark powder to their usual silkscreen ink, but we can only speculate.

On [Botmatrix]’s end, his video steps through some neat testing of the performance of the boards. They’re tested using sensors to determine how well they glow over time.

It might seem like a visual gimmick, and to an extent, it’s just a bit of fun. But still, [Botmatrix] notes that it could have some practical applications too. For example, glow-in-the-dark silkscreen could be used to highlight specific test points on a board or similar, which could be instantly revealed with the use of a UV flashlight. It’s an edge case, but a compelling one. It’s also likely to be very fun for creating visually reactive conference badges or in other applications where the PCB plays a major cosmetic role.

[Botmatrix] says these are potentially the first commercially-available glow-in-the-dark printed PCBs. We love glow in the dark stuff; we’ve even explored how to make your own glowing material before, too. .

Continue reading “Glow In The Dark PCBs Are Pretty Cool”