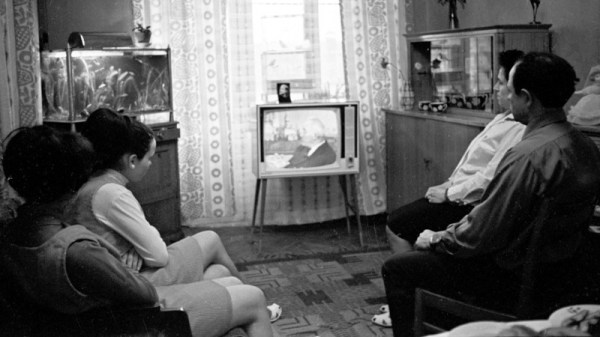
Automatic Coil Winder Gets It Done With Simple Hardware And Software

We’ve grown to expect seeing mechatronics project incorporate a standard complement of components, things like stepper motors, Arduinos, lead screws, timing belts and pulleys, and aluminum extrusions. So when a project comes along that breaks that mold, even just a little, we sit up and take notice.

Departing somewhat from this hardware hacking lingua franca is [tuenhidiy]’s automatic coil winder, which instead of aluminum extrusions and 3D-printed connectors uses simple PVC pipe and fittings as a frame. Cheap, readily available, and easily worked, the PVC does a fine job here, and likely would on any project where forces are low and precision isn’t critical. The PVC frame holds two drive motors, one to wind the wire onto a form and one to drive a lead screw that moves the form back and forth. An Arduino with a CNC shield takes care of driving the motors, and the G-code needed to do so is generated by a simple spreadsheet that takes into account the number turns desired, the number of layers, the dimensions of the spool, and the diameters of the wire. The video below shows the machine going through its paces, with pretty neat and tidy results.

Being such a tedious task, this is far from the first coil winder we’ve seen. Some adhere to the standard design language, some take off in another direction entirely, but they’re all instructive and fun to watch in action.

Continue reading “Automatic Coil Winder Gets It Done With Simple Hardware And Software”

Quiet Wings, With Shape Memory Alloy

It’s a fact of operating an aircraft, that the make noise. If you’re an aviator you might want to quiet your craft to avoid annoying people nearby, or you might even want to operate in stealth mode. It turns out that there are different sources of noise on a plane depending upon the phase of flight. A NASA study found that when landing, a gap between the wing and leading edge slats causes air to cavitate causing unnecessary noise. Blocking that hole would allow for quieter landings, but there was no material suitable for both normal flight and the landing. That is, until Texas A&M researchers devised a way to use a shape memory alloy to do it.

In addition to two different shape memory alloy configurations, the study looks at a more conventional fiberglass composite, although this would only work for a limited number of wing configurations.

Continue reading “Quiet Wings, With Shape Memory Alloy”

Dominate Video Calls With Game Boy Camera Webcam

We can’t promise it will all be positive, but there’s no question you’ll be getting plenty of attention when you join a video call using the Game Boy Camera. Assuming they recognize you, anyway. The resolution and video quality of the 1998 toy certainly hasn’t aged very well, and that’s before it gets compressed and sent over the Internet.

From a technical standpoint, this one is actually pretty simple, if rather convoluted. [RetroGameCouch] hasn’t modified the Game Boy Camera in any way, he’s just connected it to the Super Game Boy, which in turn is slotted into a Super Nintendo. From there the video output of the SNES is passed through an HDMI converter, and finally terminates in a cheap HDMI capture device. His particular SNES has been modified with component video, but on the stock hardware you’ll have to be content with composite.

The end result of all these adapters and cables is that the live feed from the Game Boy Camera, complete with the Super Game Boy’s on-screen border, is available on the computer as a standard USB video device that can be used with whatever program you wish. If you’re more interested in recovering still images, we’ve recently seen a project that lets you pull images from the Game Boy Camera over WiFi.

Continue reading “Dominate Video Calls With Game Boy Camera Webcam”

Simple Tip Helps With Powder Coating Perfection On Difficult Parts

To say that that the commercially available garden path lights commonly available at dollar stores are cheap is a vast overstatement of their true worthlessness. These solar-powered lights are so cheaply built that there’s almost no point in buying them, a fact that led [Mark Presling] down a fabrication rabbit hole that ends with some great tips on powder coating parts with difficult geometries.

Powder coating might seem a bit overkill for something as mundane as garden lights, but [Mark] has a point — if you buy something and it fails after a few weeks in the sun, you might as well build it right yourself. And a proper finish is a big part of not only getting the right look, but to making these totally un-Tardis-like light fixtures last in the weather. The video series below covers the entire design and build process, which ended up having an aluminum grille with some deep grooves. Such features prove hard to reach with powder coating, where the tiny particles of the coating are attracted to the workpiece thanks to a high potential difference between them. After coating, the part is heated to melt the particles and form a tough, beautiful finish.

But for grooves and other high-aspect-ratio features, the particles tend to avoid collecting in the nooks and crannies, leading to an uneven finish. [Mark]’s solution was to turn to “hot flocking”, where the part is heated before applying uncharged coating to the deep features. This gets the corners and grooves well coated before the rest of the coating is applied in the standard way, leading to a much better finish.

We love [Presser]’s attention to detail on this build, as well as the excellent fabrication tips and tricks sprinkled throughout the series. You might want to check out some of his other builds, like this professional-looking spot welder.

Continue reading “Simple Tip Helps With Powder Coating Perfection On Difficult Parts”

Solder Bridges Aid Desoldering

As our own Elliot Williams laid out, many people think that soldering is a key skill for electronics, but we don’t as often think about desoldering. Even if you are perfect in your technique, there’s always the chance you’ll put in a bad part or have a part fail later and it will need replacement. [Robert] has a short video showing his method for removing through-hole components and you can see it below.

This isn’t the first time we’ve seen it, of course. In fact, it is very much like using hot air, although it doesn’t require hot air, just extra solder and a regular iron. Of course, if we knew that connector was bad, we’d have been tempted to cut each pin apart and remove them one at a time. Heating a joint and then slamming your hand on the bench can work wonders.

We always think desoldering pumps are a good idea, but the electric ones tend to be anemic. The ones with the springs are usually better, but still have limitations. In the end, we’ll stick with using hot air, but if all you have is an iron, this method is worth checking out. You might also be interested in the needle method.

Continue reading “Solder Bridges Aid Desoldering”

Monowheel Balancing Robot Can’t Turn (Yet)

Self-balancing robots have become a common hobby project, and they usually require two wheels to work. [James Bruton] has managed to single wheel balancing robot by adding gyroscopic stabilization.

[James] has done other self-balancing robots, like his Sonic robot, but recently started experimenting with gyroscopic stabilization. In that project, he proposed the idea of combining the two stabilization methods to create a monowheel robot, and he followed through on that idea. The wheel is powered by a brushless motor and is stabilized conventionally around the wheel’s axis. Side to side balancing is achieved using a phenomenon known as gyroscopic precession, by tilting a pair of heavy spinning wheels. This is not to be confused with reaction wheels, which use rotational inertia for control. It appears the actuating the gyroscopes also affects the front-to-back stabilization, so at the moment the robots won’t stay on one spot. [James] plans to implement a second observation controller in software to solve this.

Another challenge with this robot is that it cannot turn at the moment. The gyroscopes are not in the correct orientation to effect rotation around the vertical axis, and changing their orientation would cause other problems. A fan, which works like a helicopter’s tail rotor is one option, and a reaction wheel on top might also work. We’re partial to the reaction wheel idea. Having a different mechanical control mechanism for each axis would make it quite an interesting robot.

Continue reading “Monowheel Balancing Robot Can’t Turn (Yet)”

Walk The First 3D-Printed Bridge And Be Counted

Way back in 2018, we brought you news of a 3D-printed stainless steel pedestrian bridge being planned to span a Dutch canal in Amsterdam. Now it’s finally in place and open to the public — the Queen made it official and everything. MX3D printed it on their M1 Metal additive manufacturing machine that is essentially a group of robots welding layers of metal together using traditional welding wire and gas.

The partnership of companies involved originally planned to build this beautiful bridge in situ, but safety concerns and other issues prevented that and it was built in a factory instead. The bridge has been printed and ready since 2018, but a string of delays got in the way, including the fact that the canal’s walls had to be refurbished to accommodate it. Since it couldn’t be made on site, the bridge was taken there by boat and placed with a crane. After all this, the bridge is only permitted to be there for two years. Hopefully, they have the option to renew.

This feat of engineering spans 40 feet (12.2 meters) long and sits 20 feet (6.3 meters) wide. It’s equipped with sensors that measure structural stuff like strain, displacement, load, and rotation, and also has environmental sensors for air quality and temperature. All of this data is sent to the bridge’s digital twin, which is an exact replica in the form of a computer model. One of the goals is to teach the bridge how to count people. Be sure to check out our previous coverage for a couple of short videos about the bridge.