Jumbo LED Matrix Brings Classic Sprites To Life

Despite all the incredible advancements made in video game technology over the last few decades, the 8-bit classics never seem to go out of style. Even if you weren’t old enough to experience these games when they were new, it’s impossible not to be impressed by what the early video game pioneers were able to do with such meager hardware. They’re a reminder of what can be accomplished with dedication and technical mastery.
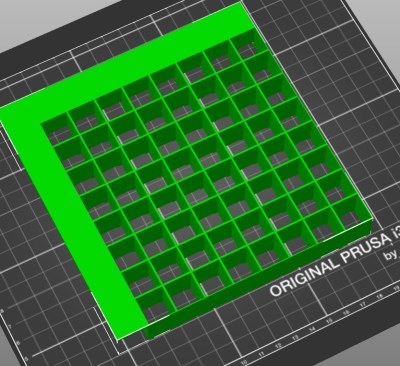
The grid has been split up for easier printing.

If you’d like to put a little retro inspiration on your desk, take a look at this fantastic 16 x 16 LED matrix put together by [Josh Gerdes]. While it’s obviously not the only thing you could use it for, the display certainly seems particularly adept at showing old school video game sprites in all their pixelated glory. There’s something about the internal 3D printed grid that gives the sprites a three dimensional look, while the diffused glow reminds us of nights spent hunched over a flickering CRT.

The best part might be how easy it is to put one of these together for yourself. You’ve probably got most of what you need in the parts bin; essentially it’s just a WS2812B strip long enough to liberate 256 LEDs from and a microcontroller to drive them. [Josh] used an Arduino Nano, but anything compatible with the FastLED library would be a drop-in replacement. You’ll also need a 3D printer to run off the grid, and something to put the whole thing into. The 12×12 shadowbox used here looks great, but we imagine clever folks such as yourselves could make do with whatever might be laying around if you can’t nip off to the arts and crafts store right now.

Beyond looking great, this project is a fantastic reminder of how incredibly handy WS2812 LEDs really are. Whether you’re recreating iconic game sprites or fashioning your own light-up sunglasses, it’s hard to imagine how we managed before these little wonders hit the scene.

Continue reading “Jumbo LED Matrix Brings Classic Sprites To Life”

This Week In Security: Psychic Paper, Spilled Salt, And Malicious Captchas

Apple recently patched a security problem, and fixed the Psychic Paper 0-day. This was a frankly slightly embarrasing flaw that [Siguza] discovered in how iOS processed XML data in an application’s code signature that allowed him access to any entitlement on the iOS system, including running outside a sandbox.

Entitlements on iOS are a set of permissions that an application can request. These entitlements range from the aforementioned com.apple.private.security.no-container to platform-application, which tells the system that this is an official Apple application. As one would expect, Apple controls entitlements with a firm grip, and only allows certain entitlements on apps hosted on their official store. Even developer-signed apps are extremely limited, with only two entitlements allowed.

This system works via an XML list document that is part of the signed application. XML is a relative of HTML, but with a stricter set of rules. What [Siguza] discovered is that iOS contains 4 different XML parsers, and they deal with malformed XML slightly differently. The kicker is that one of those parsers does the security check, while a different parser is used for that actual permission implementation. Is it possible that this mismatch could contain a vulnerability? Of course there is.
Continue reading “This Week In Security: Psychic Paper, Spilled Salt, And Malicious Captchas”

Go The Extra Mile For Your LED Driver

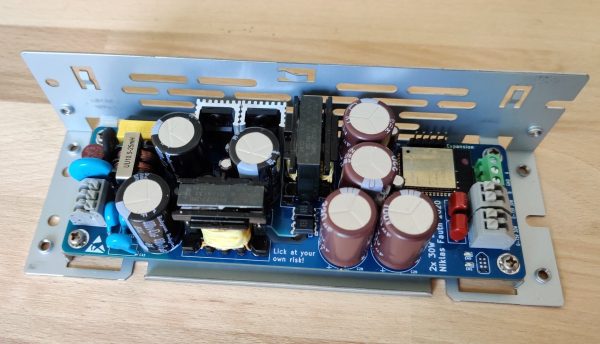
Addressable RGB LED strips may be all the rage, but that addressability can come at a cost. If instead of colors you expect to show shades of white you may the find less flickery, wider spectrum light from a string of single color LEDs and a nice supply desirable. Of course there are many ways to drive such a strip but this is Hackaday, not Aliexpressaday (though we may partake in the sweet nectar of e-commerce). [Niklas Fauth] must have really had an itch to scratch, because to get the smoothest fades for his single color LED strips, he built an entire software defined dual 50W switched-mode AC power supply from scratch. He calls it his “first advanced AC design” and we are suitably impressed.

Switched-mode power supplies are an extremely common way of converting arbitrary incoming AC or DC voltage into a DC source. A typical project might use a fully integrated solution in the form of a drop-in module or wall wart, or a slightly less integrated controller IC and passives. But [Niklas] went all the way and designed his from scratch. Providing control he has the ubiquitous ESP-32 to drive the control nodes of the supply and giving the added bonus of wireless connectivity (one’s blinkenlights must always be orchestrated). We can’t help but notice the PCBA also exposes RS485 and CAN transceivers which seem to be unused so far, perhaps for a future expansion into wired control?

Continue reading “Go The Extra Mile For Your LED Driver”

LED Shirt Does It With Tulle

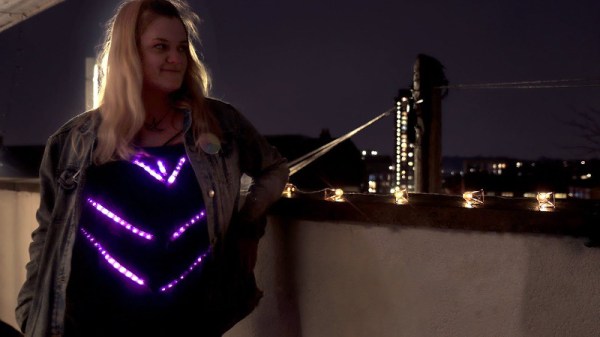
Given that we are living in what most of humanity would now call “the future”, we really ought to start acting like it. We’re doing okay on the electric cars, but sartorially we’ve got some ground to make up. Helping with this effort is [Amy Goodchild], who put together a fancy LED shirt for all occasions.

The basis of the shirt is an ESP8266 running the FastLED library, hooked up to strings of WS2812B LEDs. It’s a great combination for doing quick and simple colorful animations without a lot of fuss. The LED strips are then fastened to the shirt by sewing them on, with heatshrink added to the strips to give the thread something to attach to. Tulle fabric is used as a diffuser, hiding the strips when they’re off and providing a more pleasant glowing effect. Everything is controlled from a small box, fitted with an arcade button and 7-segment display.

It’s a fun piece that’s readily achievable for the novice maker, and a great way to learn about LEDs and sewing. We’ve seen other similar builds before, such as this glowing LED skirt. Video after the break.

Continue reading “LED Shirt Does It With Tulle”

New Part Day: SK6812 Mini-E. A Hand Solderable Neopixel Compatible LED!

Normally when we give you a New Part Day piece, it concerns a component that you will have never seen before. The subject of this find by [Robert Fitzsimons] then is a slight departure from that norm, given that the SK6812 Mini-E is a WS2812 or Neopixel compatible multi-colour LED of a type that has been available for a while now.

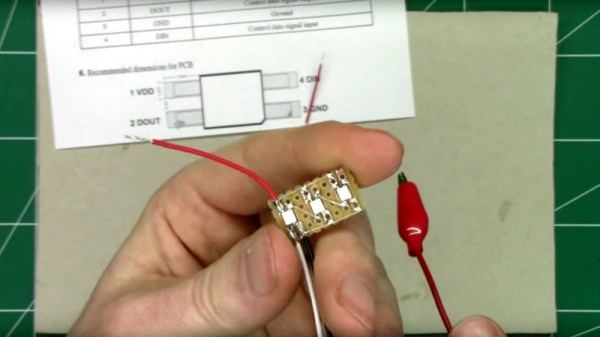
What makes this component new though is its packaging. The Mini-E variant of the SK6812 only appeared last year and has now found its way through to smaller order quantities on AliExpress. Its special feature is that it has a set of flat leads rather than the usual pads on the underside of the package. This means that unlike its predecessors it is readily hand solderable, as he demonstrates by attaching a set of leads to one.

The leads emerge halfway up the side of the device, which seems designed to be mounted recessed within a PCB hole. He demonstrates this with a piece of stripboard, and remarks that they would make a good choice for many small projects such as Shitty Add-On boards.

We’ve touched the leadless SK6812s a few times before, along the way remarking that in some respects they are better than the WS2812 they follow.

Continue reading “New Part Day: SK6812 Mini-E. A Hand Solderable Neopixel Compatible LED!”

Addressable LED Strings In Your USB

WS2812Bs, or NeoPixels, or whatever else you call them brought full-color LEDs to maker projects a meter at a time in recent years. Hooked up to a microcontroller, they make creating vibrant, full-color glowables a cinch. They won’t work on their own though, and a some point you want to ditch the dev board and let the blinking stand on its own two feet. Enter the USB LED Otter.

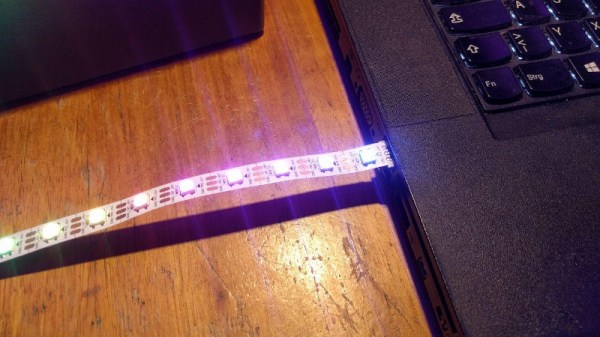
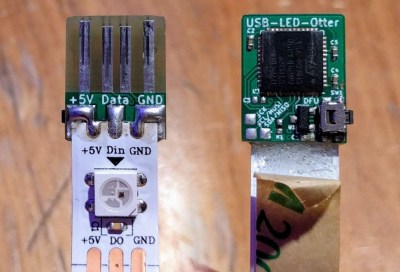
This small square of PCB lets you plug an LED strip directly into a USB port. The PCB itself has four traces on the back that mate with any USB port, and three pads for soldering the strip’s ground, 5 V line, and data. An STM32F072 microcontroller serves as the brains of the operation, packing plenty of horsepower and full compatibility with USB 2.0.

Code is flashed to the chip over USB using Device Firmware Upgrade (DFU) and once written the strip can then be driven by jamming the string into a suitably powerful USB wall charger. The woman behind the build, [Jana Marie], has mentioned that Open Pixel Control could be implemented but that may be an exercise left to the reader.

It’s a useful little tool, and one that promises to do even more with a little more development. Whipping up a few boards should be an easy task for anyone with a reflow oven and a free weekend. Oh, and if you’re tired of the WS2812? There’s other addressable LEDs out there, too!

Add LEDs To Your Stained Glass

Stained glass is an art form that goes back many centuries, with the churches and cathedrals of Europe boasting many stunning examples from the mediaeval masters of the craft. You do not however have to go to York or Chartres cathedrals to experience stained glass, for it remains a vibrant and creative discipline with many contemporary practitioners. One thing the stained glass of today has in common with that of yesteryear though is that it remains static, being composed of pieces of glass held together by metal strips. This is something that [Frank Zhao] has addressed as he has evolved a technique that allows him to incorporate LEDs into static stained glass, making for a particularly eye-catching effect.

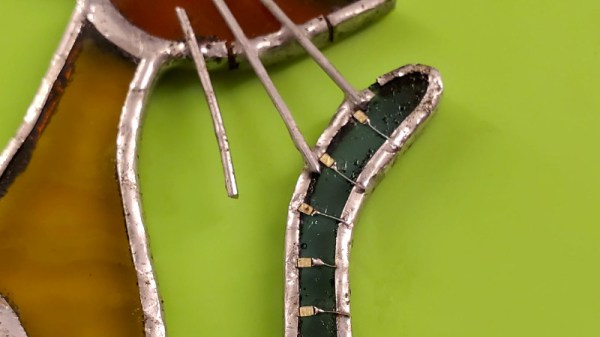
It’s likely that we join many readers in not knowing the intricacies of making a piece of stained glass, so his is a fascinating write-up for its step-by-step run-through. His stained glass cat has pieces of glass edged with copper tape, which he then solders together. Driving the LEDs is not something that should be alien to us, but his method of using the copper-and-solder stained glass joints as conductors for them by creating strategically placed cuts is very effective. The final effect is of a homogeneous piece without the cuts being particularly visible , but with a pleasing array of lights on the cat’s tail. Those of us for whom stained glass production is new have learned something of the technique, and stained glass artists have seen their craft do something completely new.

Stained glass hasn’t featured here too often, the closest we’ve come is this striking fake stained glass Iron-Man themed panel a few years ago.