Flip-Dot Oscilloscope Is Flippin’ Awesome

Oscilloscope displays have come a long way since the round phosphor-coated CRTs that adorned laboratories of old. Most modern scopes ship with huge, high-definition touch screens that, while beautiful, certainly lack a bit of the character that classic scopes brought to the bench. It’s a good thing that hackers like [bitluni] are around to help remedy this. His contribution takes the form of what may be both the world’s coolest and least useful oscilloscope: one with a flip-dot display.

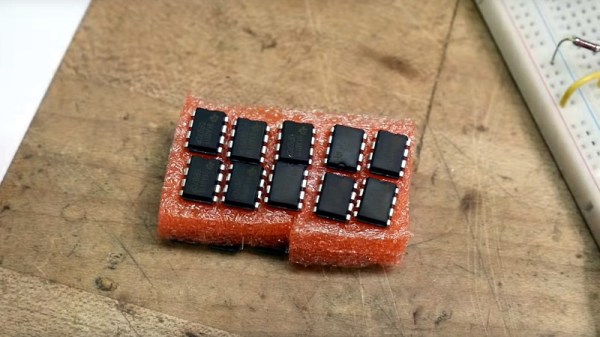
Yup — a flip-dot display, in all it’s clickedy-clacky, 25×16 pixel glory. The scope can’t trigger, its maximum amplitude is only a couple of volts, and its refresh rate is, well, visible, but it looks incredible. The scope is controlled by an ESP32, which reads the analog signal being measured. It then displays the signal via an array of driver ICs, which allow it to update the dots one column at a time by powering the tiny electromagnets that flip over each colored panel.

Even better, [bitluni] live-streamed the entire build. That’s right, if you want to watch approximately 30 hours of video covering everything from first actuating a pixel on the display to designing and assembling a PCB to drive it, then you’re in luck. For the rest of us, he was kind enough to make a much shorter summary video you can watch below. Of course, this scope doesn’t run Doom like some others, but its probably only a matter of time.

Thank to [Zane Atkins] for the tip!

Continue reading “Flip-Dot Oscilloscope Is Flippin’ Awesome”

Development Of Magnetic Locking Idea Shows Great Progress

No matter how its done, with whatever level of fakery, magnetic levitation just looks cool.  We don’t know about you, but merely walking past the tackiest gadget shop, the displays of levitating and rotating objects always catches our eye. Superconductors aside, these devices are pretty much all operating in the same way; an object with a permanent rare-earth magnet is held in a stable position between a pair of electromagnets one above and one below, with some control electronics to adjust the field strength and close the loop.

But, there may be another way, albeit a rather special case, where a magnet can not only be levitated, but locked in place using a rotating magnetic field. The video shows a demonstration of how the mass of a magnet can be used to phase lock it against a rotating field. In essence, the magnet will want to rotate to align with the rotating magnetic field, but its mass will mean there is a time delay for the force to act and rotation to occur, which will lag the rotating magnetic field, and if it is phased just so, the rotation will be cancelled and the magnet will be locked in a stable position. Essentially the inertia of the magnet can be leveraged to counteract magnet’s tendency to rapidly rotate to find a stable position in the field.

Whilst the idea is not new, Turkish experimenter [Hamdi Ucar] has been working on this subject for some time (checkout his YouTube channel for a LOT of content on it), even going as far as to publish a very detailed academic paper on the subject. With our explanation here we’re trying to simplify the subject for the sake of brevity, but since the paper has a lot of gory details for the physicists among you, if you can handle the maths, you can come to your own conclusions.

Continue reading “Development Of Magnetic Locking Idea Shows Great Progress”

the conversion from hynix SRAM to FRAM on a Pokemon Yellow PCB

Pokemon Time Capsule

The precious Pokemon we spent hours capturing in the early nineties remain trapped, not just by pokeballs, but within a cartridge ravaged by time. Generally, Pokemon games before the GameBoy Advance era had SRAM and a small coin cell to save state as NVRAM (Non-volatile random access memory) was more expensive. These coin cells last 10-15 years, and many of the Pokemon games came out 20 years ago. [9943246367] decided to ditch the battery and swap the SRAM for a proper NVRAM on a Pokemon Yellow cartridge, 23 years later.

The magic that makes it work is a FRAM (ferroelectric random access memory) made by Cypress that is pin-compatible with the 256K SRAM (made by SK Hynix) on the original game cartridge PCB. While FRAM data will only last 10 years, it is a write-after-read process so as long as you load your save file every 10 years, you can keep your Pokemon going for decades. For stability, [9943246367] added a 10k pull-up on the inverted CE (chip enable) pin to make sure the FRAM is disabled when not in use. A quick test shows it works beautifully. Overall, a clever and easy to have to preserve your Pokemon properly.

Since you’re replacing the chip, you will lose the data if you haven’t already. Perhaps you can use [Selim’s] Pokemon Transporter to transport your pokemon safely from the SRAM to the FRAM.

South Korean KSLV-2 Nuri Rocket Almost Orbits

There was a bit of excitement recently at the Naro Space Center on Outer Naro Island, just off the southern coast of the Korea Peninsula. The domestically developed South Korean Nuri rocket departed on its inaugural flight from launch pad LB-2 at 5pm in the afternoon on Thursday, 21 Oct. The previous launch in the KSLV-2 program from this facility was in 2018, when a single-stage Test Launch Vehicle was successfully flown and proved out the basic vehicle and its KRE-075 engines.

This final version of the three-stage Nuri rocket, formally known as Korean Space Launch Vehicle-II (KSLV-2), is 47.2 m long and 3.5 m in diameter. The first stage is powered by a cluster of four KRE-075 sea-level engines having 3 MN of thrust. The second stage is a single KRE-075 vacuum engine with 788 kN thrust, and the final stage is a KRE-007 vacuum engine with 69 kN thrust (all these engines are fueled by Jet-A / LOX). In this maiden flight, the first two stages performed as expected, but something went wrong when the third stage shut off prematurely and failed to gain enough velocity to put the 1400 kg dummy satellite into orbit.

A committee formed to investigate the flight failure convened this week, and issued a statement after a preliminary review of the collected telemetry data. So far, all indications point to a drop in oxidizer tank pressure in the third stage. This could be the result of a leak in the tank itself or the associated plumbing. They will also investigate whether a sensor or other failure in the tank pressurization control system could be at fault. A second launch is currently scheduled for May of next year. Check out [Scott Manley]’s video below the break, where he discusses the launch itself and some history of South Korea’s space program.

Continue reading “South Korean KSLV-2 Nuri Rocket Almost Orbits”

Visualizing Audio With An LCD VU Meter

We all love seeing data represented in pretty ways — whether it’s necessary or not. Take VU meters for example. They’re a super useful tool for audio editors to balance signals, but they also look really cool, even if you’re only listening to music. Who didn’t use a Winamp skin with a built-in VU meter back in the day? Even after the demise of everyone’s favorite media player, we still see these great graphs popping up all over the place.

Most recently, we’ve seen VU meters circle back around to have a bit of a retro vibe in this awesome Arduino-controlled LCD VU meter built by [mircemk]. Based on the KTAudio VU Meter project, it features an ultra-wide LCD, audio input, and volume knob, all tidily wrapped up in a case whose color scheme that can only conjure images of the famed Altair 8800, or an old Tektronix oscilloscope. The LCD itself is fairly responsive — but you can judge for yourself in the video below. The signature fading that so commonly accompanies screen refreshes on LCDs such as this one really adds to the retro effect.

You may just need one of these displays on your desk — after all, while you may not need to know how loud each audio channel is, don’t you at least want the information available? Just in case. Bar graph display a bit too modern-looking for you? Well then you should check out [mircemk]’s OLED version that displays dual analog meters.

Continue reading “Visualizing Audio With An LCD VU Meter”

Reballing And A Steady Hand Makes A Raspberry Pi 800

The all-in-one Raspberry Pi 400 computer is a capable device, but those seeking its maximum power may be disappointed by its 4 GB of memory. When the Pi 4 and Compute Module 4 have double that figure, surely the Pi 400 could catch up! A reddit user called [Pi800] rose to the challenge by replacing the 4 GB chip from the Pi 400 with the 8 GB chip from a Pi Compute Module, resulting in the so-called Pi 800, a working 8 GB all-in-one Pi.

As a piece of work it’s a deceptively straightforward yet extremely fiddly piece of soldering that requires a steady hand for even the most skilled of solderers. What takes it beyond the norm though is the reballing process. A ball-grid-array chip has a grid of small balls of solder on its underside that make the contacts, and these melt when it is soldered so require replacement before reworking. This is normally done with a template of carefully aligned holes to line up balls of solder in a stream of hot air, but lacking the template in this case the job was done by hand, laboriously ball by ball. A soldering task we’d hesitate to take on ourselves, so we’re impressed.

The result is an 8 GB all-in-one Pi, and it’s honestly not beyond the realms of possibility that an official version of this mod could be a future Raspberry Pi product. Perhaps we’ll wait for that, but should you be impatient then at least it’s possible to roll your own. It’s certainly not the first BGA memory swap we’ve brought you.

2021 Remoticon Shirt

Last Call For Hackaday Remoticon Shirts

Hackaday conferences have a long history of excellent T-shirt designs and this year’s Remoticon is no different. If you want one of your own, you need get on that before Friday. The only way to score on is to buy one of the T-Shirt + General Admission tickets by November 11th — it gets you into all of the conference events just like the free ticket, but also scores you a shirt. (Shipping within the US is free, international delivery costs an additional $10.) What you see above is the actual test print, modeled by Aleksandar Bradic who designed this and all of the shirt from past Hackaday conferences.

Of course the most important thing is that you don’t miss Remoticon, and there is a free ticket which will remain available through the end of the conference, but you can help us with the logistics by getting one now.

The full list of speakers and the schedule is now available on the conference website. We’re delighted to have Elecia White, Keith Thorne, and Jeremy Fielding present keynote talks, and 16 additional speakers on a range of hardware-related topics. (This is notable: we originally planned for a single day of talks but were blow away by all the proposals and doubled the speaking slots!)

You can’t quite rub elbows with all your friends from afar, but you can certainly spend time together in the conference Discord, during the Hacker Trivia (form teams if you like!), at the Bring-a-Hack inside Gather Town, and at the afterparty which will include a live set from DJ Jackalope.

Everyone Who Bought a Shirt, Read This!

If you bought a shirt and have already claimed it using the code we emailed to you, thank you, you are all set.

If you already bought a shirt but haven’t claimed it, check your email. You need to respond to the Google form we sent you. If you bought a T-shirt ticket and didn’t get an email from us, let us know. All shirts need to be claimed by November 15th! Gogogo!

If you plan to order your shirt right now, here’s what will happen. Buy your ticket following the link at the top of this article. We will email you a poll question about domestic or international shipping because we have to use two different ordering interfaces for these — logistics are hard. We will then email you a redemption code and link where you can choose your size and shipping address.

We Appreciate The Patience All of You Have Shown

Thank you to everyone for your amazing patience through this process. We wanted to replicate the experience of walking into Supercon and getting a shirt at the check-in table. Shipping logistics made that a bit harder, but everyone involved has been super awesome about it and that feels really good. See you at Remoticon a week from Friday!