Chumby Digital Picture Frame Teardown

overview-1

At this year’s Consumer Electronics Show, Chumby unveiled their latest prototype. It’s a network connected digital picture frame that runs Flash widgets. Just like the current Chumby model, they’re publishing the software and hardware under a license designed to let you hack it. They let us borrow one of their open chassis evaluation kits to teardown and photograph. We’ve got more pictures, full specs, and the schematics below.

Continue reading “Chumby Digital Picture Frame Teardown”

How-to: Digital Picture Frame, 100% DIY

frontii

There are a ton of digital picture frame tutorials out there. Most are old laptops with crafty case reconfigurations that fit a photo frame profile.

We set out to build a 100% DIY, scratch-built digital picture frame. Our frame has a 12bit color LCD, gigabytes of storage on common, FAT-formatted microSD cards, and you can build it at home. We’ve got the details below.

Continue reading “How-to: Digital Picture Frame, 100% DIY”

Juicebox Digital Picture Frame For Mom

picture frame

[joevennix]’s digital picture frame for Mother’s day is really an update to a previous how-to he wrote. The original shows you how to build a digital photo frame using a Juicebox media player.  His version doesn’t require the MP3 addon (it would make it easier) since he connects the SD card directly to the header. His latest features a much better case and hideaway controls. He admits that he still can’t cut a matte worth a darn.

Continue reading “Juicebox Digital Picture Frame For Mom”

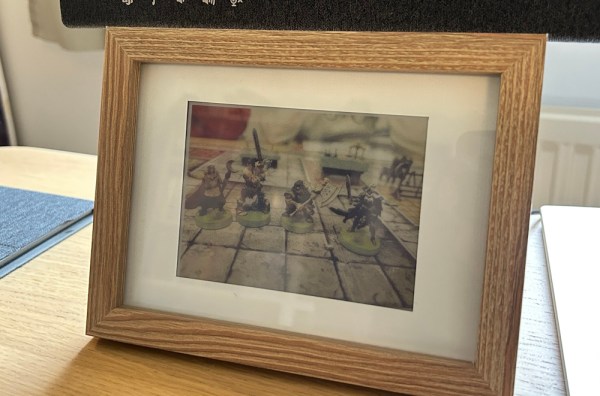
A brown, wooden picture frame with a white matte holds a slightly pixelated photo of gaming miniatures. It is sitting on a wooden table.

A Colorful Take On The E-Ink Photo Frame

Everyone loves sharing photos, and with most pictures being taken on smartphones now, digital frames are more convenient than finding a photo printer. [Wolfgang Ziegler] used an e-ink screen to create a colorful digital picture frame.

Starting with a seven color e-ink HAT he’d forgotten he had, a spare Pi Zero, and analog photo frame, he pieced the parts together into a pretty slick, sunlight readable photo frame. [Ziegler] details how he set up the frame to display new images using the Pimoroni inky library. He set a fifteen minute refresh interval since the color e-ink display takes 30 seconds to refresh to keep it from looking weird too often.

With the holidays coming up, this might make a perfect gift for family that wants to see the latest from your travels without blasting it to the whole internet. We’ve covered a few different options from a lightweight ESP8266 build, to this one that can rotate, and even issues with some of the commercial options.

Polaroid Develops Its Pictures Remotely

For those who didn’t experience it, it’s difficult to overstate the cultural impact of the Polaroid camera. In an era where instant gratification is ubiquitous, it’s easy to forget that there was a time when capturing a photograph meant waiting for film to be developed or relying on the meticulous art of darkroom processing. Before the era of digital photography, there was nothing as close to instant as the Polaroid. [Max] is attempting to re-capture that feeling with a modified Polaroid which instantly develops its pictures in a remote picture frame.

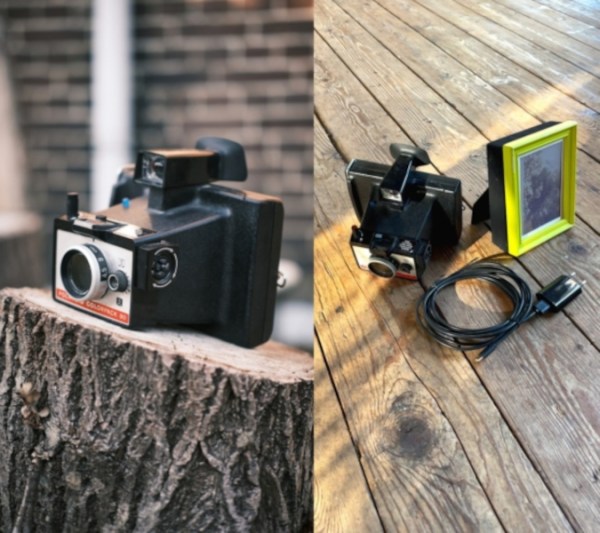
The build is based on a real, albeit non-functional, Polaroid Land Camera. Instead of restoring it, a Raspberry Pi with a camera module is placed inside the camera body and set up to capture pictures. The camera needs to connect to a Wi-Fi network before it can send its pictures out, though, and it does this automatically when taking a picture of a QR code. When a picture is snapped, it sends it out over the Internet to wherever the picture frame is located, which has another Raspberry Pi inside connected to an e-ink screen. Once a picture is taken on the camera it immediately shows up in the picture frame.

To help preserve the spirit of the original Polaroid, at no point is an image saved permanently. Once it is sent to the frame, it is deleted from the camera, and the next picture taken overwrites the last. And, for those who are only familiar with grayscale e-ink displays as the integral parts of e-readers, there have been limited options for color displays for a while now, as we saw in this similar build which was painstakingly built into a normal-looking picture frame as part of an attempted family prank.

Continue reading “Polaroid Develops Its Pictures Remotely”

Trinocular Lens Makes Digital Wigglegrams Easier To Take

Everyone likes a good animated GIF, except for some Hackaday commenters who apparently prefer to live a joyless existence. And we can’t think of a better way to celebrate moving pictures than with a 3D printed trinocular camera that makes digital Wigglegrams a snap to create.

What’s a Wigglegram, you say? We’ve seen them before, but the basic idea is to take three separate photographs through three different lenses at the same time, so that the parallax error from each lens results in three slightly different perspectives. Stringing the three frames together as a GIF later results in an interesting illusion of depth and motion. According to [scealux], the inspiration for building this camera came from photographer [Kirby Gladstein]’s work, which we have to admit is pretty cool.

While [Kirby] uses a special lenticular film camera for her images, [scealux] decided to start his build with a Sony a6300 mirrorless digital camera. A 3D printed lens body with a focusing mechanism holds three small lenses which were harvested from disposable 35 mm film cameras — are those still a thing? Each lens sits in front of a set of baffles to control the light and ensure each of the three images falls on a distinct part of the camera’s image sensor.

The resulting trio of images shows significant vignetting, but that only adds to the charm of the finished GIF, which is created in Photoshop. That’s a manual and somewhat tedious process, but [scealux] says he has some macros to speed things up. Grainy though they may be, we like these Wigglegrams; we don’t even hate the vertical format. What we’d really like to see, though, is to see everything done in-camera. We’ve seen a GIF camera before, and while automating the post-processing would be a challenge, it seems feasible.

Continue reading “Trinocular Lens Makes Digital Wigglegrams Easier To Take”

An OLED Photo Frame Powered By The ATtiny85

Rolling your own digital picture frame that loads images from an SD card and displays them on an LCD with a modern microcontroller like the ESP32 is an afternoon project, even less if you pull in somebody else’s code. But what if you don’t have the latest and greatest hardware to work with?

Whether you look at it as a practical application or an interesting experiment in wringing more performance out of low-end hardware, [Assad Ebrahim]’s demonstration of displaying digital photographs on an OLED using the ATtiny85 is well worth a look. The whole thing can put put together on a scrap of perfboard with a handful of common components, and can cycle through the five images stored on the chip’s flash memory for up to 20 hours on a CR2032 coin cell.

As you might expect, the biggest challenge in this project is getting all the code and data to fit onto the ATtiny85. To that end [Assad] wrote his own minimal driver for the SSD1306 OLED display, as the traditional Adafruit code took up too much space. The driver is a pretty bare bones implementation, but it’s enough to initialize the screen and get it ready for incoming data. His code also handles emulating I2C over Atmel’s Universal Serial Interface (USI) at an acceptable clip, so long as you bump the chip up to 8 MHz.

For the images, [Assad] details the workflow he uses to take the high-resolution color files and turn them into an array of bytes for the display. Part of that it just scaling down and converting to 1-bit color, but there’s also a bit of custom Forth code in the mix that converts the resulting data into the format his code expects.

This isn’t the first time we’ve seen somebody use one of these common OLED displays in conjunction with the ATtiny85, and it’s interesting to see how their techniques compare. It’s not a combination we’d necessarily chose willingly, but sometimes you’ve got to work with whats available.