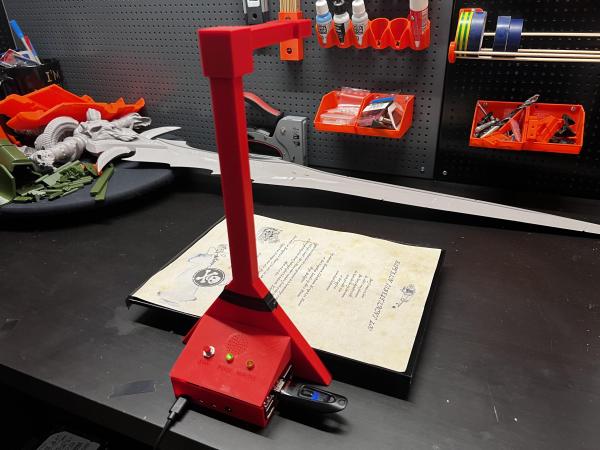
A red 3D-printed Raspberry Pi-based document scanner

Raspberry Pi Scanner Digitizes On The Cheap

It’s pretty important in 2024 to be able digitize documents quickly and easily without necessarily having to stop by the local library or buy an all-in-one printer. While there are plenty of commercial solutions out there, [Caelestis Cosplay] has created a simple document scanner that takes documents, as [Caelestis Cosplay] puts it, from papers to pixels.

The build is probably what you’re expecting — it’s essentially a Raspberry Pi (in this case a 4B), a V2 Pi camera, and a handful of custom 3D-printed parts. [Caelestis Cosplay] says they had never designed anything for printing before, and we think it looks great. There’s also a buzzer to indicate that the scan is starting (one beep) or has completed (two beeps), a ‘ready’ indicator, and a ‘working’ indicator.

Everything you’d need to build your own is available over on Instructables, including document scanner and controller scripts. Be sure to check it out in action after the break, and see it quickly scan in a document and put it on a thumb drive.

Looking for a 3D scanner? Check out the OpenScan project.

Continue reading “Raspberry Pi Scanner Digitizes On The Cheap”

Watch The OpenScan DIY 3D Scanner In Action

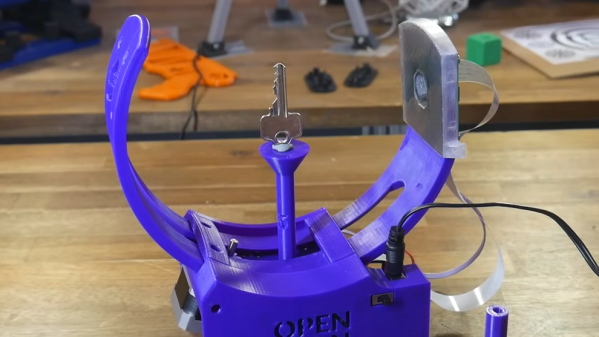
[TeachingTech] has a video covering the OpenScan Mini that does a great job of showing the workflow, hardware, and processing method for turning small objects into high-quality 3D models. If you’re at all interested but unsure where or how to start, the video makes an excellent guide.

We’ve covered the OpenScan project in the past, and the project has progressed quite a bit since then. [TeachingTech] demonstrates scanning a number of small and intricate objects, including a key, to create 3D models with excellent dimensional accuracy.

[Thomas Megel]’s OpenScan project is a DIY project that, at its heart, is an automated camera rig that takes a series of highly-controlled photographs. Those photographs are then used in a process called photogrammetry to generate a 3D model from the source images. Since the quality of the source images is absolutely critical to getting good results, the OpenScan hardware platform plays a pivotal role.

Once one has good quality images, the photogrammetry process itself can be done in any number of ways. One can feed images from OpenScan into a program like Meshroom, or one may choose to use the optional cloud service that OpenScan offers (originally created as an internal tool, it is made available as a convenient processing option.)

It’s really nice to have a video showing how the whole workflow works, and highlighting the quality of the results as well as contrasting them with other 3D scanning methods. We’ve previously talked about 3D scanning and what it does (and doesn’t) do well, and the results from the OpenScan Mini are fantastic. It might be limited to small objects, but it does a wonderful job on them. See it all for yourself in the video below.

Continue reading “Watch The OpenScan DIY 3D Scanner In Action”

Pi 5 And SDR Team Up For A Digital Scanner You Can Actually Afford

Listening to police and fire calls used to be a pretty simple proposition: buy a scanner, punch in some frequencies — or if you’re old enough, buy the right crystals — and you’re off to the races. It was a pretty cheap and easy hobby, all things considered. But progress marches on, and with it came things like trunking radio and digital modulation, requiring ever more sophisticated scanners, often commanding eye-watering prices.

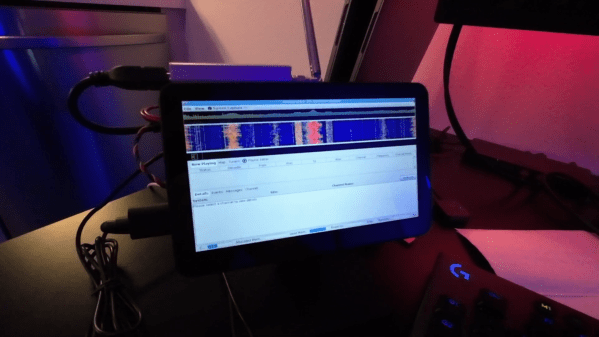
Having had enough of that, [Top DNG] decided to roll his own digital trunking scanner on the cheap. The first video below is a brief intro to the receiver based on the combination of an RTL-SDR dongle and a Raspberry Pi 5. The Pi is set up in headless mode and runs sdrtrunk, which monitors the control channels and frequency channels of trunking radio systems, as well as decoding the P25 digital modulation — as long as it’s not encrypted; don’t even get us started on that pet peeve. The receiver also sports a small HDMI touchscreen display, and everything can be powered over USB, so it should be pretty portable. The best part? Everything can be had for about $250, considerably cheaper than the $600 or so needed to get into a purpose-built digital trunking scanner — we’re looking at our Bearcat BCD996P2 right now and shedding a few tears.

The second video below has complete details and a walkthrough of a build, from start to finish. [Top DNG] notes that sdrtrunk runs the Pi pretty hard, so a heat sink and fan are a must. We’d probably go with an enclosure too, just to keep the SBC safe. A better antenna is a good idea, too, although it seems like [Top DNG] is in the thick of things in Los Angeles, where LAPD radio towers abound. The setup could probably support multiple SDR dongles, opening up a host of possibilities. It might even be nice to team this up with a Boondock Echo. We’ve had deep dives into trunking before if you want more details.

Continue reading “Pi 5 And SDR Team Up For A Digital Scanner You Can Actually Afford”

X-Ray CT Scanners From EBay, Brought Back To Life

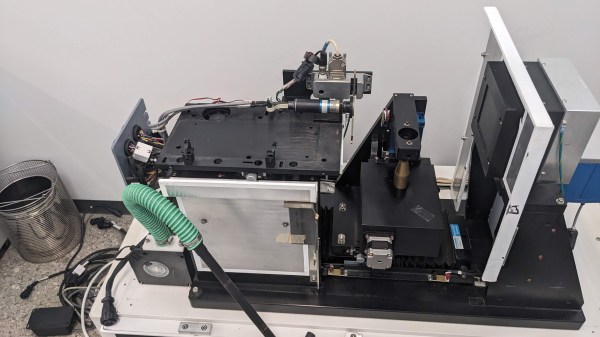
If you have ever wondered what goes into repairing and refurbishing an X-ray Computed Tomography (CT) scanner, then don’t miss [Ahron Wayne]’s comprehensive project page on doing exactly that. He has two small GE Explore Locus SP machines, and it’s a fantastic look into just what goes into these machines.

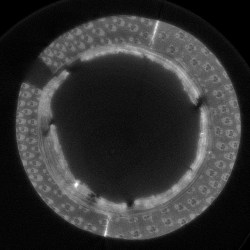
CT scan of papyrus roll in a bamboo sheath.

These devices use a combination of X-rays and computer software to reconstruct an internal view of an object. To bring these machines back into service means not only getting the hardware to work correctly, but the software end (including calibration and error correcting) is just as important.

That means a lot of research, testing, and making do. For example, instead of an expensive calibration grid made from an array of tiny tungsten carbide beads, [Ahron] made do with a PCB laden with a grid of copper pads. The fab house might have scratched their heads a little on that one, but it worked just fine for his purposes and price was certainly right.

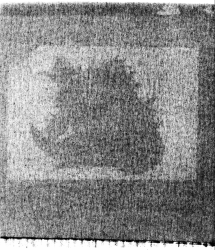
Scan of a foil Pokémon card.

Tools like these enable all kinds of weird and wonderful projects of their own. So what can one do with such a machine? CT scanning can spot fake AirPods or enable deeper reverse engineering than a regular workshop is normally able to do.

What else? Shown here is an old foil Pokémon card from an unopened package! (Update: the scan is not from a card in a sealed package, it is just a scanned foil card. Thanks to Ahron for clarifying.) [Ahron] coyly denies having a pet project of building a large enough dataset to try to identify cards without opening the packs. (Incidentally, if you just happen to have experience with supervised convolutional neural networks for pix2pix, he asks that you please reach out to him.)

The real power of CT scanning becomes more apparent if you take a look at the videos embedded below the page break. One is a scan of an acorn, [Ahron]’s first successful scan. Another is an interesting scan of a papyrus roll in a bamboo sheath. Both of the videos are embedded below.

Continue reading “X-Ray CT Scanners From EBay, Brought Back To Life”

Open Source Scanner Scans The Slides

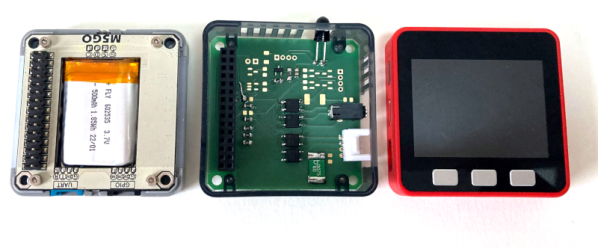
What do you get when you join a slide projector and a digital camera? Filmolimo, an open source slide scanner. The scanner uses an M5Stack Fire, an ESP32 development board. Thanks to the ESP32, you can control the device via WiFi.

All the project files, including KiCAD design files, are on GitHub. Of course, you will probably have to adapt things to your specific camera and slide projector. The PCB is double-sided and looks easy to put together. The board is mostly opto-isolation and interface between the controller and the equipment. The software allows you to change things like the time between slides, for example.

This is one of those projects you probably only need for a bit. Unless, of course, you regularly scan slides. You can farm it out to a service provider, but what fun is that? If you have a few hundred thousand slides, you might need to go for speed. If you just have a few, you can get by with a simple adapter.

ThunderScan: The Wild 1980s Product That Turned A Printer Into A Scanner

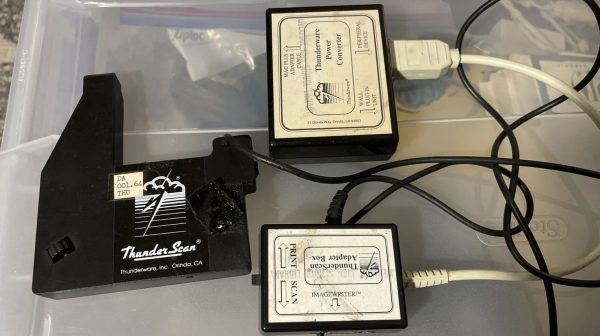
Back in the 1980s, printers were expensive things. Scanners were rare, particularly for the home market, because home computers could barely handle basic graphics anyway. Back in these halcyon days, an obscure company called Thunderware built a device to convert the former into the latter. It was known as the Thunderscan, and was a scanning head built for the Apple ImageWriter dot matrix printer. Weird enough already, but this device hides some weird secrets in its design.

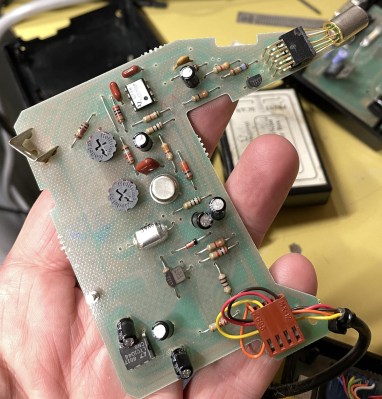
The actual scanning method was simple enough; the device mounted a carriage to the printer head of the ImageWriter. In that carriage was an optical reflective sensor which was scanned across a page horizontally while it was fed through the printer. So far, so normal.

The hilarious part is how the scanner actually delivered data to the Macintosh computer it was hooked up to. It did precisely nothing with the serial data lines at all, these were left for the computer to command the printer. Instead, the output of the analog optical sensor was fed to a voltage-to-frequency converter, which was then hooked up to the handshake/clock-in pin on the serial port.

The scanner software simply looked at the rate at which new characters were becoming available on the serial port as the handshake pin was toggled at various frequencies by the output of the optical sensor. Faster toggling of the pin indicated a darker section of the image, slower corresponded to lighter.

Interestingly, [Andy Hertzfeld] also has his own stories to tell on the development, for which his software contribution seems to have netted him a great sum of royalties over the years. It’s funny to think how mainstream scanners once were; and yet we barely think about them today beyond a few niche uses. Times, they change.

Thanks to [J. Peterson] for the tip!

CT Scanner Reveals The Difference Between Real And Fake AirPods

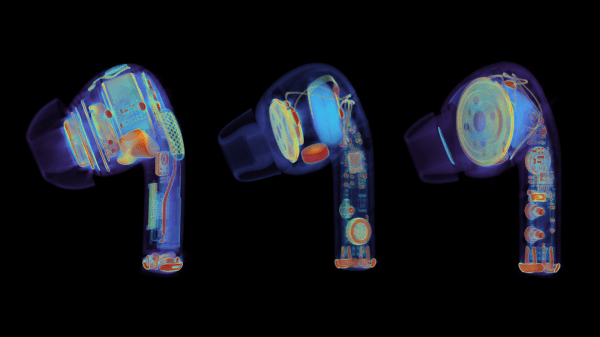
These days, you have to be careful what you buy. Counterfeit hardware is everywhere, especially when you’re purchasing things sight unseen over the Internet. [Jon Bruner] recently set out to look at a bunch of fake AirPod clones, and found that the similarities between the imposters and the real thing are only skin deep. A CT scan reveals all.

As you might expect, Apple’s AirPods are a fine example of miniaturization. They’re packed to the gills with hardware, with very little wasted space inside. Flexible PCBs hook up the electronics in an elegant and tidy fashion. Three tiny MEMS microphones are on board to capture the user’s voice and filter out noise. The battery that runs the show is a hefty lithium-ion coin cell which fills almost all the empty space behind the audio driver.

By contrast, the fakes look positively weedy inside. They cut out the bonus microphones, using just one to do the job. Wires link up the different components, with unimpressive blobby soldering visible that has splattered around the internal enclosure. Even the cases are lower-tech, with a weaker battery and a poorer charging solution. Hilariously, cheaping out on the tech makes the fakes lighter, so they compensate by adding weights to create a sense of heft for the user.

It’s amazing how much is revealed by a CT scan, that doesn’t even require opening the devices to tear them down. Fake hardware really is a scourge that many in the tech industry find themselves fighting against on a regular basis.