CCFL Scanner Bulb Makes A Cool Desk Lamp

The bulbs inside scanners (before transitioning to LED, anyway) were cold cathode fluorescent tubes that emit a fairly wide bandwidth of light. They were purpose-built to produce a very specific type and shape of light, but [Julius Curt] has taken this in a new, upcycled direction. Instead of just producing light, the light itself is also part of the aesthetic. A very cool 3D printed case houses the bulb and power supply and smartly hides the connecting wires to achieve a very clean look.
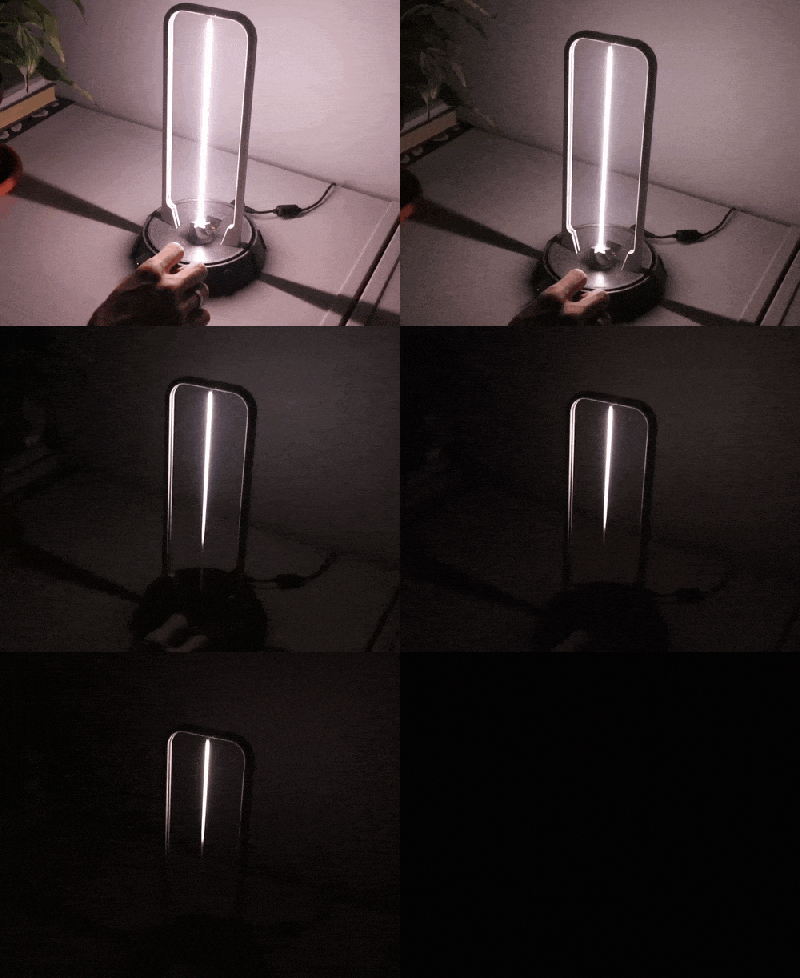
Part of the design involves adding a DC-DC converter before the lamp driver, allowing fading of the light. This isn’t anything new in lamps, but [Julius] noticed an interesting effect when dimming the vertically oriented lamp: as the power was reduced, the column of light would start to extinguish from one end, leading to an elongated teardrop-shaped light source.

This leads to a very interesting look, and the neat case design leads to an extremely unique lamp! The emitted light’s color temperature seems to vary a bit as the voltage drops, going from what appears to be a pretty cold white to a slightly warmer tone.

The design process is detailed on the project page, with a quick look at the CAD design process for the case. A neat touch was using a greeble (part of a coffee grinder) to add some different textures and break up the plastic-only look. That’s one we’ll have to note in our design books!

Continue reading “CCFL Scanner Bulb Makes A Cool Desk Lamp”

Using A 2D Scanner To Make 3D Things

[Chuck Hellebuyck] wanted to clone some model car raceway track and realised that by scanning the profile section of the track with a flatbed scanner and post-processing in Tinkercad, a useable cross-section model could be created. This was then extruded into 3D to make a pretty accurate-looking clone of the original part. Of course, using a flatbed paper scanner to create things other than images is nothing new, if you can remember to do it. A common example around here is scanning PCBs to capture mechanical details.

The goal was to construct a complex raceway for the grandkids, so he needed numerous pieces, some of which were curved and joined at different angles to allow the cars to race downhill. After printing a small test section using Ninjaflex, he found a way to join rigid track sections in curved areas. It was nice to see that modern 3D printers can handle printing tall, thin sections of this track vertically without making too much of a mess. This fun project demonstrates that you can easily combine 3D-printed custom parts with off-the-shelf items to achieve the desired result with minimal effort.

Flatbed scanner hacks are so plentiful it’s hard to choose a few! Here’s using a scanner to recreate a really sad-looking PCB, hacking a scanner to scan things way too big for it, and finally just using a scanner as a linear motion stage to create a UV exposure unit for DIY PCBs.

Continue reading “Using A 2D Scanner To Make 3D Things”

The film scanner [xssfox] found, in the center of a table, with other stuff strewn across the table

Answering All Your ISCSI Scanner Questions

iSCSI is a widely used protocol for exposing SCSI devices over a network connection, and some scanners have in the past been equipped with SCSI ports. So, could you have an iSCSI network scanner? [xssfox] details her journey making a Canoscan FS4000US film scanner work over iSCSI, sparked by someone’s overly-confident StackOverflow comment that it couldn’t be done. Nothing in the spec said it couldn’t actually work, however, and after figuring out a tentative architecture, a hardware setup was put together.

No flatbed scanners with SCSI ports could be found on the cheap, so a film scanner had to be procured. After figuring out a few hitches with the loading mechanism and getting a test image locally, it was time to try and build up the software setup, tearing through SCSI compatibility and cabling, driver and PCI pass-through woes, bluescreens, and intermediate software having dropped some of the necessary features by now. Still, [xssfox] eventually exported the scanner as an iSCSI target – and, on the other end of the network, successfully connected to it and completed a scan. The StackOverflow answer was wrong, after all.

It’s fun to see how far old technology can go, and get answers to questions you never knew you had. Whether you’re reminiscing about SCSI days or wondering what the technology about, we’ve talked about it aplenty, from a retrospective to modern-day experiments, repurposing old SCSI hardware for modern SATA ports, a Raspberry Pi implementation, an emulator, and a fair bit more.

We thank [Valentijn Sessink] and [adistuder] for sharing this with us!

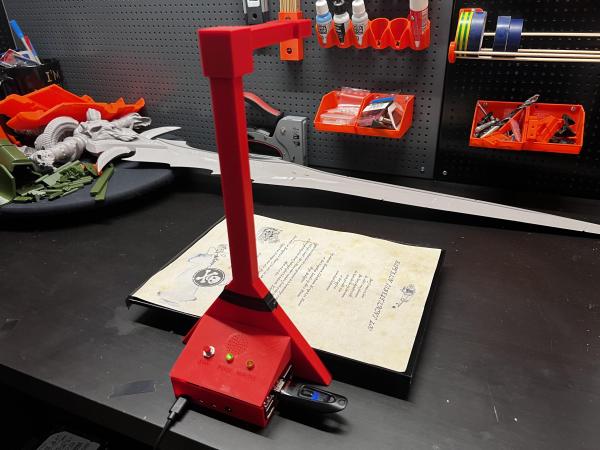
A red 3D-printed Raspberry Pi-based document scanner

Raspberry Pi Scanner Digitizes On The Cheap

It’s pretty important in 2024 to be able digitize documents quickly and easily without necessarily having to stop by the local library or buy an all-in-one printer. While there are plenty of commercial solutions out there, [Caelestis Cosplay] has created a simple document scanner that takes documents, as [Caelestis Cosplay] puts it, from papers to pixels.

The build is probably what you’re expecting — it’s essentially a Raspberry Pi (in this case a 4B), a V2 Pi camera, and a handful of custom 3D-printed parts. [Caelestis Cosplay] says they had never designed anything for printing before, and we think it looks great. There’s also a buzzer to indicate that the scan is starting (one beep) or has completed (two beeps), a ‘ready’ indicator, and a ‘working’ indicator.

Everything you’d need to build your own is available over on Instructables, including document scanner and controller scripts. Be sure to check it out in action after the break, and see it quickly scan in a document and put it on a thumb drive.

Looking for a 3D scanner? Check out the OpenScan project.

Continue reading “Raspberry Pi Scanner Digitizes On The Cheap”

Watch The OpenScan DIY 3D Scanner In Action

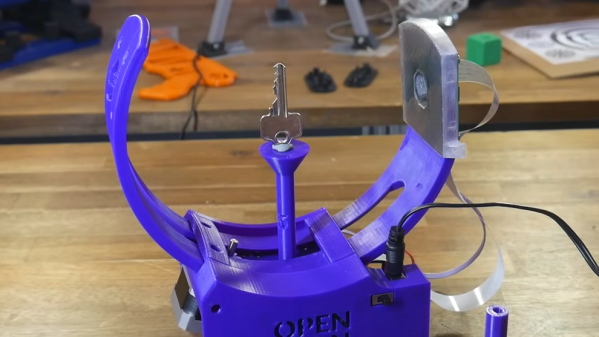
[TeachingTech] has a video covering the OpenScan Mini that does a great job of showing the workflow, hardware, and processing method for turning small objects into high-quality 3D models. If you’re at all interested but unsure where or how to start, the video makes an excellent guide.

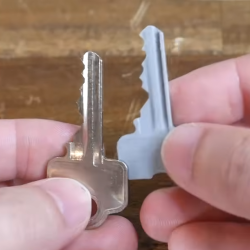
We’ve covered the OpenScan project in the past, and the project has progressed quite a bit since then. [TeachingTech] demonstrates scanning a number of small and intricate objects, including a key, to create 3D models with excellent dimensional accuracy.

[Thomas Megel]’s OpenScan project is a DIY project that, at its heart, is an automated camera rig that takes a series of highly-controlled photographs. Those photographs are then used in a process called photogrammetry to generate a 3D model from the source images. Since the quality of the source images is absolutely critical to getting good results, the OpenScan hardware platform plays a pivotal role.

Once one has good quality images, the photogrammetry process itself can be done in any number of ways. One can feed images from OpenScan into a program like Meshroom, or one may choose to use the optional cloud service that OpenScan offers (originally created as an internal tool, it is made available as a convenient processing option.)

It’s really nice to have a video showing how the whole workflow works, and highlighting the quality of the results as well as contrasting them with other 3D scanning methods. We’ve previously talked about 3D scanning and what it does (and doesn’t) do well, and the results from the OpenScan Mini are fantastic. It might be limited to small objects, but it does a wonderful job on them. See it all for yourself in the video below.

Continue reading “Watch The OpenScan DIY 3D Scanner In Action”

Pi 5 And SDR Team Up For A Digital Scanner You Can Actually Afford

Listening to police and fire calls used to be a pretty simple proposition: buy a scanner, punch in some frequencies — or if you’re old enough, buy the right crystals — and you’re off to the races. It was a pretty cheap and easy hobby, all things considered. But progress marches on, and with it came things like trunking radio and digital modulation, requiring ever more sophisticated scanners, often commanding eye-watering prices.

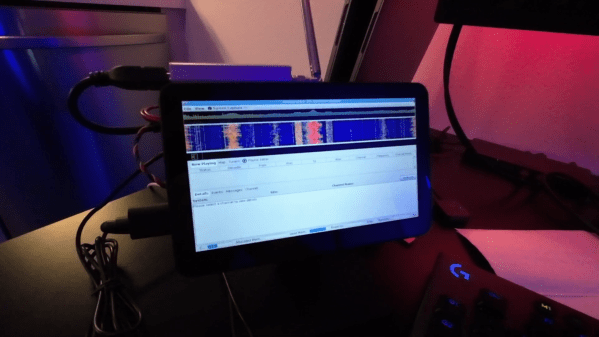
Having had enough of that, [Top DNG] decided to roll his own digital trunking scanner on the cheap. The first video below is a brief intro to the receiver based on the combination of an RTL-SDR dongle and a Raspberry Pi 5. The Pi is set up in headless mode and runs sdrtrunk, which monitors the control channels and frequency channels of trunking radio systems, as well as decoding the P25 digital modulation — as long as it’s not encrypted; don’t even get us started on that pet peeve. The receiver also sports a small HDMI touchscreen display, and everything can be powered over USB, so it should be pretty portable. The best part? Everything can be had for about $250, considerably cheaper than the $600 or so needed to get into a purpose-built digital trunking scanner — we’re looking at our Bearcat BCD996P2 right now and shedding a few tears.

The second video below has complete details and a walkthrough of a build, from start to finish. [Top DNG] notes that sdrtrunk runs the Pi pretty hard, so a heat sink and fan are a must. We’d probably go with an enclosure too, just to keep the SBC safe. A better antenna is a good idea, too, although it seems like [Top DNG] is in the thick of things in Los Angeles, where LAPD radio towers abound. The setup could probably support multiple SDR dongles, opening up a host of possibilities. It might even be nice to team this up with a Boondock Echo. We’ve had deep dives into trunking before if you want more details.

Continue reading “Pi 5 And SDR Team Up For A Digital Scanner You Can Actually Afford”

X-Ray CT Scanners From EBay, Brought Back To Life

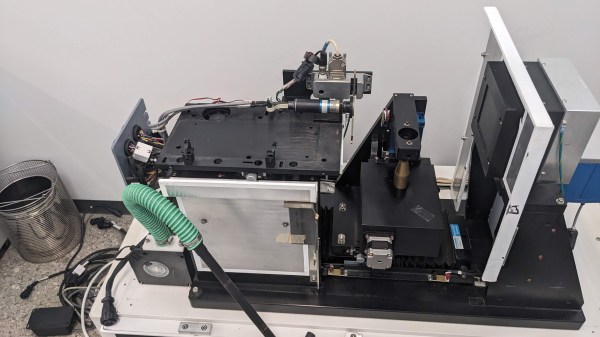
If you have ever wondered what goes into repairing and refurbishing an X-ray Computed Tomography (CT) scanner, then don’t miss [Ahron Wayne]’s comprehensive project page on doing exactly that. He has two small GE Explore Locus SP machines, and it’s a fantastic look into just what goes into these machines.

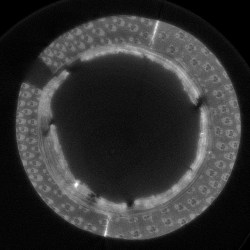
CT scan of papyrus roll in a bamboo sheath.

These devices use a combination of X-rays and computer software to reconstruct an internal view of an object. To bring these machines back into service means not only getting the hardware to work correctly, but the software end (including calibration and error correcting) is just as important.

That means a lot of research, testing, and making do. For example, instead of an expensive calibration grid made from an array of tiny tungsten carbide beads, [Ahron] made do with a PCB laden with a grid of copper pads. The fab house might have scratched their heads a little on that one, but it worked just fine for his purposes and price was certainly right.

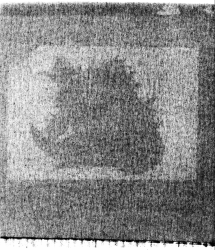
Scan of a foil Pokémon card.

Tools like these enable all kinds of weird and wonderful projects of their own. So what can one do with such a machine? CT scanning can spot fake AirPods or enable deeper reverse engineering than a regular workshop is normally able to do.

What else? Shown here is an old foil Pokémon card from an unopened package! (Update: the scan is not from a card in a sealed package, it is just a scanned foil card. Thanks to Ahron for clarifying.) [Ahron] coyly denies having a pet project of building a large enough dataset to try to identify cards without opening the packs. (Incidentally, if you just happen to have experience with supervised convolutional neural networks for pix2pix, he asks that you please reach out to him.)

The real power of CT scanning becomes more apparent if you take a look at the videos embedded below the page break. One is a scan of an acorn, [Ahron]’s first successful scan. Another is an interesting scan of a papyrus roll in a bamboo sheath. Both of the videos are embedded below.

Continue reading “X-Ray CT Scanners From EBay, Brought Back To Life”