Illustrated Kristina with an IBM Model M keyboard floating between her hands.

Keebin’ With Kristina: The One With The Arboreal Keyboards

Well, unfortunately we don’t know much yet about this nice wooden keyboard from [Kelvin Chow], but maybe this inclusion will encourage [Kelvin] to post more about it.

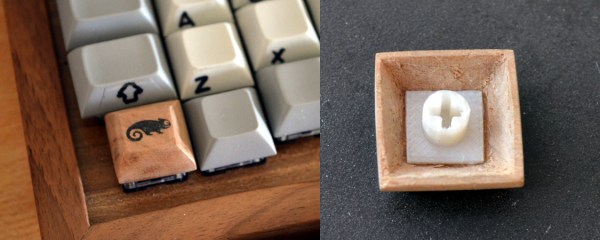
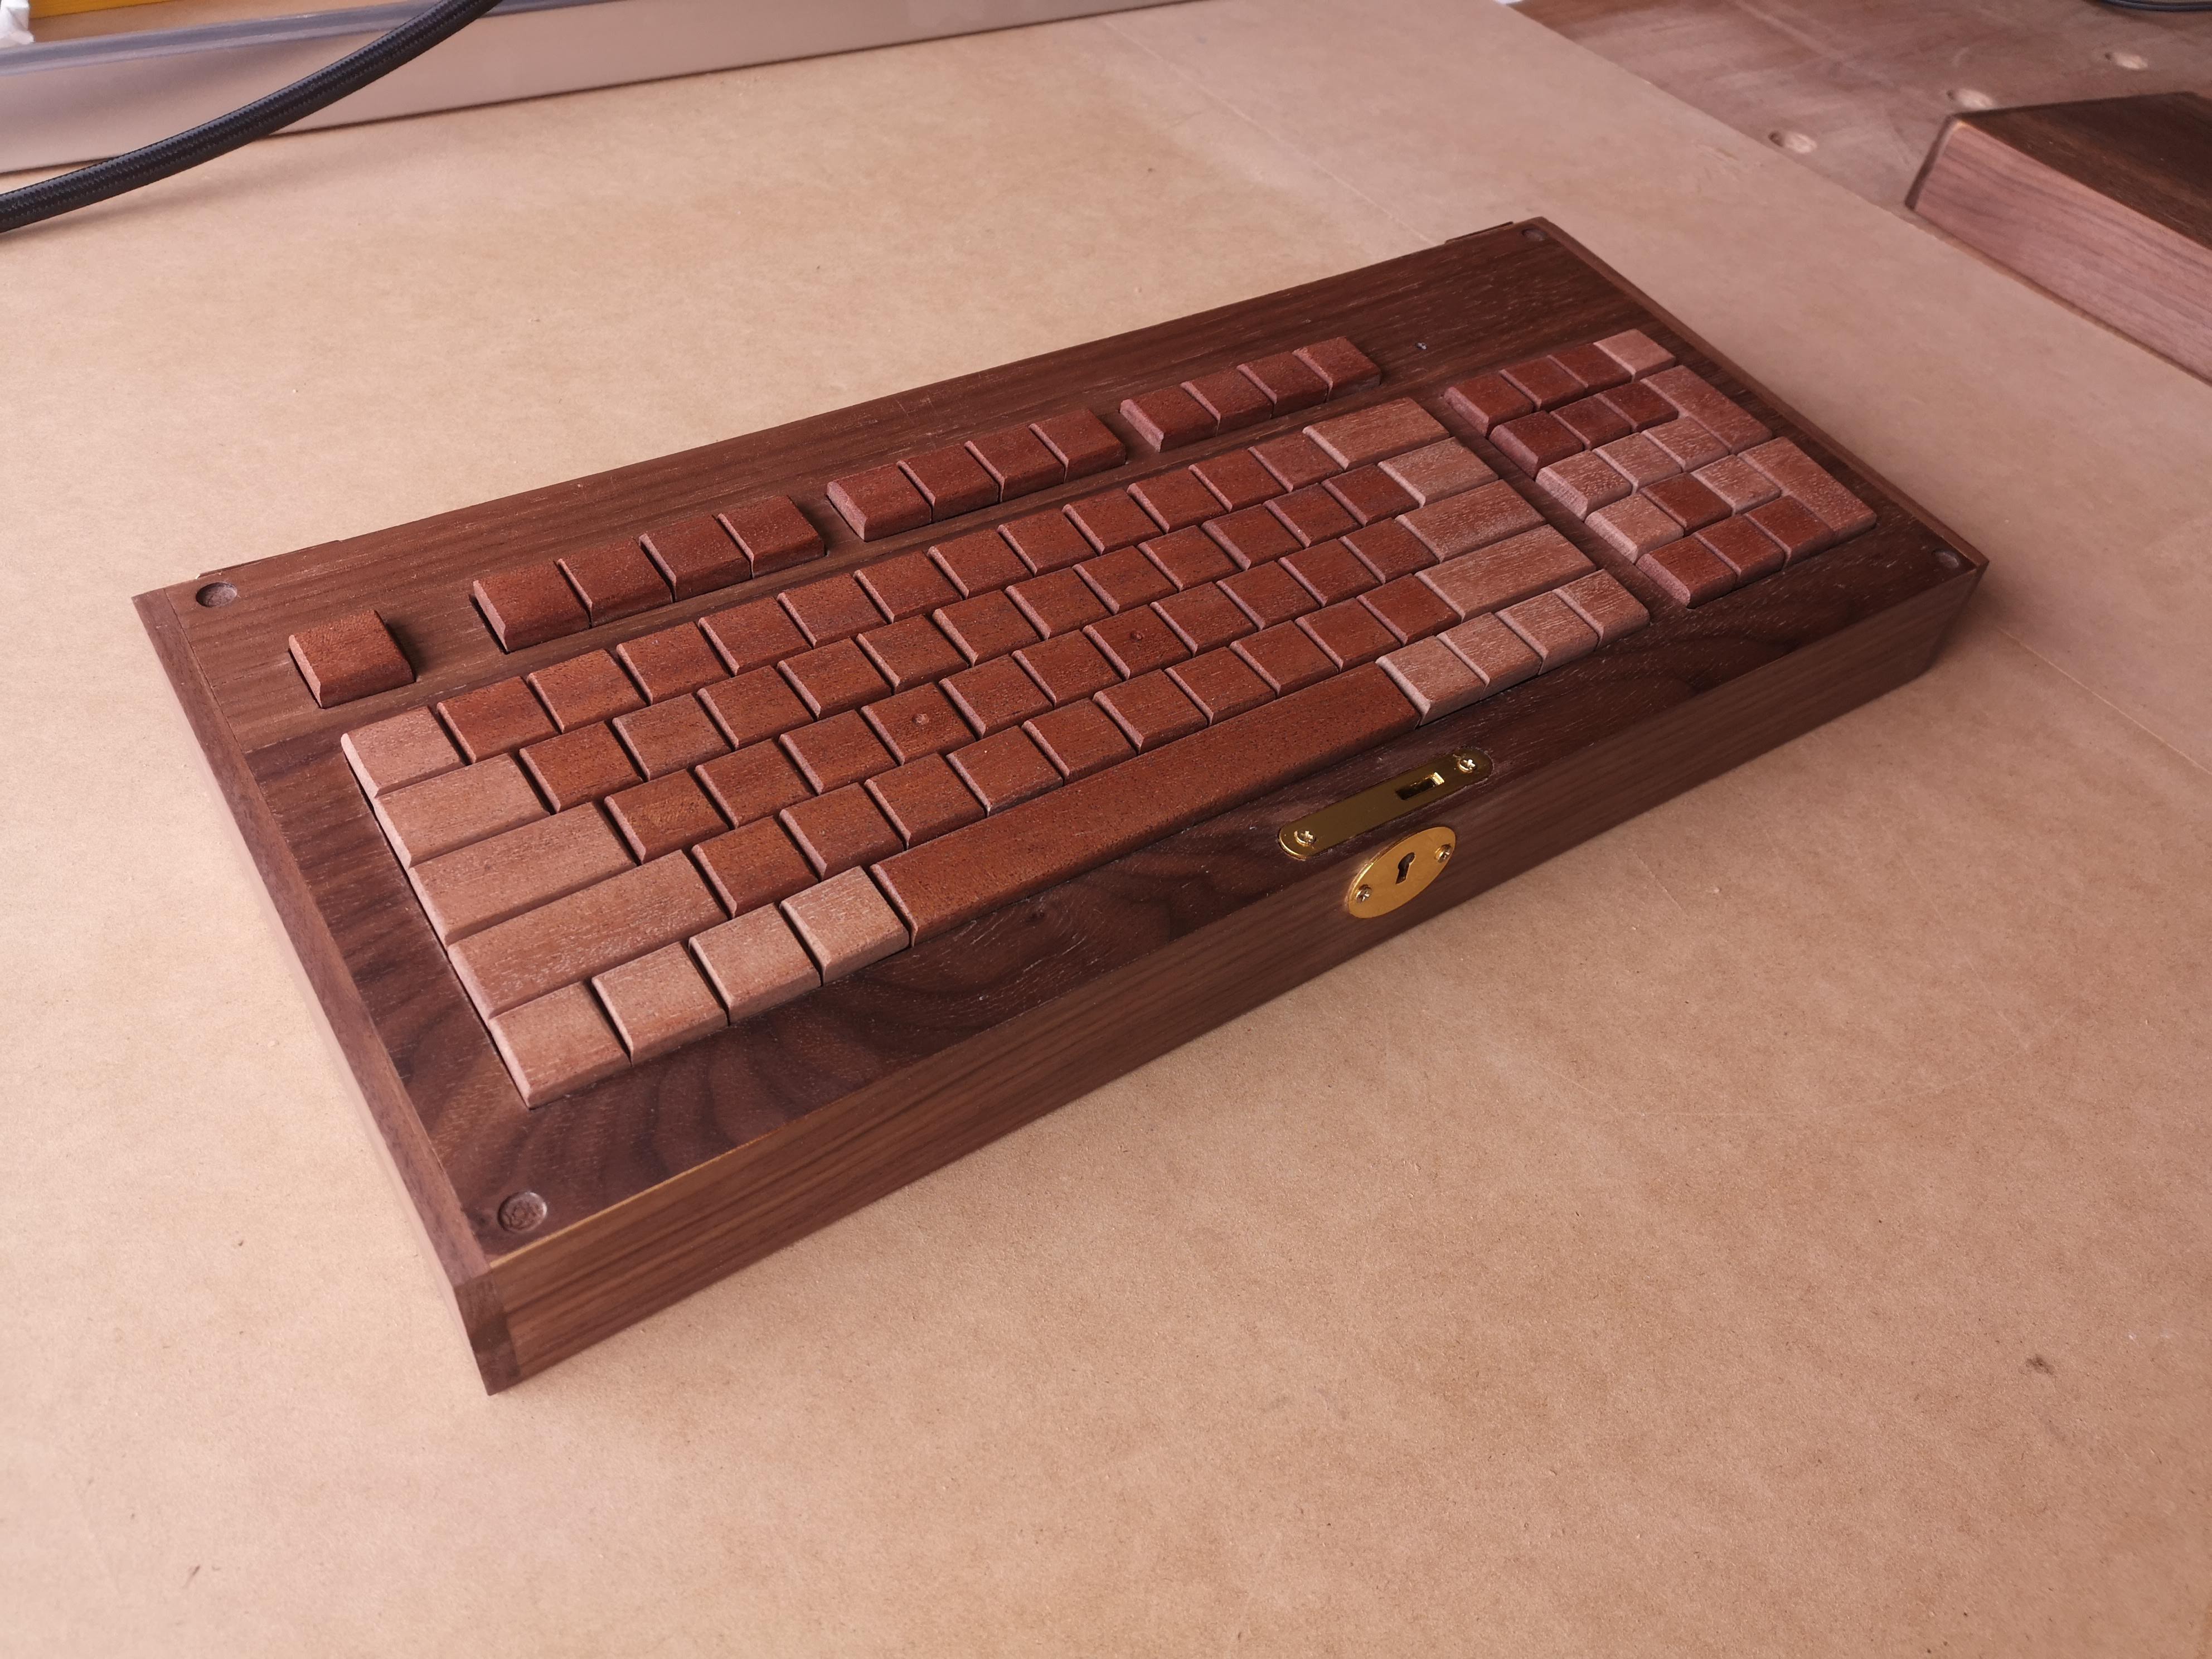
Sure is nice-looking, don’t you think? That’s because there some great details at play here, like the legend-less two-tone keycaps and the neat-o locking box it sits in.

This keyboard is inspired by the Hacoa Ki-board, which uses a singles plank of wood to craft the keycaps. [Kelvin] wanted to try this technique for themselves. Evidently this won’t be the last wooden keyboard, so stay tuned for more over on Hackaday.io.

This isn’t the first dead-tree keyboard we’ve seen around here, either. A while back we saw one with Scrabble tile keycaps, and earlier this year, a nice wooden macro pad.

Continue reading “Keebin’ With Kristina: The One With The Arboreal Keyboards”

Taking Mechanical Keyboard Sounds To The Next Level

When it comes to mechanical keyboards, there’s no end to the amount of customization that can be done. The size and layout of the keyboard is the first thing to figure out, and then switches, keycaps, and then a bunch of other customizations inside the keyboard like the mounting plate and whether or not to add foam strips and other sound- and vibration-deadening features. Of course some prefer to go the other direction with it as well, omitting the foam and installing keys with a more noticeable click, and still others go even further than that by building a separate machine to make their keyboard activity as disruptive as it could possibly be.

This started as a joke among [ac2ev] and some coworkers, who were already teasing about the distinct sound of the mechanical keyboard. This machine, based on a Teensy microcontroller, sits between any USB keyboard and its host computer, intercepting keystrokes and using a small solenoid to tap on a block of wood every time a keystroke is detected. There’s also a bell inside that rings when the enter key is pressed, similar to the return carriage notification for typewriters, and as an additional touch an audio amplifier with attached speaker plays the Mario power-up sound whenever the caps lock key is pressed.

[ac2ev] notes that this could be pushed to the extreme by running a much larger solenoid powered by mains electricity, but since this was more of a proof-of-concept demonstration for some coworkers the smaller solenoid was used instead. The source code for the build can be found on the project’s GitHub page and there’s also a video of this machine in action here as well. Be careful with noisy mechanical keyboards, though, as the sounds the keys produce can sometimes be decoded to determine what the user is typing.

Mechanical Keyboard As Travel Saxophone

Those who play larger musical instruments, things like drums, piano, harp, tuba, upright bass, or Zeusaphone, know well the challenges of simply transporting their chosen instrument to band practice, a symphony hall, or local watering hole. Even those playing more manageably-sized instruments may have similar troubles at some point especially when traveling where luggage space is at a premium like on an airplane. That’s why [jcard0na] built this electronic saxophone, designed to be as small as possible.

Known as the “haxophone”, the musical instrument eschews the vibrating column of air typical of woodwind instruments in favor of an electronic substitute. Based around the Raspberry Pi, the device consists of a custom HAT with a number of mechanical keyboard switches arrayed in a way close enough to the layout of a standard saxophone that saxophonists will be able to intuitively and easily play. Two pieces of software run on the Pi to replicate the musical instrument, one that detects the player’s breaths and key presses, and another that synthesizes this information into sound.

While [jcard0na] notes that this will never replicate the depth and feel of a real instrument, it does accomplish its design goal of being much more easily transportable than all but the most soprano of true saxophones. As a musical project it’s an excellent example of good design as well, much like this set of electronic drums with a similar design goal of portability.

A retro-styled briefcase-shaped computer with an e-ink display

2022 Cyberdeck Contest: Steampunk Cyberdeck Is Made From Wood, Leather, Brass And E-Paper

Laptop screens have come a long way ever since the first LCD-equipped portables hit the market back in the 1980s. But even today’s high-resolution, full-color screens are not ideal for use in direct sunlight: limited contrast and annoying reflections can make reading awkward and working nearly impossible. Electronic-paper displays don’t suffer from those problems, but their low update speed and lack of color limit their use for general computing.

A retro briefcase computer, openedFor some people however, the limitations of e-ink are not a deal-breaker. One of them is [Alleycat], who built a portable computer specifically for use in direct sunlight and equipped it with a 10.3″, 1872×1404 resolution e-ink display. It’s powered by a LattePanda Alpha 800s that runs Windows 10, and is mainly used for text-based tasks.

The LattePanda and the display are mounted inside a beautiful hand-made wooden case with a brass cover and leather straps, which makes it look like a kind of steampunk attaché case. A beefy power bank makes it a truly mobile machine, even though it doesn’t come with a built-in keyboard: [Alleycat] is too much of an ErgoDox fan to include anything inferior with the Steampunk Cyberdeck.

With an update rate of 15 Hz the display is nowhere near as fast as a modern TFT screen, but it looks entirely usable when [Alleycat] demonstrates scrolling in a web browser and even the classic DOS game Alley Cat. In fact, it reminds us of those first-generation LCD screens that were fitted on 286-class laptops back in the day, although with a vastly higher resolution.

We’ve seen a few e-ink based computer designs before, such as this Macintosh Classic II and this e-ink laptop project. The steampunk theme would go well with a hand-crafted metal mouse or this tiny display.

Continue reading “2022 Cyberdeck Contest: Steampunk Cyberdeck Is Made From Wood, Leather, Brass And E-Paper”

Wooden Keycaps Minus The CNC

What’s the most important part of the keycap? The average user-who-cares might tell you it’s the look and feel, but a keyboard builder would probably say the mounting style. That’s where the rubber meets the road, after all. For anyone trying to make their own keycaps, ‘the mount itself’ is definitely the correct answer. Try printing your own keycaps, and you’ll learn a lot about tolerances when it comes to getting the mount right.

Conversely, you could use a subtractive process like a wood mill to make keycaps. Sounds easy enough, right? But what about all of us who don’t have access to one? [cbosdonnat], who has no CNC, has blazed a cellulose trail, combining hand-tooled wooden keycaps with 3D-printed mounts to create fully-customized keycaps. It’s a great project with concise how-to, especially when it comes to building the jigs needed to keep the keycaps consistently sized and shaped.

It makes a whole lot of sense to start by hollowing out the bottom instead of shaping the business side first or even cutting out the key shape, since the mount is mechanically vital. Why waste time on the look and feel if the foundation isn’t there yet?

Hardwood is a must for DIY keycaps, because the walls need to be thin enough to both fit over the switch and within the matrix, and be sturdy enough not to break with use. We love the look of the varnish-transferred laser-printed logo, and only wish there was a video so we could hear the clacking.

There are all kinds of ways to put legends on DIY keycaps, like waterslide decals for instance.

Cityscape Multi-Level Keyboard Really Stacks Up

Keyboards with wells like the Maltron, the Kinesis Advantage family, and everything dactyl-esque out there are great. Trust us, we know this firsthand. But if you want to build your own curvy girl, how the heck can you implement that shape without 3D printing, clever woodworking, or access to tooling and plastic molding equipment? Well, there is another way. Over on twitter (translated) (Threadreader: Japanese, English), [tsukasa_metam] has achieved the key well effect by stacking up PCBs to create a skyline of vertically-staggered keys.

The boards of Cityscape are all screwed together for mechanical integrity, but those screws are working overtime, providing electrical connections between the layers as well. We particularly like that there is an impetus for this build other than ‘I thought of it, so let’s do it’ — [tsukasa_metam] tends to typo in the double key press sense, hitting Q for instance at the same time when A was the intended target. Between the 3.2 mm of key travel, the 2.8 mm step height, and those flat F10 keycaps, that is no longer an issue.

Instead of the popular low-profile Kailh choc switches, [tsukasa_metam] went with TTC KS32s, a new switch introduced in 2020. Unlike chocs, they’ll take Cherry MX-style keycaps, as long as they’re wearing short skirts. Cityscape isn’t totally open source, but the idea is now out there nonetheless, and we happen to have an Odd Inputs and Peculiar Peripherals contest running now through July 4th.

Do stacked PCBs seem kinda familiar? Hey, it’s easier than winding transformer coils.

Via KBD #79

Mods Make A Stock Keyboard Your Own

Trust me, you don’t have to build your own keyboard from the deskpad up to be happy or feel like one of the cool kids. Sure, it doesn’t hurt, but not everyone is able to or even wants to start from next to nothing. Take [Roger] for example. [Roger] started with a stock mechanical keeb — the Ultimate Hacking Keyboard (UHK) — which can be outfitted with magnetic add-on modules such as a thumb key cluster, trackball, trackpoint, and touch pad, and made it his own.

While the stock board that you choose may not be so option-laden, there are plenty of other things one can do to customize things, and [Roger] did basically all of them. The Kailh browns that the UHK came with were too loud, so [Roger] swapped them out for Zilent V2 Silent tactiles and dampened the case with plenty of neoprene foam.

[Roger] frequently switches between two keyboard layouts, which got confusing at times. But instead of boring blank keycaps, he scrounged around until he found a cool set. (We do like the way they look with the wood wrist rests.) Speaking of those wrist rests, the right one is carved out and hiding a 10,000 mAh power bank, because [Roger] also made the UHK wireless using one of those often-out-of-stock BT-500 Bluetooth adapters. This allows him to switch between two PCs with a keyboard shortcut.

Think you want to go split, but not sure about key wells and column stagger and all that jazz? Something like the UHK is a good place to start, because it takes the familiar brick wall layout and breaks it into two pieces. No idea what you want? Check out the split keyboard finder.