New Part Day: Espressif Announces ESP32-S2 With USB

Espressif, the company behind the extremely popular ESP8266 and ESP32 microcontrollers has just announced their latest chip. It’s the ESP32-S2. It’s a powerful WiFi-enabled microcontroller, and this one has support for USB OTG.

Compared to the ESP32 we know and love, there are a few differences. The ESP32-S2 uses a single core Xtensa LX7 core running at up to 240 MHz, where the current ESP32 uses either a single or dual core LX6. The differences between these cores is hidden away in marketing speak and press releases, but it appears the LX7 core is capable of many more floating point operations per cycle: apparently 2 FLOPS / cycle for the LX6, but 64 FLOPS / cycle for the LX7. This is fantastic for DSP and other computationally heavy applications. Other features on the chip include 320 kB SRAM, 128 kB ROM, and 16 kB of RTC memory.

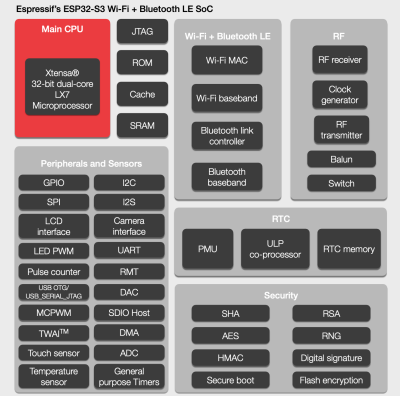
Connectivity for the ESP32-S2 is plain WiFi; Bluetooth is not supported. I/O includes 42 GPIOs, 14 capacitive touch sensing IOs, the regular SPI, I2C, I2S, UART, and PWM compliment, support for parallel LCDs, a camera interface, and interestingly full-speed USB OTG support. Yes, the ESP32-S2 is getting USB, let us all rejoice.

Other features include an automatic power-down of the RF circuitry when it isn’t needed, support for RSA and AES256, and plenty of support for additional Flash and SRAMs should you need more memory. The packaging is a 7 mm x 7 mm QFN, so get out the microscope, enhance your calm, and bust out the flux for this one. Engineering samples will be available in June, and if Espressif’s past performance in supplying chips to the community holds true, we should see some projects using this chip by September or thereabouts.

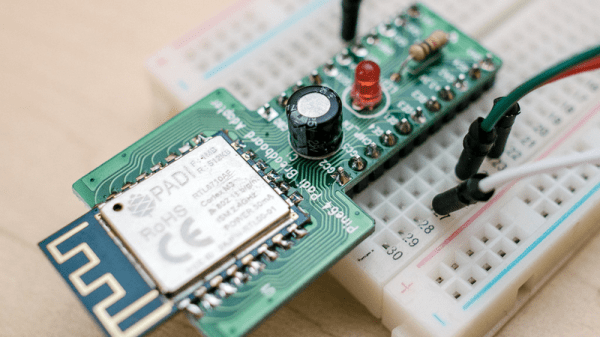
(Banner image is of a plain-old ESP32, because we don’t have any of the new ones yet, naturally.)

Rust Running On The Realtek RTL8710: ESP8266 Alternative?

For simply getting your project connected to WiFi, a least among hacker circles, nothing beats the ESP8266. But it’s not the only player out there, and we love to see diversity in the parts and languages that we use. One of the big shortcomings of the ESP8266 is the slightly-oddball Xtensa CPU. It’s just not as widely supported by various toolchains as its ARM-based brethren.

And so, when [Zach] wanted to do some embedded work in Rust, the ESP8266 was out of the picture. He turned to the RTL8710, a very similar WiFi module made by Realtek. Documentation for the RTL8710 is, at the moment, crappy, much as the ESP8266 documentation was before the hacker community had at it. But in trade for this shortcoming, [Zach] got to use the LLVM compiler, which supports the ARM architecture, and that means he can code in Rust.

In the end, the setup that [Zach] describes is a mix of FreeRTOS and some of the mbed libraries, which should be more than enough to get you up and running fairly painlessly on the chip. We’ve actually ordered a couple of these modules ourselves, and were looking to get started in straight C, but having Rust examples working doesn’t hurt, and doesn’t look all that different.

Is anyone else using the RTL8710? An ARM-based, cheap WiFi chip should be interesting.

How To Get Started With The ESP32

ESP32 is the hottest new wireless chip out there, offering both WiFi and Bluetooth Low Energy radios rolled up with a dual-core 32-bit processor and packed with peripherals of every kind. We got some review sample dev boards, Adafruit and Seeed Studio had them in stock for a while, and AI-Thinker — the company that makes the most popular ESP8266 modules — is starting up full-scale production on October 1st. This means that some of you have the new hotness in your hands right now, and the rest of you aren’t going to have to wait more than a few more weeks.

As we said in our first-look review of the new chip, many things are in a state of flux on the software side, but the basic process of writing, compiling, and flashing code to the chip is going to remain stable. It’s time to start up some tutorials!

Continue reading “How To Get Started With The ESP32”

Software USB On The ESP8266

A while back, [cnlohr] needed a USB keyboard and mouse. His box ‘o junk didn’t hold this particular treasure, and instead of hopping on Amazon like a normal geek or venturing into the outside realm on a mid-level ‘store’ quest like a normal person, [cnlohr] decided to turn an ESP8266 into a USB keyboard and mouse. How hard could it be? The ESP doesn’t support USB, but bitbanging hasn’t stopped him before. The end result is a USB stack running on the ESP8266 WiFI module.

[cnlohr] has been working for about a month on this USB implementation for the ESP, beginning with a logic analyzer, Wireshark, Xtensa assembly, and a lot of iteration. The end result of this hardware hacking is a board based on the ESP8285 – an 8286 with integrated Flash – that fits snugly inside a USB socket.

This tiny board emulates low-speed USB (1.5 Mbps), and isn’t really fast enough for storage, serial, or any of the fancier things USB does, but it is good enough for a keyboard and mouse. Right now, [cnlohr]’s ESP USB device is hosting a webpage, and by loading this webpage on his phone, he has a virtual keyboard and mouse on a handheld touchscreen.

If you’re keeping track, [cnlohr] has now brought Ethernet and USB to a tiny microcontroller that can be bought for a few bucks through the usual online outlets. If you’d like to build your own ESP USB stick, all the files are over on the Gits.

Thanks [lageos] for the tip.

Continue reading “Software USB On The ESP8266”

[CNLohr], ESP8266, USB…

“Round up the usual suspects…”

[CNLohr] just can’t get enough of the ESP8266 these days — now he’s working on getting a version of V-USB software low-speed USB device emulation working on the thing. (GitHub link here, video also embedded below.) That’s not likely to be an afternoon project, and we should warn you that it’s still a project in progress, but he’s made some in-progress material available, and if you’re interested either in USB or the way the mind of [CNLohr] works, it’s worth a watch.

In this video, he leans heavily on the logic analyzer. He’s not a USB expert, and couldn’t find the right resources online to implement a USB driver, so he taught himself by looking at the signals coming across as he wiggled a mouse on his desk. Using the ever-popular Wireshark helped him out a lot with this task as well. Then it was time to dig into Xtensa assembly language, because timing was critical.

Speaking of timing, one of the first things that he did was write some profiling routines so that he could figure out how long everything was taking. And did we mention that [CNLohr] didn’t know Xtensa assembly? So he wrote routines in C, compiled them using the Xtensa GCC compiler, and backed out the assembly. The end result is a mix of the two: assembly when speed counts, and C when it’s more comfortable.

Continue reading “[CNLohr], ESP8266, USB…”

Ethernet Controller Discovered In The ESP8266

The venerable ESP8266 has rocked the Internet of Things world. Originally little more than a curious $3 WiFi-to-serial bridge, bit by bit, the true power of the ESP has become known, fully programmable, with a treasure trove of peripherals it seemed that the list of things the ESP couldn’t do was short. On that list, at least until today was Ethernet.

No, despite the misleading title, the ESP does not have a MAC and/or PHY, but what it does have is an incredible 80 MHz DMA-able shift register which can be used to communicate 10BASE-T Ethernet using a new project, espthernet. Join me after the break for video proof, and a deep dive into how this is possible.

Continue reading “Ethernet Controller Discovered In The ESP8266”

Hacklet 84 – Alarm Clocks

The stereotypical hardware hacker is a creature of the night. Some of us do our best work in the wee hours. The unfortunate side effect of this is that we have a hard time getting up in the morning. Sometimes life demands a hacker be up-and-at-em before noon though. In these cases, the only solution is an alarm clock. This week’s Hacklet features some of the best alarm clock projects on Hackaday.io!

mercyWe start with [hberg32] and Merciless Pi Alarm Clock. Merciless is a good name for this Raspberry Pi based clock. We have to say it’s quite snazzy with its laser cut case and large seven segment LED face. When the alarm goes off though, this Pi bites back.

Titanium drivers powered by a 20 watt amplifier will wake even the heaviest sleepers. If that’s not enough, [hberg32] added a bed shaker to vibrate you out of the sack. The snooze button only works 3 times, after that you can press all you want, the music will still play. As if that wasn’t enough, this clock even has a pressure sensor. If you get back in bed, the alarm starts up again. Truly fitting of the name “merciless”.

irss[Ceady] took the kinder, gentler route with Integrated Room Sunrise Simulator. This alarm clock simulates dawn, gently waking the user up. A Lutron Maestro series wireless dimmer allows the sunrise simulator to slowly increase the room’s light level over a period of 10 minutes, allowing [Ceady] to wake up silently.

The clock itself uses an ATmega168 for control. [Ceady] spent a considerable amount of time testing out different methods of creating a seven segment LED display. When casting with cornstarch and resin didn’t do the trick, he went to commercial LED diffuser film from Inventables. The film proved to be just what he was looking for.

chumby2Next up is [Spiros Papadimitriou] with DIY Chumby-lite. Taking inspiration from [Bunnie Huang] and the Chumby project, [Spiros] created a friendly alarm clock with a touchscreen LCD. Much like the Chumby, this clock packs a WiFi module.

In this case though, the WiFi module is an ESP8266, whose on-board Xtensa microcontroller runs the whole show. [Spiros] programmed his Sparkfun ESP8266 Thing in C++. To keep costs down, [Spiros] left out anything unnecessary – like a real-time clock module. The Chumby-lite uses NTP to stay regular. The reductions paid off – this clock can be built for around $13.00, not including the very nice 3D printed case.

1983[Wanderingmetalhead] takes us all way back to 1983 with his 7 Day Alarm Clock. 32 years ago, this was [wanderingmetalhead’s] first embedded system project. As the name implies, this clock stores a different wake time for each day of the week. Actual numeric entry sure beats the old “hold two buttons and watch the numbers spin” system.

This is an oldie. The system is based upon a Motorola (which became Freescale, and is now NXP) 6802 micro. The code was written in assembly and cross-assembled on an Apple II. A 3.58MHz colorburst crystal divided down to 60 Hz provides the time base. This setup wasn’t perfect, but good down to a about a minute a month. The whole project lived and worked in an old amplifier case, where it dutifully woke [wanderingmetalhead] each day for 17 years.

If you want to see more alarm clock projects, check out our new alarm clocks list! If I didn’t wake up early enough to catch your project, don’t be shy, just drop me a message on Hackaday.io. That’s it for this week’s Hacklet. As always, see you next week. Same hack time, same hack channel, bringing you the best of Hackaday.io!