FauxTRS Is Definitely Not A Trash 80

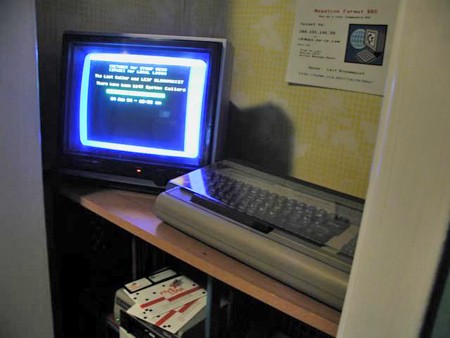
Among the 8-bit home micro boom from the late 1970s through early 1980s, the introduction to computing for many wasn’t a pricey Apple or Commodore, instead it was the slightly lower budget machine from Radio Shack. The TRS-80 series of computers live on and have a loyal following among retro computing enthusiasts. But like all such machines the original hardware is harder to find in 2024, so how about the TRS-80 experience without the failing vintage parts? The FauxTRS from [Jpasqua] is just that, the feel of a Model 3 or Model 4, powered by a Raspberry Pi.

In a sense then, this is a very well-designed case for a Raspberry Pi that looks a lot like the Tandy of old. With a modern LCD and keyboard it could just as easily be a normal desktop machine, but when the emulator fires up it does indeed look very much like a small version of the real thing. You can download the STL files from Printables, and for the cost of a few extra parts you can have one too.

Alternatively, if a faux TRS doesn’t do it for you, there’s always the chance of making a more real one.

A Brief History Of Perpetual Motion

Conservation of energy isn’t just a good idea: It is the law. In particular, it is the first law of thermodynamics. But, apparently, a lot of people don’t really get that because history is replete with inventions that purport to run forever or produce more energy than they consume. Sometimes these are hoaxes, and sometimes they are frauds. We expect sometimes they are also simple misunderstandings.

We thought about this when we ran across the viral photo of an EV with a generator connected to the back wheel. Of course, EVs and hybrids do try to reclaim power through regenerative braking, but that’s recovering a fraction of the energy already spent. You can never pull more power out than you put in, and, in fact, you’ll pull out substantially less.

Not a New Problem

If you think this is a scourge of social media and modern vehicles, you’d be wrong. Leonardo da Vinci, back in 1494, said:

Oh ye seekers after perpetual motion, how many vain chimeras have you pursued? Go and take your place with the alchemists.

There was a rumor in the 8th century that someone built a “magic wheel,” but this appears to be little more than a myth. An Indian mathematician also claimed to have a wheel that would run forever, but there’s little proof of that, either. It was probably an overbalanced wheel where the wheel spins due to weight and gravity with enough force to keep the wheel spinning.

Continue reading “A Brief History Of Perpetual Motion”

A C64 SID Replacement With Built-in Games

Developer [frntc] has recently come up with a smaller and less expensive way to not only replace the SID chip in your Commodore 64 but to also make it a stereo SID! To top it off, it can also hold up to 16 games and launch them from a custom menu. The SIDKick Pico is a simple board with a Raspberry Pi Pico mounted on top. It uses a SID emulation engine based on reSID to emulate both major versions of the SID chip — both the 6581 and the 8580. Unlike many other SID replacements, the SIDKick Pico also supports mouse and paddle inputs, meaning it replaces all functionality of the original SID!

Sound can be generated in three different ways: either using PWM to create a mono audio signal that is routed out via the normal C64/C128 connectors, an external PCM5102A DAC board, or using a different PCB design that has pads for an on-board DAC and TL072 op-amp. While many Commodore purists dislike using replacement chips, the reality is that all extant SID chips were made roughly 40 years ago, and as more and more of them fail, options like the SIDKick Pico are an excellent way to keep the sound of the SID alive.

If you want to hear the SIDKick Pico in action, you can check out the samples on the linked GitHub page, or check out the video below by YouTuber Wolfgang Kierdorf of the RETRO is the New Black channel. To get your hands on a SIDKick Pico, you can follow the instructions on the GitHub page for ordering either bare PCBs or pre-assembled PCBs from either PCBWay or your board manufacturer of choice.

Continue reading “A C64 SID Replacement With Built-in Games”

Using Kick Assembler And VS Code To Write C64 Assembler

YouTuber [My Developer Thoughts], a self-confessed middle-aged Software Developer, clearly has a real soft spot for the 6502-based 8-bit era machines such as the Commodore 64 and the VIC-20, for which he has created several video tutorials while travelling through retro-computing. This latest instalment concerns bringing up the toolchain for using the Kick Assembler with VS Code to target the C64, initially via the VICE emulator.

The video offers a comprehensive tutorial on setting up the toolchain on Windows from scratch with minimal knowledge. While some may consider this level of guidance unnecessary, it is extremely helpful for those who wish to get started with a few examples quickly and don’t have the time to go through multiple manuals and Wikis. In that regard, the video does an excellent job.

VS Code is a great tool with a large user base, so it’s not surprising that there’s a plugin for using the Kick Assembler directly from the IDE. You can also easily launch the application onto the emulator with just a push of a button, allowing you to focus on learning and working on your application. Once it runs under emulation, there’s a learning curve for running it on native hardware, but there are plenty of tutorials available for that. While you could code directly on the C64 itself, it’s much more pleasant to use modern tools, revision control, and all the conveniences and not have to endure the challenges.

Once you’ve mastered assembly, it may be time to move on to C or even C++. The Oscar64 compiler is a good choice for that. Next, you may want to show off your new skills on the retro demo scene. Here’s a neat C64 demo with a twist. There is no C64.

Continue reading “Using Kick Assembler And VS Code To Write C64 Assembler”

Tarzan, Lost Since 1983, Swings Back Onto The Atari 2600

Computer gaming history is littered with tales of fabled lost hardware and software. Some of them are very famous such as the E.T. cartridges buried in a desert landfill or the few prototype SNES/CD-ROM hybrid that Nintendo was developing with Sony before the introduction of the PlayStation, but others have faded somewhat into obscurity. Among these is Tarzan for the Atari 2600, a game which was never released due to the 1983 console crash, and which the [Video Game History Foundation] have a report on its rediscovery and preservation.

The game was to be published by Coleco for their ColecoVision console as well as the 2600. The ColecoVision version was released and was apparently even fairly well reviewed, but the Atari port was canceled and its very existence eventually faded into obscurity.

Continue reading Tarzan, Lost Since 1983, Swings Back Onto The Atari 2600″

The Amiga We All Wanted In 1993

To be an Amiga fan during the dying days of the hardware platform back in the mid 1990s was to have a bleak existence indeed. Commodore had squandered what was to us the best computer ever with dismal marketing and a series of machines that were essentially just repackaged versions of the original. Where was a PCI Amiga with fast processors, we cried!

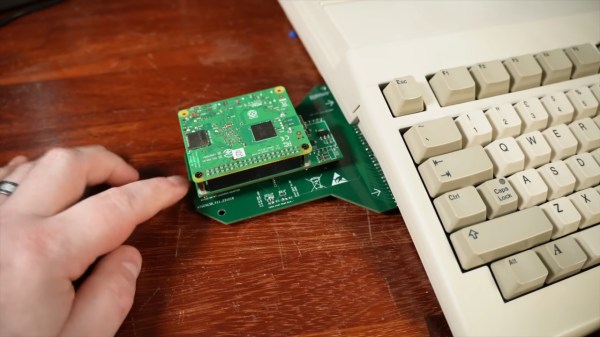
Now, thirty years too late, here’s [Jason Neus] with just the machine we wanted, in the shape of an ATX form factor Amiga motherboard with those all-important PCI slots and USB for keyboard and mouse.

What would have been unthinkable in the ’90s comes courtesy of an original or ECS Amiga chipset for the Amiga functions, and an FPGA and microcontroller for PCI and USB respectively. Meanwhile there’s also a PC floppy drive controller, based on work from [Ian Steadman]. The processor and RAM lives on a daughter card, and both 68040 and 68060 processors are supported.

Here in 2024 of course this is still a 1990s spec board, and misty-eyed speculation about what might have happened aside, it’s unlikely to become your daily driver. But that may not be the point, instead we should evaluate it for what it is. Implementing a PCI bus, even a 1990s one, is not without its challenges, and we’re impressed with the achievement.

If you’re interested in Amiga post-mortems, here’s a slightly different take.

Homebrew Computer From The Ground Up

Building a retro computer of some sort is a rite of passage for many of us, with some building replicas or restorations of old Commodores, Ataris, and other machines from decades past. Others go even further back, to the time of the Intel 8008 or earlier, and a dedicated few will build something completely novel. This project from [3DSage] falls squarely in the latter category, with his completely DIY computer built component by component from scratch, including the machine code needed to run it.

[3DSage] starts with the backbone of every computer: the clock. He first demonstrates how a pair of NOT gates with a set of capacitors can be used as a rudimentary clock pulse, then builds a more refined version with a 555 timer and potentiometer for adjustable rates. Then, it’s on to creating a binary counter, which is a fundamental part of the memory system for this small computer, and finally, allows this circuitry to behave like a normal computer. Using a set of switches to store values in memory and stepping through them with the clock, the computer can be programmed to do plenty of tasks just like a modern microcontroller.

[3DSage] built this project a few years ago and has used it for real-world applications such as controlling servos, LED arrays, playing music, and other tasks. Although he has to program it using his own machine code by hand, it’s a usable computer in many ways. If you want to eschew modernity and build a retro computer in the style of the 1960s, though, this piece goes through what it would have been like to build a similar system in the era when these computers were more common. If you have a switch fetish, you might like to see how real computers worked back then, too.

Continue reading “Homebrew Computer From The Ground Up”