Billions of people use GPS on a daily basis, along with the various other satellite navigation systems available today. But few of us spend much time contemplating the fleet of satellites above us that actually makes the system work. [Robert Wolf] has, though, and he’s built a simple visualizer that displays just what those space birds are doing at any given time.
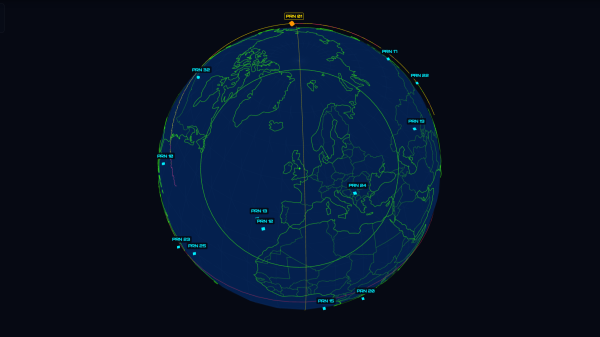
The visualizer runs right in the browser, and displays a cluster of GPS satellites in a 3D view around the Earth. The tool also offers a list of satellites and related data, including signal-to-noise ratio of the received signals from each one, and the ability to play back satellite positions from previous days. The satellite positions are captured from a GPS receiver that [Robert] operates in the UK.
The view isn’t global or complete, since the receiver can only see a certain number of satellites from its location, but it nevertheless gives an idea of where a subset of GPS satellites are flying above the globe. Depending on the selected view, it’s possible to see the satellites superimposed over the world map itself — or from a distant observer’s perspective, as if looking at the Earth from a distance, among other options.
If you’ve ever wanted an intuitive idea about where the GPS satellites live, this tool is a great way to understand it. We’ve also previously discussed the wide range of GPS alternatives that have been developed over the years. If you’ve got your own GPS hacks brewing in the home lab, don’t hesitate to let us know on the tipsline.