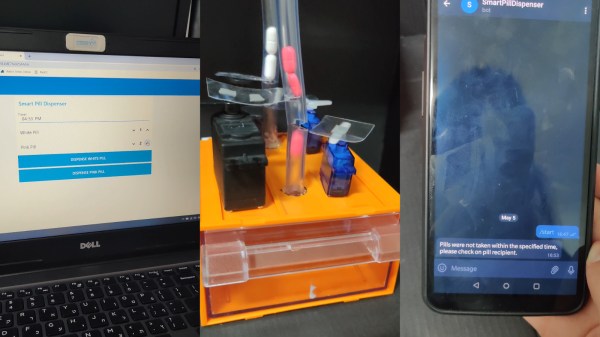
While the Coronavirus-induced lockdown surely makes life easier for the socially anxious and awkward ones among us, it also takes away the one thing that provides a feeling of belonging and home: conferences. Luckily, there are plenty of videos of past events available online, helping to bypass the time until we can mingle among like-minded folks again. To put one additional option on the list, one event you probably never even heard of is Disobey, Finland’s annual security conference that took place for its fifth time in Helsinki earlier this year, and they recently published the playlist of this year’s talks on their YouTube channel.
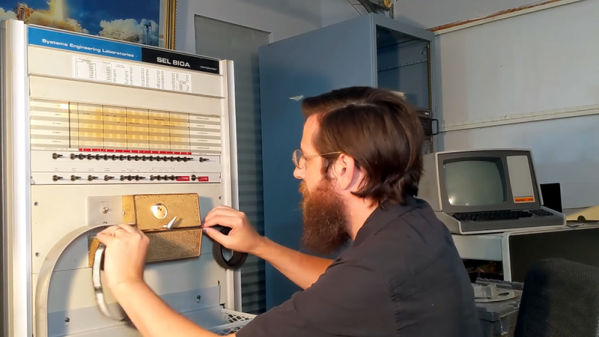
With slightly under 1500 hackers, makers, and generally curious people attending this year, Disobey is still on the smaller side of conferences, but comes with everything you’d expect: talks, workshops, CTF challenges, and a puzzle-ridden badge. Labeling itself as “The Nordic Security Event”, its main focus is indeed on computer and network security, and most of the talks are presented by professional security researchers, oftentimes Red Teamers, telling about some of their real-world work.
In general, every talk that teaches something new, discusses important matters, or simply provides food for thought and new insight is worth watching, but we also don’t want to give everything away here either. The conference’s program page offers some outline of all the talks if you want to check some more information up front. But still, we can’t just mention a random conference and not give at least some examples with few details on what to expect from it either, so let’s do that.
Continue reading “Mitigating Con Deprivation: Disobey 2020” →

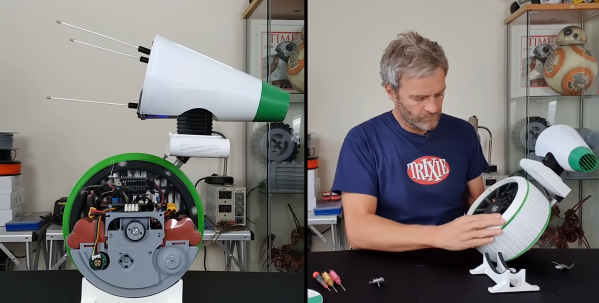
 D-O is effectively a two-wheeled self-balancing robot, with two thin drive wheels on the outer edges of the main body. A wide flexible tire covers the space between the two wheels, where the electronics are housed, without actually forming part of the drive mechanism. The main drive motors are a pair of geared DC motors with encoders to allow closed-loop control down to very slow speeds. The brains of the operation is an Arduino MKR-W1010 GET on a stack that consists of a motor driver, shield, IMU shields, and prototyping shield. [Matt] did discover a design error on the motor driver board, which caused the main power switching MOSFET to burst into flames from excessive gate voltage. Fortunately he was able to work around this by simply removing the blown MOSFET and bridging the connection with a wire.