Arduino Gets Command Line Interface Tools That Let You Skip The IDE

Arduino now has an officially supported command-line interface. The project, called arduino-cli, is the first time that the official toolchain has departed from the Java-based editor known as the Arduino IDE. You can see the official announcement video below.

Obviously this isn’t a new idea. Platform IO and other command-line driven tools exist. But official support means even if you don’t want to use the command line yourself, this should open up a path to integrate the Arduino build process to other IDEs more easily.

The code is open source, but they do mention in their official announcement that you can license it for commercial use. We assume that would mean if you wanted to build it into a product, not just provide an interface to it. This seems like something Arduino expects, because a lot of the command line tools can produce json which is a fair way to send information to another application for parsing.

The command line interface doesn’t just build a sketch. You can do things like install and manage libraries. For example, to create a new sketch:

Continue reading “Arduino Gets Command Line Interface Tools That Let You Skip The IDE”

ARM Programming With Bare C

We confess. When starting a microcontroller project, we often start with the last one we did for that environment, copy it, and just make changes. And the first one? It — ahem — might have been found on the Internet. There’s a lot more than just your code that goes into this. If you want  to do (and understand) absolutely everything yourself on an ARM development project, you could use an all-in-one walkthrough. It just so happens [Jacob Mossberg] has a from scratch guide of what you need to do to get your C code running on ARM.

Starting with an ARM Cortex M3, he writes a simple C program and gets the assembly language equivalent. What follows is a detailed analysis of the machine code, exploring what the compiler assumed would be set up. This leads to understanding of what the start up code and linker script needs to look like.

It is a great approach and reminded us of the old saying about “teach someone how to fish.” He even devotes a little time to talking about getting debugging working with OCD. Of course, the exact details are specific to the chip he’s using, but most of it would apply to any ARM chip. Even if you don’t use ARM, though, the thought process and methodology is itself quite interesting.

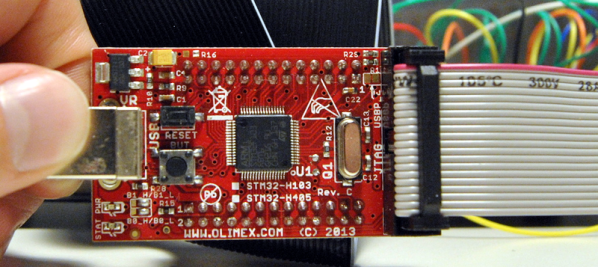
This post would be just the thing if you are using Blue Pills and ready to move away from the Arduino ecosystem. Of course, if you want to veer away from the Arduino system, but don’t want to go all the way to bare metal, there’s always mBed.

Quick And Easy NTP Clock

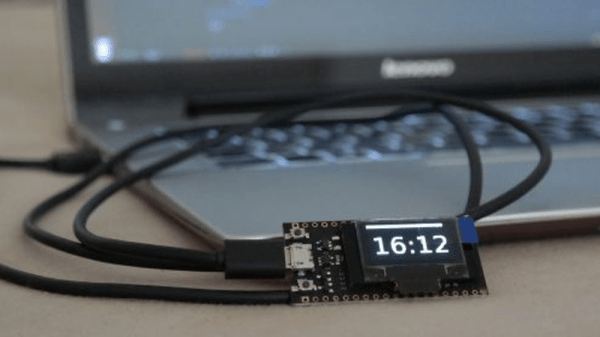
[Danman] got an ESP32 with built-in OLED display, and in the process of getting a clock up and running and trying to get a couple of NodeMCU binaries installed on it, thought he’d try rolling his own.

[Danman] used PlatformIO to write the code to his ESP. PlatformIO allowed [Danman] to browse for a NTP library and load it into his project. After finding the NTP library, [Danman] wrote a bit of code and was able to upload it to the ESP. When that was uploaded [Danman] noticed that nothing was being displayed on the OLED, but that was just a simple matter of tracking down the right address to use when setting up the library for his OLED. Lastly, [Danman] created a large font to display the time with and his mini-clock was done!

It’s always nice to see someone be able to go from buying a board to having a demo put together, and it’s getting easier and easier. Check out this OLED watch, and this pocket watch doesn’t use OLEDs, but it still looks pretty cool.

Test your speed

Modern Strongman Games Test Your Speed Instead

Step right up! What would a Makerfaire be without some carnival games? And being a Makerfaire, they could of course be modernized versions. In [avishorp]’s case, he made a series of games that test your speed and look very much like the old strongman game, aka high striker or strength tester.

In the strongman game, you smash a lever with all your might using a hammer. A puck on the other end of the lever then shoots up a tower, hopefully high enough to hit a bell, winning you a prize. In [avishorp]’s games the puck, tower and bell are all replaced with an LED strip. In the swipe game, the faster you swipe your hand sideways over two optical proximity sensors, the higher the LEDs light up. In the drum game, the speed with which you drum on a rubber disk with embedded accelerometer, the higher the LEDs light up. The chase and response games both involve buttons that you have to rapidly hit, to similar effect.

For the brains, each game is controlled by an Adafruit Trinket board. [Avishorp] chose to use the PlatformIO IDE instead of the Arduino IDE to write them, preferring its modern editor, but he didn’t like that it doesn’t print and that it doesn’t tell you the final file size. The latter issue caused him to overwrite the bootloader, something that he understandably considered a major inconvenience.

Check out his page for more details, Fritzing diagrams, links to code, and all game videos. Meanwhile we’ve included clips of the drum and swipe games below.

And if it’s more carnival games you’re looking for, how about this adult-sized Sit ‘n Spin made using a rear differential and axle assembly out of an old car or truck. Or maybe you prefer something less likely to make you woozy, in which case you can try fishing with the Bass Master 3000.

Continue reading “Modern Strongman Games Test Your Speed Instead”

A BluePill For Arduino Dependence

Arduinos are helpful but some applications require more than what Arduinos can provide. However, it’s not always easy to make the switch from a developed ecosystem into the abyss that is hardware engineering. [Vadim] noticed this, which prompted him to write a guide to shepherd people on their quest for an Arduino-free environment, one BluePill at a time.

With an extended metaphor comparing Arduino use and physical addiction, [Vadim’s] writing is a joy to read. He chose to focus on the BluePill (aka the next Arduino Killer™) which is a $1.75 ARM board with the form factor of an Arduino Nano. After describing where to get the board and it’s an accompanying programmer, [Vadim] introduces PlatformIO, an alternative to the Arduino IDE. But wait! Before the Arduino die-hards leave, take note that PlatformIO can use all of the “Arduino Language,” so your digitalWrites and analogReads are safe (for now). Like any getting started guide, [Vadim] includes the obligatory blinking an LED program. And, in the end, [Vadim] sets his readers up to be comfortable in the middle ground between Arduino Land and the Wild West.

The debate for/against Arduino has been simmering for quite some time, but most agree that Arduino is a good place to start: it’s simpler and easier than jumping head first. However, at some point, many want to remove their “crippling Arduino dependency” (in the words of [Vadim]) and move on to bigger and better things. If you’re at this point, or still cling to your Uno, swing on over and give Vadim’s post a read. If you’re already in the trenches, head on over and read our posts about the BluePill and PlatformIO which are great complements for [Vadim’s].

Take The Blue Pill And Go Forth

Forth has a long history of being a popular hacker language. It is simple to bootstrap. It is expressive. It can be a very powerful system. [jephthal] took the excellent Mecrisp Forth and put it on the very inexpensive STM32 “blue pill” board to create a development system that cost about $2. You can see the video below.

If you have thirty minutes, you can see just how easy it is to duplicate his feat. The blue pill board has to be programmed once using an STM32 programmer. After that, you can use most standard Forth words and also use some that can manipulate the low-level microcontroller resources.

Continue reading “Take The Blue Pill And Go Forth”

KIM-1 To COSMAC Elf Conversion — Sort Of

In the mid-1970s, if you had your own computer, you probably built it. If you had a lot of money and considerable building skill, you could make an Altair 8800 for about $395 — better than the $650 to have it built. However, cheaper alternatives were not far behind.

In 1976, Popular Electronics published plans for a computer called the COSMAC Elf which you could build for under $100, and much less if you had a good junk box. The design was simple enough that you could build it on a piece of perf board or using wire wrap. We featured the online archive of the entire Popular Electronics collection, but hit up page 33 of this PDF if you want to jump right to the article that started it all. The COSMAC Elf is a great little machine built around a 40-pin RCA 1802 processor, and for many was the first computer they owned. I lost my original 1802 computer in a storm and my recent rebuild in another completely different kind of storm. But there is a way to reclaim those glory days without starting from scratch.  I’m going to repurpose another retro-computing recreation; the KIM-1.

I’ll admit it, Rewiring a real KIM-1 to take an 1802 CPU would be difficult and unnecessary and that’s not what this article is about. However, I did have a KIM UNO — [Oscar’s] respin of the classic computer using an Arduino mini pro. Looking at the keyboard, it occurred to me that the Arduino could just as easily simulate an 1802 as it could a 6502. Heck, that’s only two digits different, right?

The result is pretty pleasing. A “real” Elf had 8 toggle switches, but there were several variations that did have keypads, so it isn’t that far off. Most Elf computers had 256 bytes of memory (without an upgrade) but the 1802 UNO (as I’m calling it) has 1K. There’s also a host of other features, including a ROM and a monitor for loading and debugging programs that doesn’t require any space in the emulated 1802.

Continue reading “KIM-1 To COSMAC Elf Conversion — Sort Of”