Modern Network Adapter For Retro Computers

Universal Serial Bus, or USB, is so ingrained in modern computing that it’s hard to imagine a time without it. That time did exist, though, and it was a wild west of connector types, standards, and interfacing methods. One of the more interesting interfaces of the time was the SIO system found in 8-bit Atari computers which ended up sharing a lot of the features of modern USB, and its adaptability is displayed in this modern project which brings WiFi, Bluetooth, USB, and SD card slots to any old Atari with an SIO port.

The project is called FujiNet and it uses the lightweight protocol of SIO to add a number of modern features to the 8-bit machine. It’s based on an ESP32, and the chip performs the functions of a network adapter by bridging WiFi and Bluetooth to the Atari. It does this by simulating drives that would have potentially been used on the Atari in its time, such as a floppy disk drive, an RS232 interface, or a modem, and translating them to the modern wireless communication protocols. It even has the ability to emulate a printer by taking the output of the print job from the Atari and converting it to PDF within the device itself.

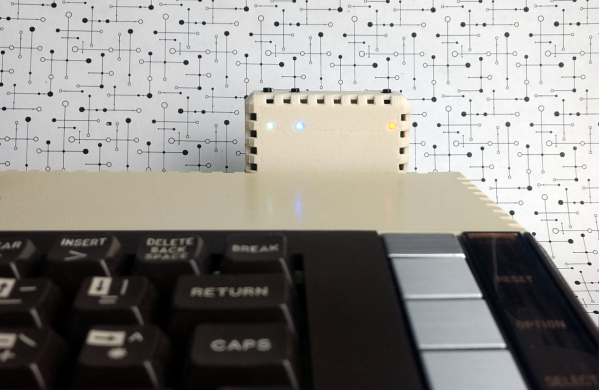
Not only does this bring a lot of functionality to the Atari, which you may be able to use to view sites like retro.hackaday.com, but the FujiNet is housed in a period-appropriate 3D-printed case that matches the look and feel of the original Atari. If you need a more generic solution for your retrocomputing networking adventures that isn’t limited to SIO, we recommend grabbing a Raspberry Pi to handle that.

Thanks to [Gavin] for the tip!

Codespaces For Embedded Development

We can sympathize with [Benjamin Cabé]. He has a lot of development boards and it has become painful to maintain the many toolchains for each board. We’ve also suffered from upgrading one tool breaks another tool in some obscure way. His solution? Use Github Codespaces which you can get early access for beta testers.

The idea is that you can spin off a container-specific to a GitHub repository that has all the proper versions and dependencies required to work with a project.

If you sign up for the beta, you’ll be on a waitlist, but it is interesting to see [Benjamin] go through the steps. The service is free during the beta and you get two codespaces. Presumably, you’ll eventually be able to pay for more capability.

The idea is good, but we’ll have to see about the implementation. A preconfigured container might move from machine to machine or even to deep storage for later reconstitution. Flashing the binary image to the device looked painful from the browser. We’ve seen it done nicely with, for example, the online Arduino IDE but it did take some installable software helpers to do that.

We’ll be curious about how many different platforms this will support. However, you can roll your own version of this and avoid the cloud using Docker or even a full-blown VM like VirtualBox. Sure, it is more work, but you control your destiny. Add something like Platform.IO and your choice of development tools and you can avoid having so many competing development tools all in your main computer.

Continue reading “Codespaces For Embedded Development”

Surgery On The Arduino IDE Makes Bigger Serial Buffers

It is pretty well-known that I’m not a big fan of the Arduino infrastructure. Granted, these days you have more options with the pro IDE and Platform IO, for example. But the original IDE always gives me heartburn. I realized just how much heartburn the other day when I wanted to something very simple: increase the receive buffer on an ATmega32 serial port. The solution I arrived at might help you do some other things, so even if you don’t need that exact feature, you still might find it useful to see what I did.

Following this experience I am genuinely torn. On the one hand, I despise the lackluster editor for hiding too much detail from me and providing little in the way of useful tools. On the other hand, I was impressed with how extensible it was if you can dig out the details of how it works internally.

First, you might wonder why I use the IDE. The short answer is I don’t. But when you produce things for other people to use, you almost can’t ignore it. No matter how you craft your personal environment, the minute your code hits the Internet, someone will try to use it in the IDE. A while back I’d written about the $4 Z80 computer by [Just4Fun]. I rarely have time to build things I write about, but I really wanted to try this little computer. The parts sat partially assembled for a while and then a PCB came out for it. I got the PCB and — you guessed it — it sat some more, partially assembled. But I finally found time to finish it and had CP/M booted up.

The only problem was there were not many good options for transferring data back and forth to the PC. It looked like the best bet was to do Intel hex files and transfer them copy and paste across the terminal. I wanted better, and that sent me down a Saturday morning rabbit hole. What I ended up with is a way to make your own menus in the Arduino IDE to set compiler options based on the target hardware for the project. It’s a trick worth knowing as it will come in handy beyond this single problem.

Continue reading “Surgery On The Arduino IDE Makes Bigger Serial Buffers”

The Arduino IDE Finally Grows Up

While the Arduino has a very vocal fan club, there are always a few people less than thrilled with the ubiquitous ecosystem. While fans may just dismiss it as sour grapes, there are a few legitimate complaints you can fairly level at the stock setup. To address at least some of those concerns, Arduino is rolling out the Arduino Pro IDE and while it doesn’t completely address every shortcoming, it is worth a look and may grow to quiet down some of the other criticisms, given time.

For the record, we think the most meaningful critiques fall into three categories: 1) the primitive development environment, 2) the convoluted build system, and 3) the lack of debugging. Of course, there are third party answers for all of these problems, but now the Pro IDE at least answers the first one. As far as we can tell, the IDE hides the build process just like the original IDE. Debugging, though, will have to wait for a later build.

Continue reading “The Arduino IDE Finally Grows Up”

Review: OSEPP STEM Kit 1, A Beginner’s All-in-One Board Found In The Discount Aisle

As the name implies, the OSEP STEM board is an embedded project board primarily aimed at education. You use jumper wires to connect components and a visual block coding language to make it go.

I have fond memories of kits from companies like Radio Shack that had dozens of parts on a board, with spring terminals to connect them with jumper wires. Advertised with clickbait titles like “200 in 1”, you’d get a book showing how to wire the parts to make a radio, or an alarm, or a light blinker, or whatever.

The STEM Kit 1 is sort of a modern arduino-powered version of these kits. The board hosts a stand-alone Arduino UNO clone (included with the kit) and also has a host of things you might want to hook to it. Things like the speakers and stepper motors have drivers on board so you can easily drive them from the arduino. You get a bunch of jumper wires to make the connections, too. Most things that need to be connected to something permanently (like ground) are prewired on the PCB. The other connections use a single pin. You can see this arrangement with the three rotary pots which have a single pin next to the label (“POT1”, etc.).

I’m a sucker for a sale, so when I saw a local store had OSEPP’s STEM board for about $30, I had to pick one up. The suggested price for these boards is $150, but most of the time I see them listed for about $100. At the deeply discounted price I couldn’t resist checking it out.

So does an embedded many-in-one project kit like this one live up to that legacy? I spent some time with the board. Bottom line, if you can find a deal on the price I think it’s worth it. At full price, perhaps not. Join me after the break as I walk through what the OSEPP has to offer.

Continue reading “Review: OSEPP STEM Kit 1, A Beginner’s All-in-One Board Found In The Discount Aisle”

Cheap ESP32 Webcam

Looking for a cheap way to keep an eye on something? [Kevin Hester] pointed us to a way to make a WiFi webcam for under $10. This uses one of the many cheap ESP32 dev boards available, along with the Internet of Things platform PlatformIO and a bit of code that creates an RTSP server. This can be accessed by any software that supports this streaming protocol, and a bit of smart routing could put it on the interwebs. [Kevin] claims that the ESP32 camera dev boards he uses can be found for less than $10, but we found that most of them cost about $15. Either way, that’s cheaper than most commercial streaming cameras.

Continue reading “Cheap ESP32 Webcam”

Make Your Cactus Bionic With Bionic Cactus

The closest some of us at Hackaday get to a green thumb comes when we are painting, so for us and other folks not gifted in the gardening department Bionic Cactus might help. It’s a neatly designed water and light control system, built around an ESP8266. You can control the system through a web interface, setting a schedule for water and light and seeing how much water is left in the reservoir. There is also a soil moisture sensor and it will even email you when it is running low on water. As creator [SamsonKing] notes, if you combine this with a 3D-printed plant pot and light holder, and you’ve got a complete system from growing herbs and spices in the middle of winter.

[SamsonKing] created the system using PlatformIO, a neat open source Internet of Things development platform that means you could probably switch the system over to run on other low-power platforms if you had them lying around. But with an ESP8266 typically costing no more than a few bucks, it’s a neat and low-cost way to keep your plants fed and watered.

Automated gardening has featured many times here at Hackaday, just one of many is this indoor hydroponic lettuce factory.