A Solar-Powered Wristwatch With An ATtiny13

Wristwatches come in many shapes, sizes, and types, but most still have at least one thing in common: they feature a battery that needs to be swapped or recharged somewhere been every other day and every few years. A rare few integrate a solar panel that keeps the internal battery at least somewhat topped up, as environmental light permits.

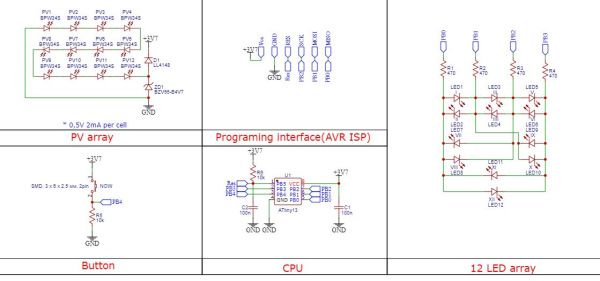
This “Perpetual” wristwatch designed by [Serhii Trush] aims to keep digitally ticking along using nothing but the integrated photodiodes, a rechargeable LIR2430 cell, and a power-sipping face that uses one LED for each hour of the day.
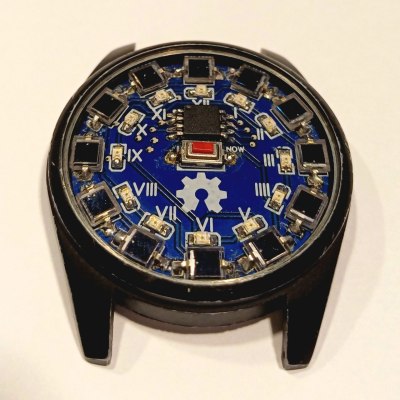
The face of the perpetual wristwatch. (Credit: Serhii Trush)

The wristwatch’s operation is demonstrated in the linked video (in Ukrainian, auto-generated subtitles available): to read out the current time, the button in the center is pressed, which first shows the hour, then the minutes (in 5 minute intervals).

After this the ATtiny13 MCU goes back to sleep, briefly waking up every 0.5 seconds to update the time, which explains why there’s no RTC crystal. The 12 BPW34S photodiodes are enough to provide 2 mA at 0.5 V in full sunlight, which together keep the LIR2430 cell charged via a Zener diode.

As far as minimalistic yet practical designs go, this one is pretty hard to beat. If you wish to make your own, all of the design files and firmware are provided on the GitHub page.

Although we certainly do like the exposed components, it would be interesting to see this technique paired with the PCB watch face we covered recently.

Continue reading “A Solar-Powered Wristwatch With An ATtiny13”

Fabbing A Fab New Watch Face

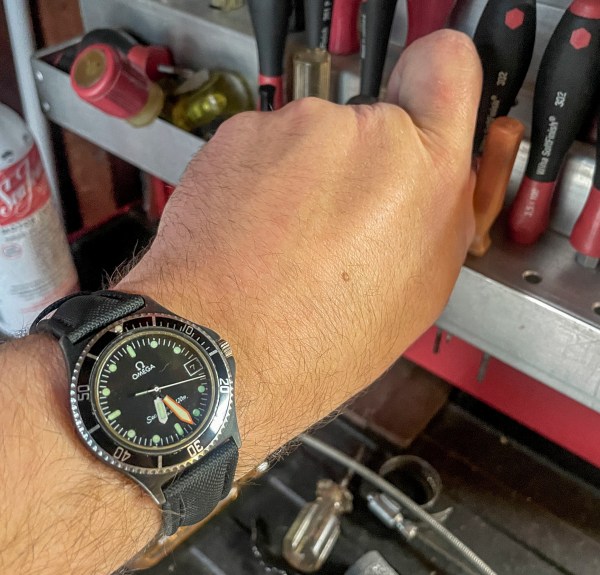
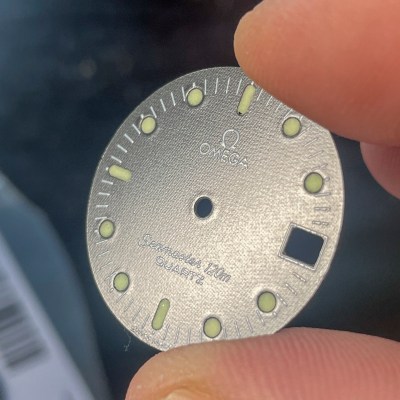
[STR-Alorman] is into vintage watches, particularly Omega Seamaster quartz numbers from the 1980s. Among his favorites is the Seamaster Calypso III, a precious few of which were created in a lovely and rare black-on-black colorway. [STR-Alorman] found one on online, but it had a number of problems including a scratched-up face. Having done a respectable amount of PCB design and assembly, he decided to make a new face and have it fabbed.

The one angle where you can even tell this is a PCB.

After taking scale-referenced photos with a DSLR, [STR-Alorman] created vectors in Illustrator and then ported those to KiCad. He sent two versions to the board house — one with holes at index points, and one without — because he wasn’t sure which would be better for applying the luminization compound that makes them glow. Spoiler alert: it was the one with the cutouts.

Once this was done, [STR-Alorman] reassembled the movement, which doesn’t look easy at all, and involved getting the height of a bit of CA glue just right so as not to interfere with the movement of the date wheel. He replaced the bezel insert, re-luminized the hands, and now has a beautiful timepiece.

We believe only the nerdiest of nerds could tell this is a PCB, and they would need exactly the right light to make that determination. Here’s a watch that leaves no doubt about it.

Big Candy Is Watching You: Facial Recognition In Vending Machines Upsets University

Most people don’t think too much of vending machines. They’re just those hulking machines that lurk around on train stations, airports and in the bowels of school and office buildings, where you can exchange far too much money for a drink or a snack. What few people are aware of is just how these vending machines have changed over the decades, to the point where they’re now collecting any shred of information on who interacts with them, down to their age and gender.

How do we know this? We have a few enterprising students at the University of Waterloo to thank. After [SquidKid47] posted a troubling error message displayed by a campus M&M vending machine on Reddit, [River Stanley] decided to investigate the situation. The resulting article was published in the February 16th edition of the university’s digital newspaper, mathNEWS.

In a bout of what the publication refers to as “Actual Journalism”, [Stanley] found that the machine in question was produced by Invenda, who in their brochure (PDF) excitedly note the many ways in which statistics like age, gender, foot traffic, session time and product demographics can be collected. This data, which includes the feed from an always-on camera, is then processed and ‘anonymized statistics’ are sent to central servers for perusal by the vending machine owner.

The good news is that this probably doesn’t mean that facial recognition and similar personalized information is stored (or sent to the big vaporous mainframe) as this would violate the GDPR  and similar data privacy laws, but there is precedence of information kiosks at a mall operator taking more liberties. Although the University of Waterloo has said that these particular vending machines will be removed, there’s something uncomfortable about knowing that those previously benign vending machines are now increasingly more like the telescreens in Orwell’s Nineteen Eighty-Four. Perhaps we’re already at the point in this timeline were it’s best to assume that even vending machines are always watching and listening, to learn our most intimate snacking and drinking habits.

Thanks to [Albert Hall] for the tip.

Watch The OpenScan DIY 3D Scanner In Action

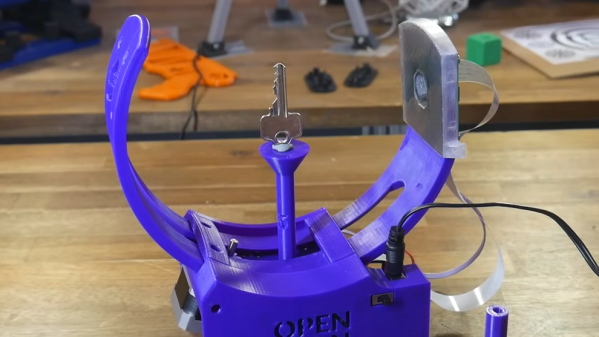
[TeachingTech] has a video covering the OpenScan Mini that does a great job of showing the workflow, hardware, and processing method for turning small objects into high-quality 3D models. If you’re at all interested but unsure where or how to start, the video makes an excellent guide.

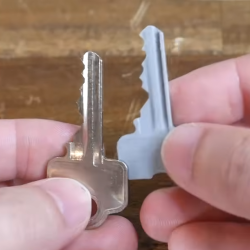
We’ve covered the OpenScan project in the past, and the project has progressed quite a bit since then. [TeachingTech] demonstrates scanning a number of small and intricate objects, including a key, to create 3D models with excellent dimensional accuracy.

[Thomas Megel]’s OpenScan project is a DIY project that, at its heart, is an automated camera rig that takes a series of highly-controlled photographs. Those photographs are then used in a process called photogrammetry to generate a 3D model from the source images. Since the quality of the source images is absolutely critical to getting good results, the OpenScan hardware platform plays a pivotal role.

Once one has good quality images, the photogrammetry process itself can be done in any number of ways. One can feed images from OpenScan into a program like Meshroom, or one may choose to use the optional cloud service that OpenScan offers (originally created as an internal tool, it is made available as a convenient processing option.)

It’s really nice to have a video showing how the whole workflow works, and highlighting the quality of the results as well as contrasting them with other 3D scanning methods. We’ve previously talked about 3D scanning and what it does (and doesn’t) do well, and the results from the OpenScan Mini are fantastic. It might be limited to small objects, but it does a wonderful job on them. See it all for yourself in the video below.

Continue reading “Watch The OpenScan DIY 3D Scanner In Action”

Slime Mold-Powered Smart Watches See Humans Fall In Love With The Goo

Humans are very good at anthropomorphising things. That is, giving them human characteristics, like ourselves. We do it with animals—see just about any cartoon—and we even do it with our own planet—see Mother Nature. But we often extend that courtesy even further, giving names to our cars and putting faces on our computers as well.

A recent study has borne this out in amusing fashion. Researchers at the University of Chicago found that human attitudes towards a device can change if they are required to take actions to look after it. Enter the slime mold smartwatch, and a gooey, heartwarming story of love and care between human and machine, mediated by mold.

Continue reading “Slime Mold-Powered Smart Watches See Humans Fall In Love With The Goo”

Droplet Watch Keeps Time Via Electrowetting

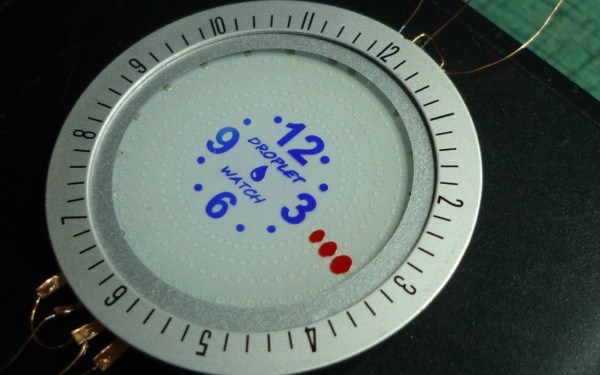
Hackers just can’t help but turn their sights on timepieces, and [Armin Bindzus] has designed an electrowetting-based watch.

Electrowetting is a way of changing the contact angle of droplets on a surface using electricity, and can be used to move said droplets. The liquid needs to be polar, so in this case [Bindzus] has used a red ink mixed with mono-ethylene glycol to stand out against the white dielectric back of the device. The 60 individual electrodes of the bottom section were etched via laser out of the ITO-coated glass that makes up the bottom plates of the face.

The top plate houses the small round pillars that keep the ink constrained to its paths. They are made of a photosensitive epoxy that is spin-coated onto the glass and then cured via the laser. The plates are put together at a distance of 0.23 mm with epoxy, but a small hole is left to insert the droplets and a filler liquid. An Attiny1614 microcontroller runs the show along with a DS3231 RTC. A 46V signal drives the droplets around their path.

It seems this project is a bit away from true wearable use, but perhaps [Bindzus] could make a desk clock first? If you’re interested in another ink-based, watch, how about this custom E-Ink Tank watch?

Continue reading “Droplet Watch Keeps Time Via Electrowetting”

A DIY E-Ink Tank Watch

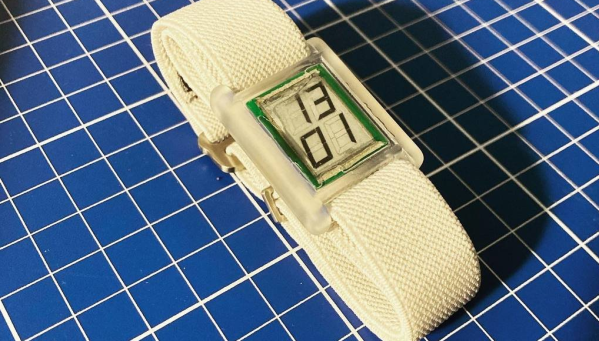
[Augusto Marinucci] liked the classic Cartier Tank series of dress watches aesthetic, but wanted something a bit more techy, with a decent runtime on a single battery. E-Ink displays are often used in such applications, but finding one to fit a custom case design, is a tall order. When ordering one off the shelf is not easy, the solution is to make one from scratch.

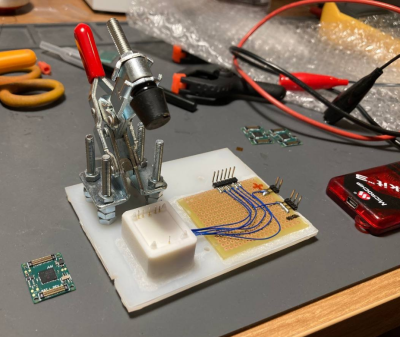
Building a programming jig is a great idea for small-scale production

The article doesn’t have much information on the E-Ink side of things, which is a bit of a shame. But from what we can glean, the segment shapes — in this case, based on the famous Apollo DSKY — are formed in the top copper of a four-layer PCB, using filled and capped vias to connect invisibly from below.

A donor E-Ink display is cut to size with scissors (we don’t know much more than this!) and glued in place around the edge to make the common electrode connection. The display PCB attaches to the control PCB, at the rear using low-profile board-to-board connectors. This board hosts a PIC16 micro, as well as an RV-3028-C7 RTC which keeps time whilst consuming a paltry 45 nA.

Five volts are provided via a MAX1722 low-power boost converter which is fed power from the CR1616 cell via a couple of logic-controllable load switches. With a low-power design such as this, it’s critical to get this correct. Any mistakes here can easily result in a very low runtime. It is easy to over-stress small button cells and kill them prematurely.

The case looks like it’s printed in a translucent resin, with the PCB stack sealed inside with a UV-cured resin pour. It’s not immediately obvious if the rear panel can be removed to access the battery and programming port. There are what appear to be screw holes, so maybe that’s possible, or maybe they’re the rear side of the PCB mounting posts. Who can tell?

If DIY hardware is but too much effort for you, then there’s the option of hacking new firmware onto an existing watch, or perhaps meeting in the middle and making something out of all those junk E-ink tags you can get from time to time?

Thanks to [JohnU] for the tip!